Digital Certificate Private Key Management
Introduction
This document provides steps on how to assign privileges to the private key of the WSE 3.0 / WCF Client Certificate and / or the License Info Certificate used by SecureAuth IdP to establish trust with devices with which it communicates.
For information on how to configure a SAML or WS Federation Signing Certificate, see the document: Grant Permission to Use Signing Certificate Private Key
Applies to
SecureAuth IdP Version | OS Version |
|---|---|
7.x+ |
|
Configuration Steps
To grant the correct privileges to the certificate
1. Start the Certificate Manager on the appliance
a. Click Start, type mmc.exe, and then press Enter
b. From the File menu, click Add / Remove Snap In
c. Under Available snap-ins, double-click Certificates
d. Select Computer Account, and then click Next
e. In the Select Computer dialog, click Finish
f. In the Add or Remove Snap-ins window, click OK
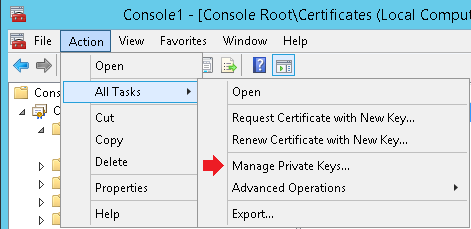
2. Find the certificate and select it
3. On the Action menu, select All Tasks, and then click Manage Private Keys...
 |
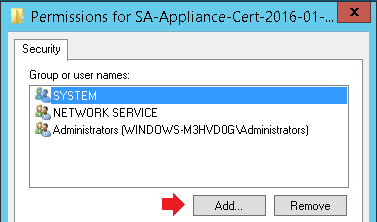
Certificate Permissions
4. The Permissions window appears
Click Add
 |
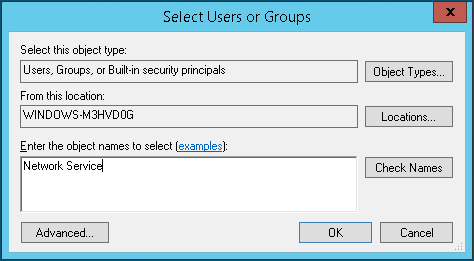
Select Users or Groups
5. The Select Users or Groups window appears
Review the From this location field to ensure the location is set to the local machine; if it is not, then click Locations... and make the applicable changes
6. In the Enter the object names to select field, enter Network Service and click Check Names
 |
7. Click OK
8. In the Permissions window, uncheck Allow as the Full control option
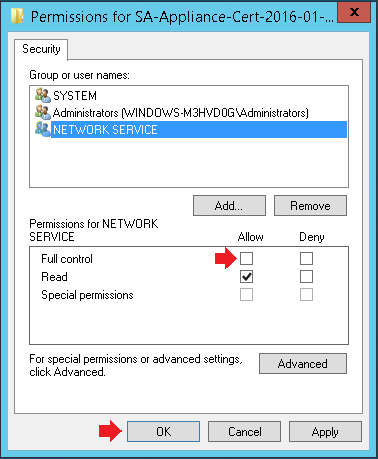 |
9. Click Apply and then OK