.NET SAML Consumer Deployment Guide
Introduction
This document details the method for enabling SecureAuth customers to integrate the SAML Service Provider into their current Internet Information Services (IIS) environment.
Prerequisites
In order to perform this integration the following components are required:
IIS Server
SecureAuth IDP setup in your environment or an accessible environment
SAML service provider compressed file
Valid X.509 certificate to sign the assertion
.Net Framework 4.5 or later
Virtual Directory Installation Steps
1. Bring up the Internet Information Services Manager.
The IIS manager can be started by selecting Run from the Start menu, then typing inetmgr and clicking OK.
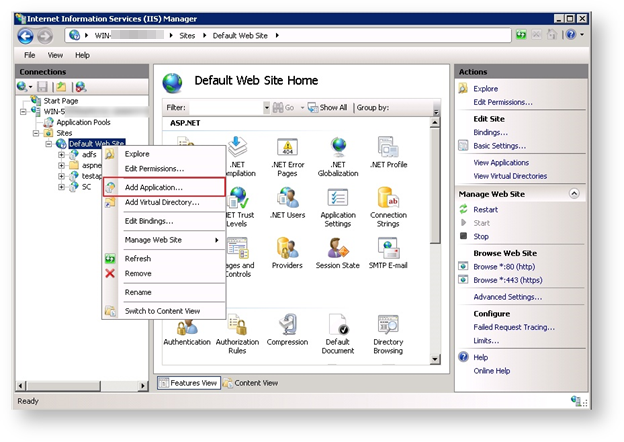
2. Expand the Sites object in the Connections pane to reveal the Default Web Site.
3. Right-click the Default Web Site and select Add Application from the context menu.
 |
The Add Application dialog box appears.
4. In the Alias field, supply a name for the site. This will be the URL that will be used later.
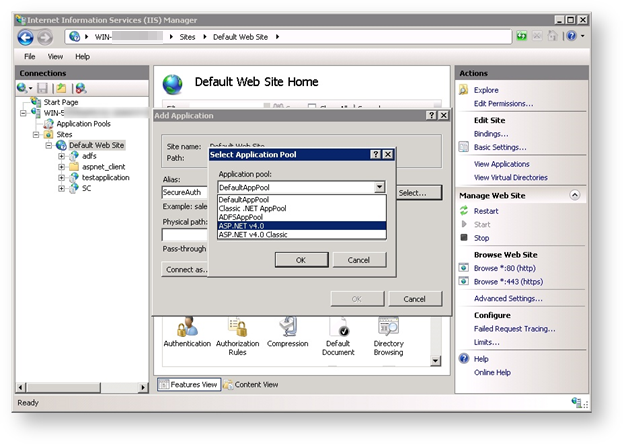
5. From the Application Pool field, click Select…
The Select Application Pool dialog box appears.
6. From the option list, select ASP.NET v4.0.
 |
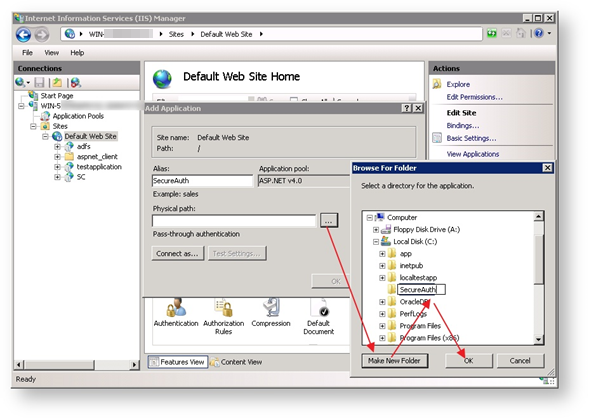
7. Select the Physical Path location by clicking the  button.
The Browse for Folder dialog box appears.
8. Click the Make New Folder button.
9. Enter a name for this new folder then click OK.
 |
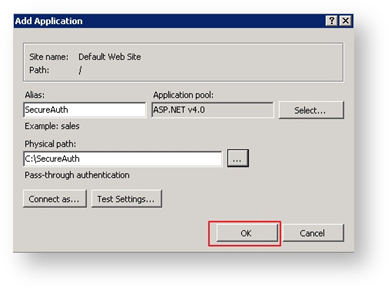
The Add Application dialog box reappears.
10. Click OK again.
 |
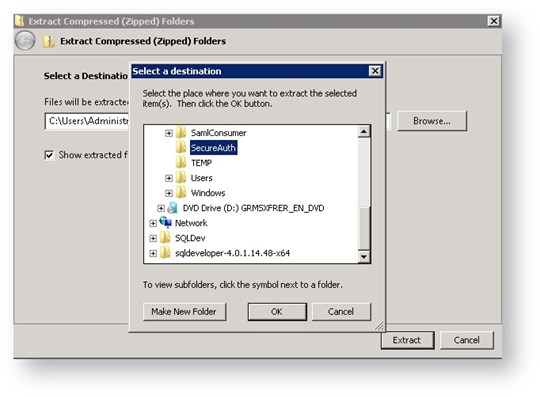
11. Extract the contents of the SAML service provider compressed file into the directory created in Step 9.
 |
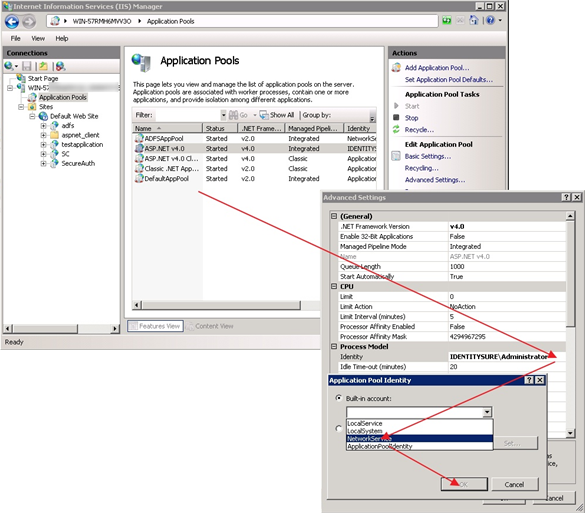
12. Return to the IIS Manager and validate that the ASP.NET v4.0 application pool has the correct identity defined so that it can read from or write to the newly-created directory.
13. From the left pane of the IIS Manager, click to highlight the Application Pools object.
All the available application pools appear in the main pane.
14. Click to highlight the ASP.NET v4.0 application pool.
15. From the right Actions pane, select Advanced Settings…
The Advanced Settings window appears.
16. Mouse over the Identity text field that displays the identity.
The Application Pool Identity dialog box appears.
17. From the available options in the Built-in account window, click to highlight a valid account then click OK.
 |
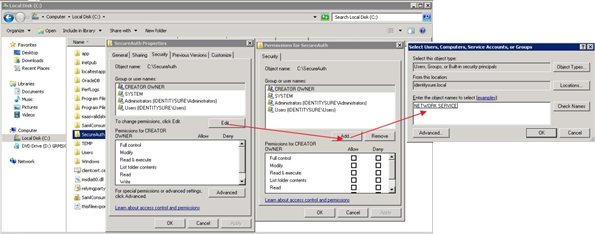
18. Define the rights to the assigned folder created earlier.
a. Right-click the folder created in Step 8 and select the Properties option.
The folder’s properties page appears.
b. Click the Edit button.
The Permissions page for that folder appears.
c. Click the Add button.
The Select Users, Computers, Service Accounts, or Groups dialog box appears.
d. In the bottom field, enter the account name for this folder.
Click Check Names to verify that this account name is correct then click OK.
e. The Permission page is reactivated with the newly defined permission highlighted.
 |
f. In the Permission box at the bottom of the screen, check the Allow box in the Modify line.
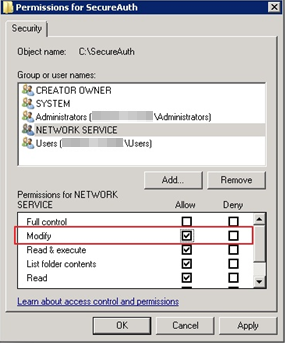 |
g. Click Apply then click OK.
19. Click OK again.
IdP Configuration Steps
1. Load the newly-created site’s admin console by double-clicking SamlAdmin.aspx.
This is one of the files extracted into the site’s new folder in Step 11 of the previous instructions.
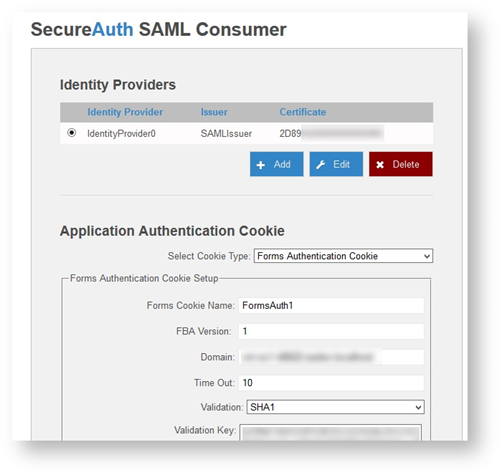
The SecureAuth SAML Consumer page appears like this example.
2. Select the IdentityProvider0 and click Edit.
 |
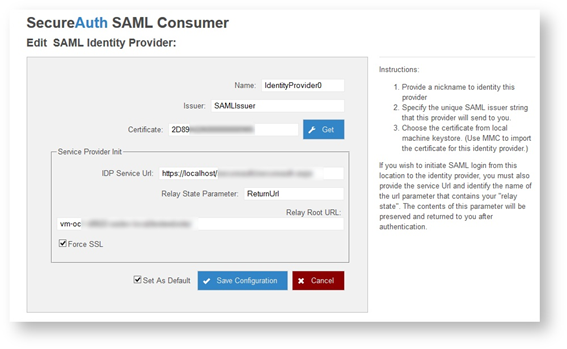
The Edit SAML Identity Provider screen appears.
3. At the Name field, leave or edit it as required.
4. At the Issuer field, type a valid issuer in the field (This can be any name as long as it matches what is typed into the issuer of the Identity Provider)
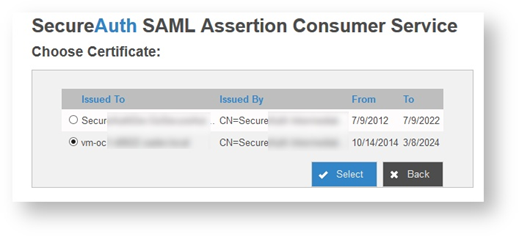
5. At the Certificate field, enter the certificate serial number, or click the Get button to display a list of installed certificates as shown in the following example.
 |
 |
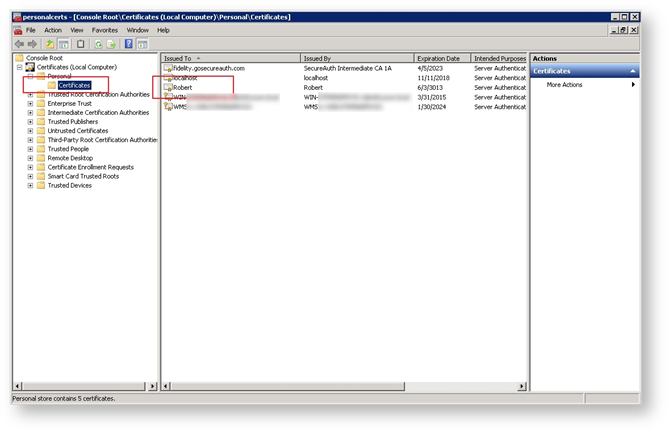
If the required certificate is not listed, import the required certificate using the Windows MMC snap-in for managing local computer certificates as shown here.
6. Install the certificate that was supplied by the Identity Provider Owner.
This should be a base-64 cer file, such as the example Robert.cer.
 |
7. Return to the admin console and select the Get button next to the certificate serial number.
The Choose Certificate screen appears.
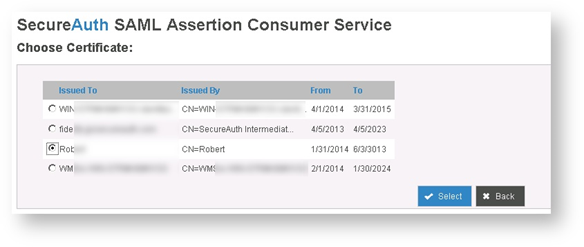 |
8. Click the radio button next to the certificate you just loaded into the certificate console, then click Select.
The Edit SAML Identity Provider page appears like the following example.
9. Enter values in the Service Provider Init section fields, as required.
IDP Service URL | Type the URL for the identity provider that can accept a SAML request. An example of a URL that will start a service provider-initiated request to an identity provider is: http://192.168.137.110/SecureAuth/SP.aspx?sso=http://192.168.137.110/SecureAuth/UserRequestPage.aspx |
Relay State Parameter | Enter a querystring parameter that can be translated into a relay state. For example, in the preceding example, the value is ReturnURL and is placed in the relay start as a parameter like this: "?ReturnUrl=https://servername/sp.aspx?ReturnURL=https://mysite/landingpage.aspx" |
Relay Root URL | Use this field to create a fully-qualified relay state URL. This is useful if the relay state URL is located at a different site or on a different system |
Force SSL | Check this box for a use-case in which an intermediate redirect passes from an SSL to a non-SSL URL. With this checked, the final relay state will be reformatted as an SSL URL. |
Set As Default | Check this box to mark this identity provider as the default in the event that no identity provider is specified in the querystring. |
10. Click Save Configuration to update the settings file.
11. Return to the SecureAuth SAML Consumer page and note that various settings (primarily encryption-related) for the identity providers are displayed in the Application Authentication Cookie section like this example.
12. Click the Generate Auth. Settings (for Web.Config) button and a text box appears containing a string as shown in the following example.
13. Copy this string and paste it into both the service provider's web.config file and the SamlConsumer's web.config file.
An additional modification may be required in the two web.config files. In the <authentication> section, make sure the "name" attribute of the <forms> node is the same for both files:
<authentication mode="Forms">
<forms name="FormsAuth1" loginUrl="https://example.company.com/samlconsumer/sp.aspx?idpkey=IdentityProvider0" requireSSL="false"/>
</authentication>
Use Examples
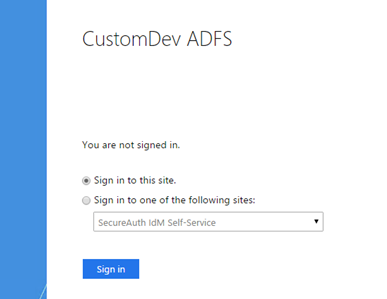
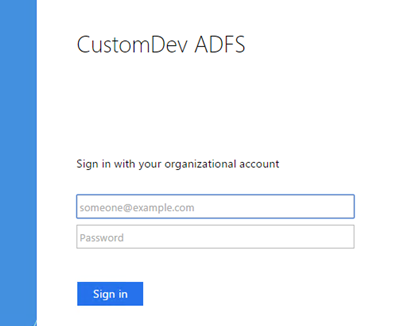
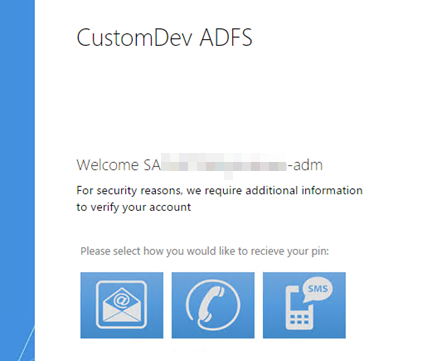
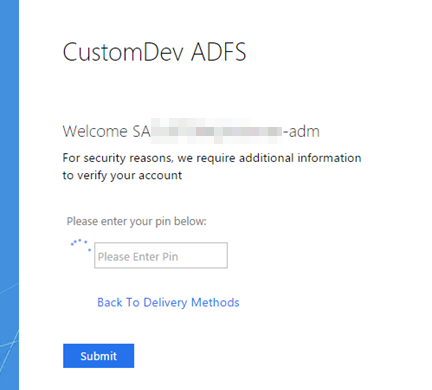
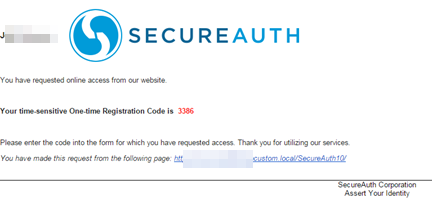
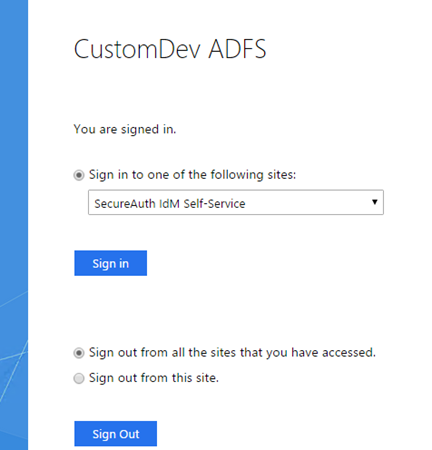
The SecureAuth adapter will be used for the defined requirements either globally or at the specific Per Relaying Party Trust. It will be prompted at either SP-initiated or IdP-initiated login attempts at ADFS.
Below is an example of an IdP-initiated login request.
 |
 |
 |
 |
 |
 |
Update Warning
The process of updating SecureAuth IdP software to a newer version may cause the SecureAuthAdapter changes to become invalid and the adapter itself to stop working. Until this feature is included in the main product, these customizations will need to be merged into any future updates.
Please contact tailoringfrontline@secureauth.com before making any updates.