Multiple Second Factor Realm Authentication (Realm Chaining)
Updated November 11, 2019
In certain environments, IT Security policies require the use of additional second-factor authentication methods before a user can complete a workflow. This practice is often used on self-service portals where multiple authentication factors help ensure the end user's identity and deter hijacking attempts. SecureAuth can accommodate these enhanced security requirements using a method called realm chaining.
In realm chaining, an end user who successfully authenticates on one realm is forwarded to another realm automatically. A token is passed along with the end user to maintain the user's identity through the realm chain. By linking realms together, the end user can be presented with an unlimited number of authentication factors in a single workflow. However, SecureAuth recommends chaining no more than three realms together.
Realm chaining can also be used with the Redirect Failure Action in the Adaptive Authentication tab, which became available in SecureAuth IdP v8.1 to redirect users to another SecureAuth IdP realm without requiring them to input their username a second time. See Adaptive Authentication Configuration Guide for details.
Prerequisites
1. SecureAuth IdP 8.x+
2. Create two New Realms. In this document,the realms are called Realm A and Realm B.
3. On each of these realms, configure the following tabs in the Web Admin before proceeding with the configuration steps outlined in this document:
Overview: the description of the realm and SMTP connections must be defined
Data: an enterprise directory must be integrated with SecureAuth IdP
Registration Methods / Multi-Factor Methods: the Multi-Factor Authentication methods that will be used to access the target must be defined
SecureAuth IdP configuration steps for Realm A
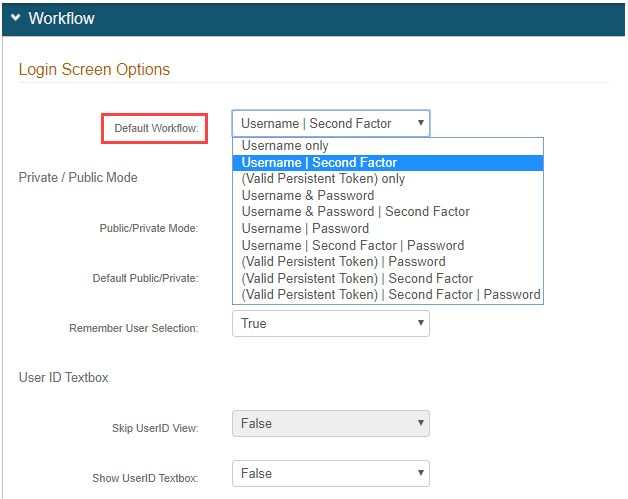
Workflow
SecureAuth IdP v9.x
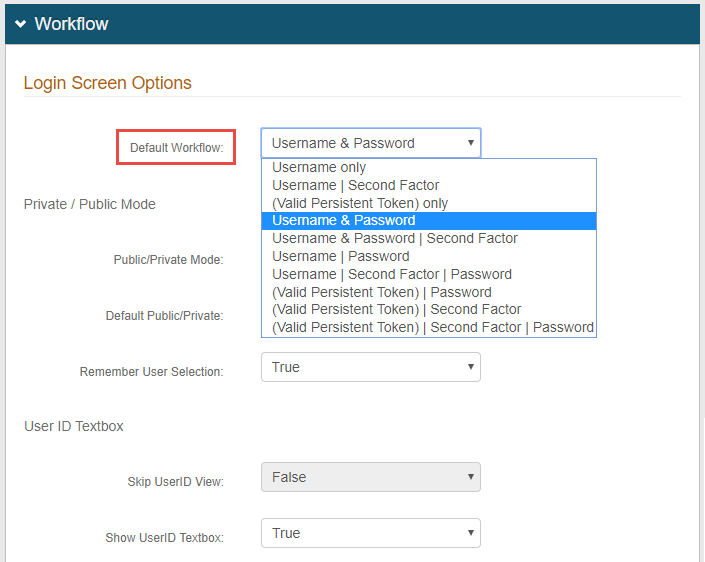
In the Workflow section, select select a two-factor authentication workflow from theDefault Workflow dropdown, such as Username & Password | Second Factor.
 |
Notice
NOTE: If configuring this realm to use the Redirect Failure Action, also configure the Adaptive Authentication section.
In SecureAuth IdP v9.x, the Adaptive Authentication section is part of the Adaptive Authentication page.
Custom Identity Consumer / Custom Front End
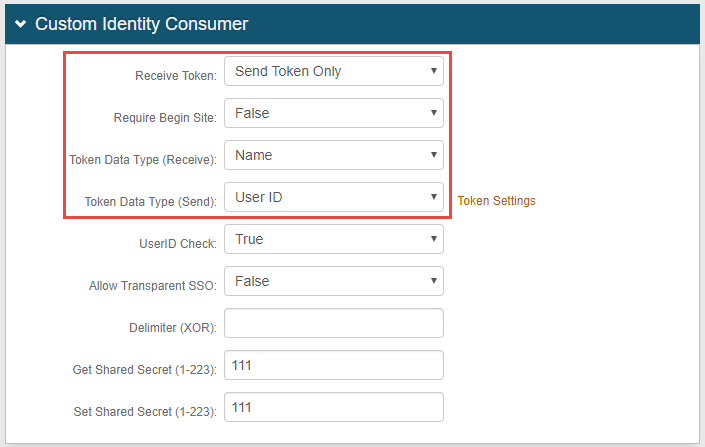
In the Custom Identity Consumer section (named Custom Front End in SecureAuth IdP v8.x), select Send Token Only from the Receive Token dropdown.
Select False from the Require Begin Site dropdown.
Select Name from the Token Data Type (Receive) dropdown.
Select User ID from theToken Data Type (Send) dropdown
Warning
Click Save once the configurations have been completed and before leaving the Workflow page to avoid losing changes.
Adaptive Authentication
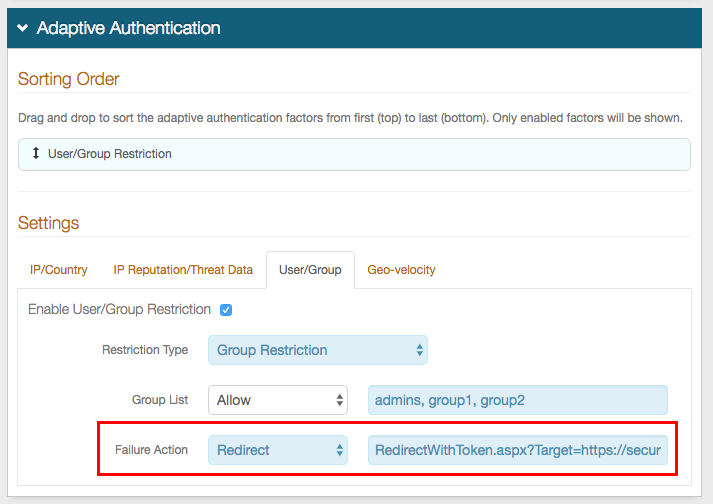
Optional: If configuring Realm A for the Redirect Failure Action, in the Adaptive Authentication section, perform the following steps.
Select Redirect from the Failure Action dropdown.
NOTE: This selection can be made for any of the Restriction Type policies. In this example, Group Restriction is selected.
In the text box to the immediate right, prepend RedirectWithToken.aspx?Target= to the realm URL.
Example: RedirectWithToken.aspx?Target=https://secureauth.company.com/secureauthB ,where B represents the number of Realm B.
Warning
Click Save once the configurations have been completed and before leaving the Workflow page / Adaptive Authentication page to avoid losing changes.
Post Authentication
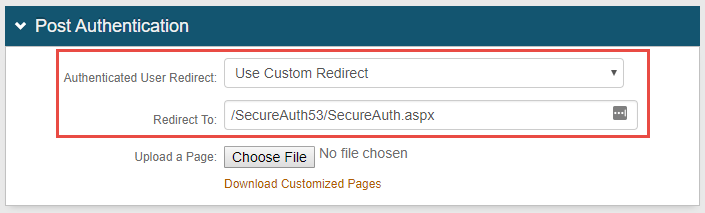
In the Post Authentication section, select Use Custom Redirect from the Authenticated User Redirect dropdown.
Enter /secureauthB/secureauth.aspx in the Redirect To text box, where B represents the number of Realm B.
Warning
Click Save once the configurations have been completed and before leaving the Post Authentication section to avoid losing changes.
Forms Auth / SSO Token
In the Forms Auth / SSO Token section, click View and Configure FormsAuth keys/SSO token.
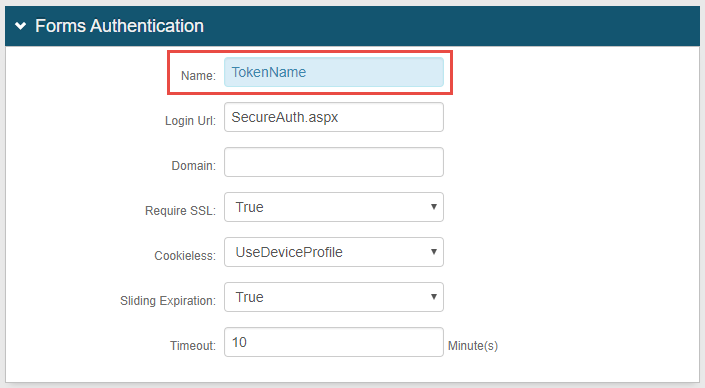
Forms Authentication
Optional: If configuring Realm A for the Redirect Failure Action, in the Forms Authentication section, set the Name to a unique, friendly token name.
 |
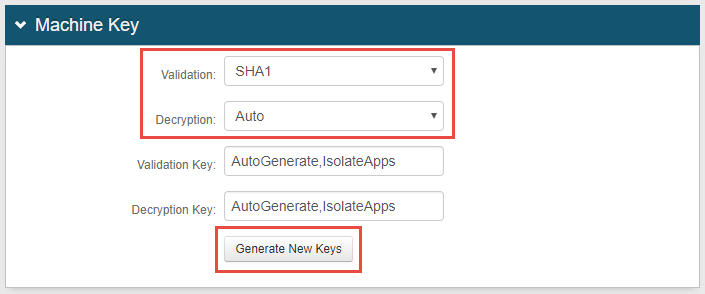
Machine Key
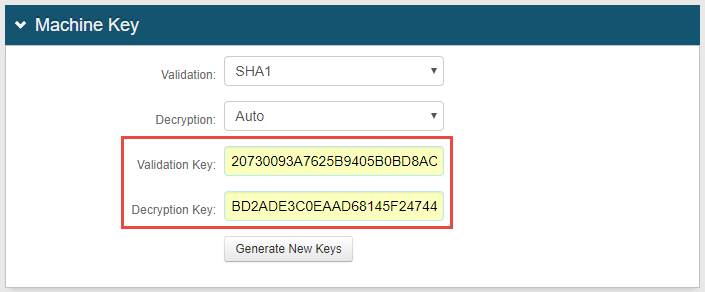
In the Machine Key section, select SHA1 from the Validation dropdown.
Select Auto from the Decryption dropdown.
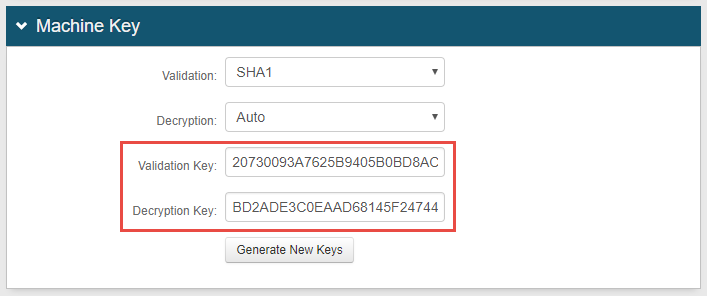
Click Generate New Keys to generate a unique set of validation and decryption keys.
The following is a sample image of results after generating new keys.
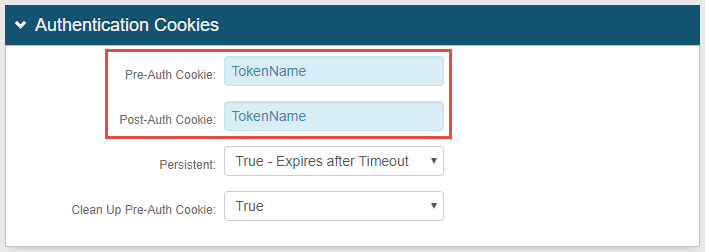
Authentication Cookies
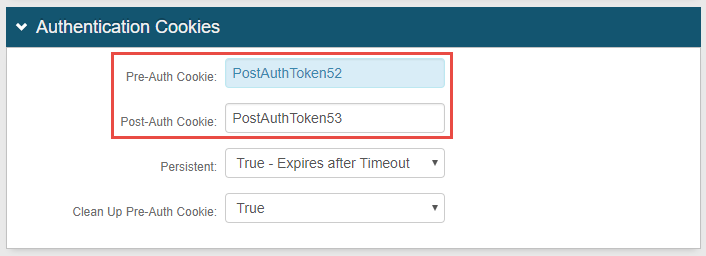
In the Pre-Auth Cookie field, type PreAuthTokenA, where A represents the realm number of Realm A, such as PostAuthToken52. Optional: If configuring Realm A for theRedirect Failure Action,enter theTokenName supplied in Forms Authentication, instead.
In the Post-Auth Cookie field, type PostAuthTokenA, where A represents the realm number of Realm A, such as PostAuthToken52. Optional: If configuring Realm A for theRedirect Failure Action,enter theTokenName supplied in Forms Authentication, instead.
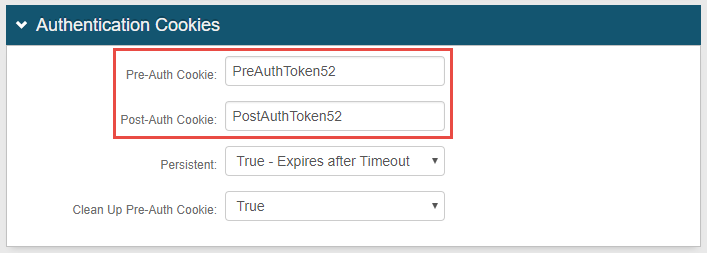
The following is a sample image of TokenName entries for the Redirect Failure Action.
Warning
Click Save once the configurations have been completed and before leaving the FormsAuth keys / SSO token page to avoid losing changes.
SecureAuth IdP configuration steps for Realm B
Workflow
SecureAuth IdP v9.x
In the Workflow section, select a two-factor authentication workflow from the dropdown named Default Workflow in 9.x, such as Username | Second Factor.
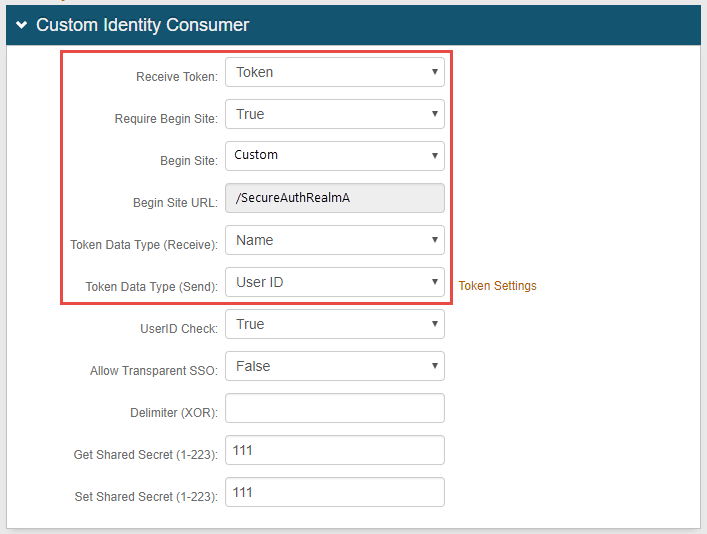
In the Custom Identity Consumer section (named Custom Front End in SecureAuth IdP v8.x), select Token from the Receive Token dropdown.
Select True from the Require Begin Site dropdown.
Select Custom from the Begin Site dropdown.
Set the Begin Site URL field to /SecureAuthRealmA.
Select Name from the Token Data Type (Receive) dropdown.
Select User ID from the Token Data Type (Send) dropdown.
Warning
Click Save once the configurations have been completed and before leaving the Workflow page to avoid losing changes.
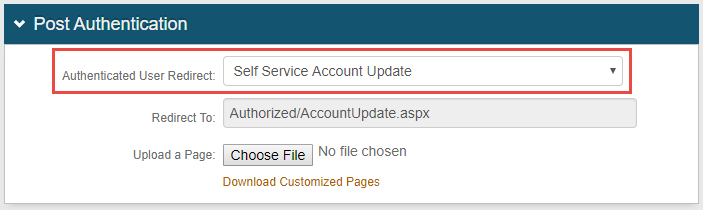
Post Authentication
In the Post Authentication section, in the Authenticated User Redirect dropdown, select the Self Service Account Update realm type.
 |
Warning
Click Save once the configurations have been completed and before leaving the Post Authentication section to avoid losing changes.
Identity Management
In the Identity Management section, select Configure self service page.
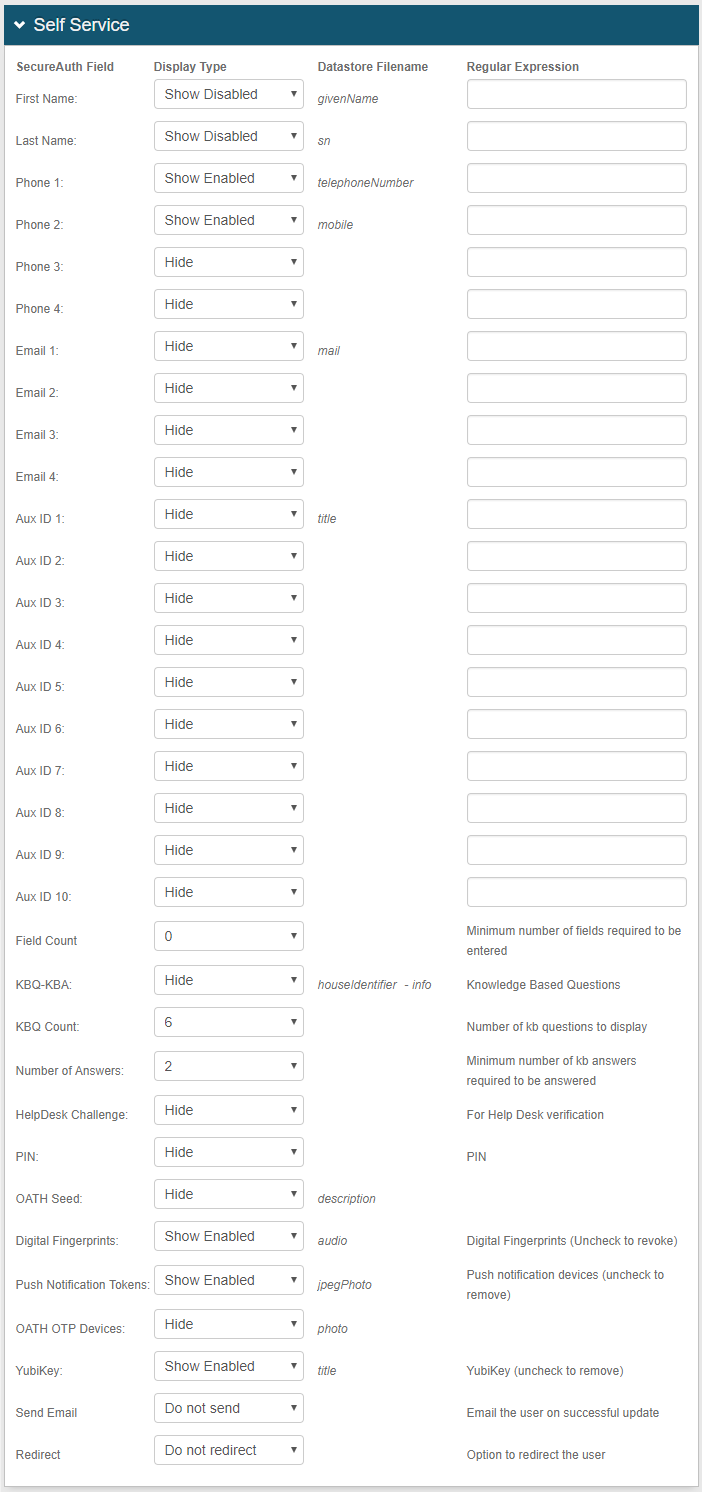
Warning
Click Save once the configurations have been completed and before leaving the Self Service page to avoid losing changes.
Click Back to return to the Post Authentication page to complete settings.
Forms Auth / SSO Token
In the Forms Auth / SSO Token section, click View and Configure FormsAuth keys / SSO token.
Forms Authentication
Optional: If configuring Realm B for the Redirect Failure Action, in the Forms Authentication section, set the Name to a unique, friendly token name.
|
Machine Key
In the Machine Key section, copy the Validation Key from this field in Realm A and paste it in this Validation Key field in Realm B.
Copy the Decryption Key from this field in Realm A and paste it in this Decryption Key field in Realm B.
Authentication Cookies
In the Pre-Auth Cookie field, type in PostAuthTokenA, where A represents the realm number of Realm A, such as PostAuthToken52. Optional: If configuring Realm A for theRedirect Failure Action, enter theTokenName supplied in Forms Authentication, instead.
In the Post-Auth Cookie field, type inPostAuthTokenB, where B represents the realm number ofRealm B, such as PostAuthToken53. Optional: If configuring Realm B for theRedirect Failure Action, enter theTokenName supplied in Forms Authentication, instead.
The following sample image shows TokenName entries for the Redirect Failure Action.
Warning
Click Save once the configurations have been completed and before leaving the FormsAuth keys / SSO token page to avoid losing changes.
End user experience
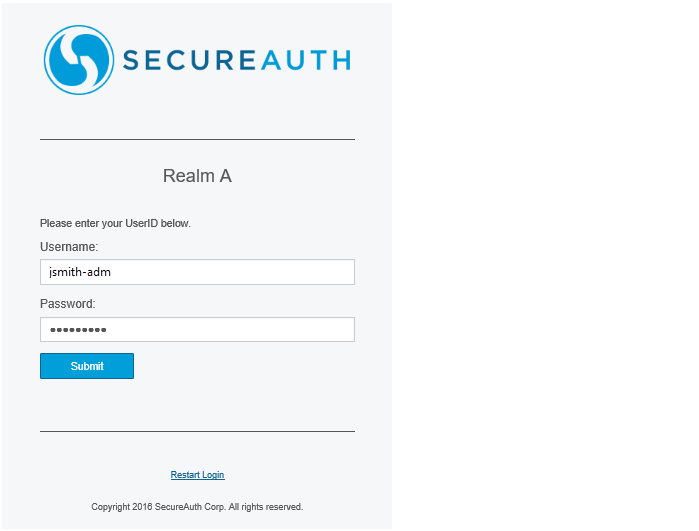
The following example shows a realm chaining workflow for an administrator authenticating into a Help Desk account management realm page.
1. The admin accesses the authentication page for Realm A and enters a user name and password.
 |
2. The admin selects how to receive passcode delivery to authenticate for Realm A.
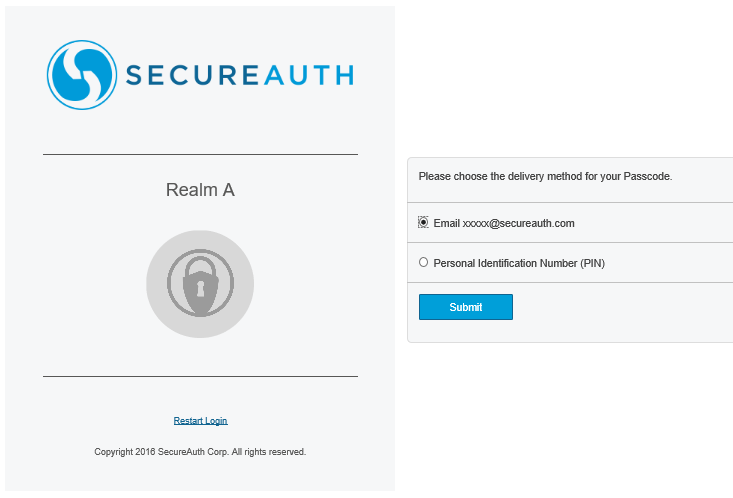 |
3. The admin selects how to receive passcode delivery to authenticate for Realm B.
 |
4. The admin authenticates in successfully and the Help Desk account management realm page is displayed.
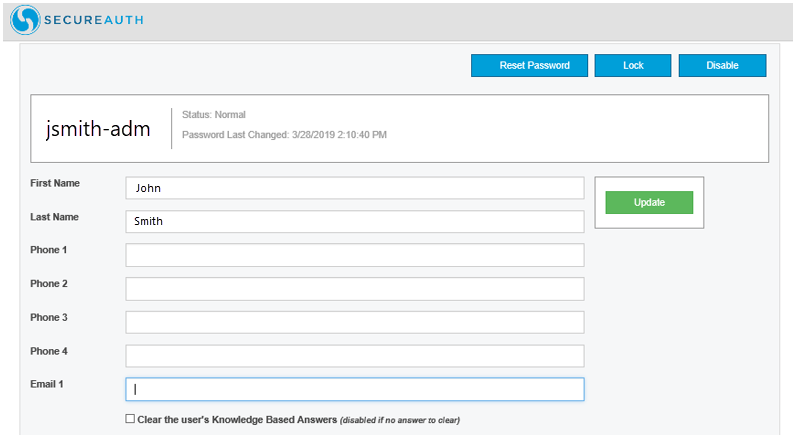 |