CyberArk Password Vault Server and AIM Integration with SecureAuth IdP
Introduction
Use this guide to integrate a CyberArk Password Vault server and CyberArk Application Identity Manager (AIM) credential provider with SecureAuth IdP so that service account passwords stored on the Vault server are automatically populated – but not stored – on SecureAuth IdP. This integration requires the Vault server to be integrated with AIM in order to retrieve the password from the Vault server.
When an end-user authenticates to an identity store (LDAP, SQL, Oracle) and CyberArk Vault is enabled to retrieve service account passwords, AIM is invoked to retrieve the service account password. Based on the realm configuration, the end-user can manage password resets, account unlocks, device self-enrollment and self-provisioning, independent of assistance from help desk personnel.
Prerequisites
Ensure these items are installed
SecureAuth IdP 9.1+ running on Windows Server 2012 R2
Identity store(s) – one or more of these data store types: Active Directory, Oracle, SQL Server
CyberArk Vault Server v9.x
Licensed version of CyberArk AIM v9.5+
On SecureAuth IdP
Configure the Web Admin of a new or existing realm – e.g. Password Reset, Account Unlock, Device Self-Enrollment and Self-Provisioning – using a supported data store
Install AIM
CyberArk AIM Configuration Steps
Notice
Refer to CyberArk Credential Provider and Application Server Credential Provider Implementation Guide for CyberArk Credential Provider installation instructions
Here's a quick outline of of configurations you will need to make in the Password Vault Web Access Admin Console:
Applications: Add an application and define the application ID
Policies: Provision accounts and set permissions to access the Password Safe
Applications: Add Application and define Application ID
Log on the Password Vault Web Access (PVWA) Admin Console with permissions to manage applications – i.e. Manage Users authorization.
On the Applications page, click Add Application; the Add Application window appears.
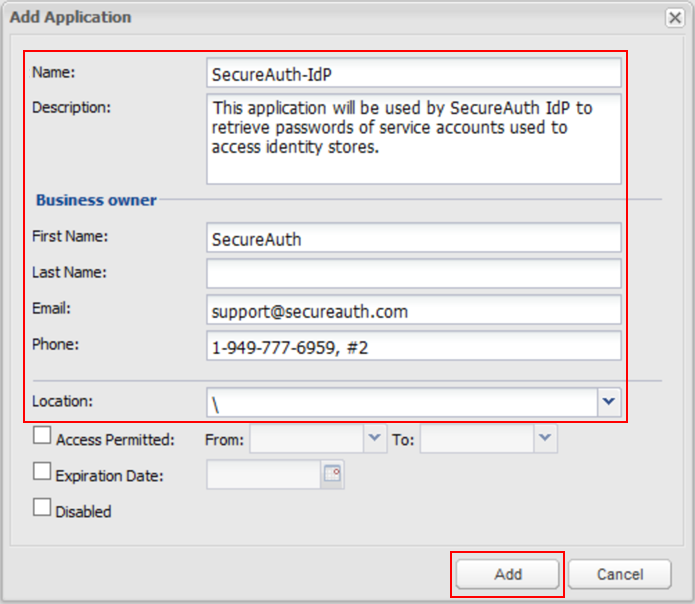
Enter the unique Name of this application – SecureAuth-IdP – to be used as the application identifier (appid).
Enter a brief Description to identify this application.
In the Business owner section, enter contact information about the owner of this application.
In the bottom section, use the dropdown to specify the Location of this application on the Vault hierarchy.
NOTE: If the Location is not selected, the application is added in the same Location as the user creating this application.
Click Add; the application is added and the Application Details page appears with this information.
Next, you will need to define the authentication details.
On the Authentication tab, enable Allow extended authentication restrictions to permit an unlimited number of machines and Windows domain OS users on a single application.
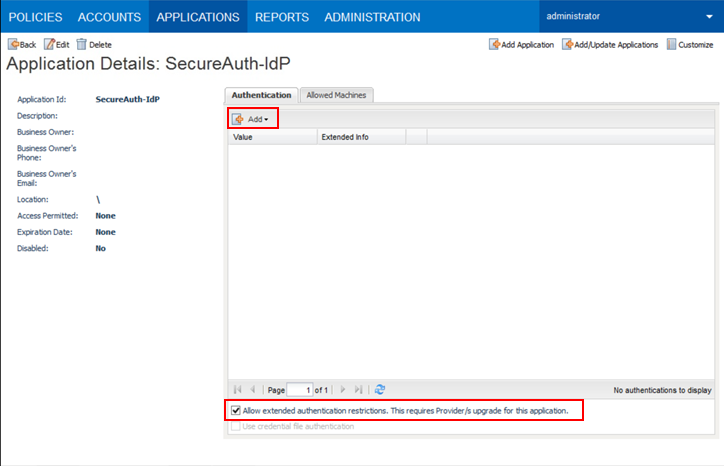
Click Add and select characteristics to define from the dropdown – details about the application must be specified so the Credential Provider can check certain application characteristics before retrieving the application password.
Tip
SecureAuth recommends using the IP address of the SecureAuth IdP appliance on which the AIM Credential Provider is installed to add an extra layer of security.
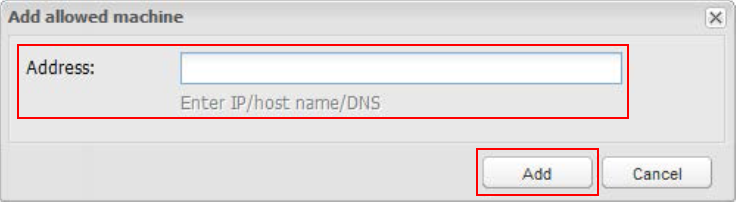
On the Allowed Machines tab, enter information the Credential Provider will use to ensure that only applications running on specified machines can access passwords.
Click Add; the Add allowed machine window appears.
Enter the Address (IP / host name / DNS) of the SecureAuth IdP appliance on which AIM is installed.
Click Add; the IP address appears on the Allowed Machines tab.
Policies: Provision accounts and set permissions to access the Password Safe
Provision accounts
The application must have access to particular existing accounts – or new accounts to be provisioned in the CyberArk Vault – in order to execute its functionality and tasks.
Ensure this user account has authorization in the Password Safe to Add accounts.
In the Password Safe, use one of two methods to provision privileged accounts required by the applications.
Manually – Add each account individually and specify all account details
Automatically – Use the Password Upload feature to add multiple accounts automatically
Notice
Refer to CyberArk Privileged Account Security Implementation Guide for more information about adding and managing privileged accounts
Set permissions to access the Password Safe
Once privileged accounts are managed by CyberArk Vault, set up access to the Safes for the application and CyberArk Application Password Providers serving the application.
Add the Credential Provider and application users as members of Password Safes on which the application passwords are stored – this can be done either manually on the Safes tab, or by specifying the Safe names on the .CSV file used for adding multiple applications.
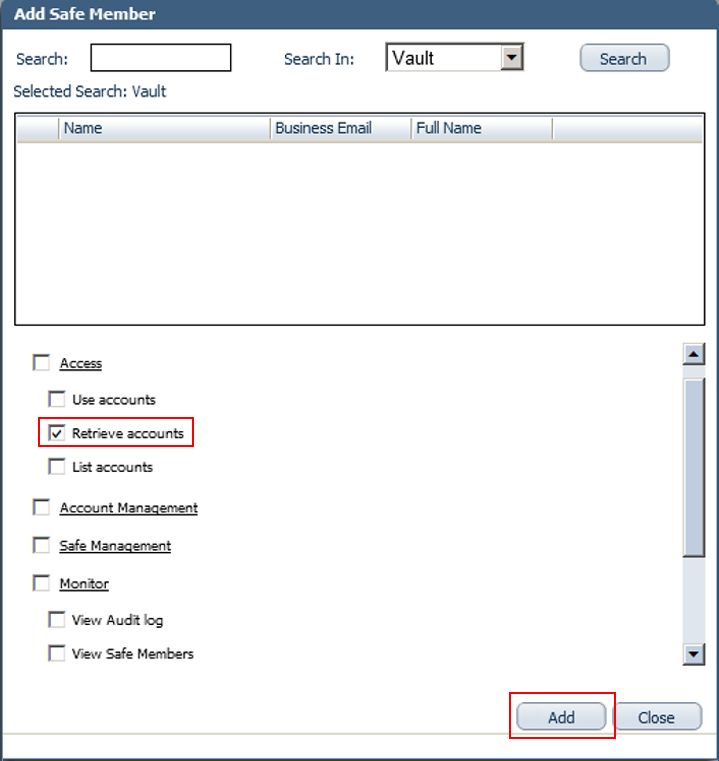
Add the Provider user as a Safe Member with authorization to:
List accounts
Retrieve accounts
View Safe Members

Notice
When installing multiple Providers in this integration, SecureAuth recommends creating a group for the Providers and then adding that group to the Safe with authorization to the options listed in step above
Add the application (SecureAuth-IdP) as a Safe Member with authorization to Retrieve accounts.
If the environment is configured for dual control:
In PIM-PSM environments (v7.2 and lower) – if the Safe is configured to require confirmation from authorized users before passwords can be retrieved, give the Provider user and the application permission to Access Safe without Confirmation
In Privileged Account Security solutions (v8.0 and higher) – when working with dual control, the Provider can always access the Safe without confirmation, so the permission to Access Safe without Confirmation does not need to be set
If the Safe is configured for object level access, ensure both the Provider user and the application have access to the password(s) to retrieve.
Notice
Refer to CyberArk Privileged Account Security Implementation Guide for more information about configuring Safe Members
SecureAuth IdP Configuration Settings
Go to the Data tab.
In the Membership Connection Settings section, select the Datastore Type from the dropdown – e.g. Active Directory (sAMAccountName) is selected on the sample screen.
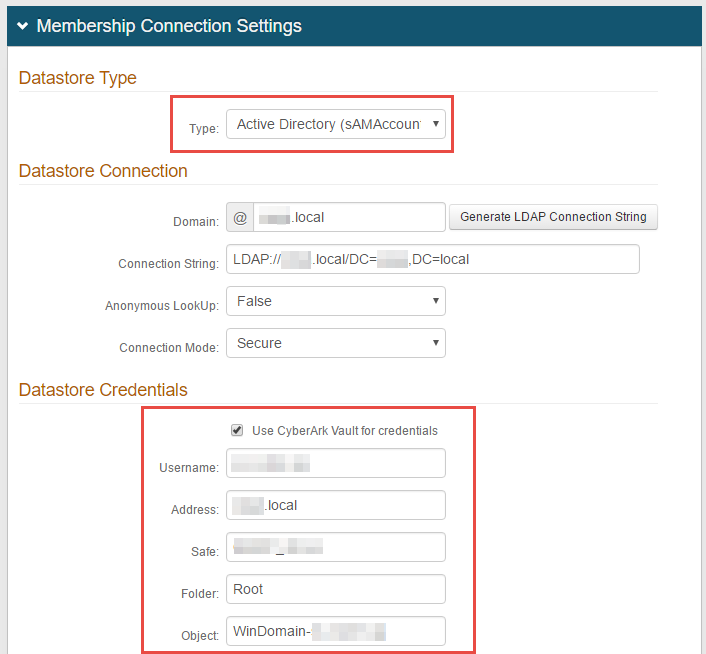
Configure Datastore Credentials and Connection information based on the data store type.
Notice
The section label, fields, and field names differ based on the type of data store selected
Enable Use CyberArk Vault for credentials.
Input the Username and Address of the machine to be scanned by AIM – this information appears on the Account Details page of the CyberArk Password Vault Web Access (PVWA) Admin Console.
(OPTIONAL) Enter any of the following details to optimize AIM's performance:
Safe – Name of the Access Control (Safe) where credentials are stored
Folder – Name of the folder where the account resides ('root' by default)
Object – Unique identifier name for the account
Save your changes.