SonicWALL Aventail Integration Guide (RADIUS)
Introduction
Use this guide to configure the integration of a SonicWALL Aventail E-Class SRA appliance with a SecureAuth IdP RADIUS Server.
Instructions are provided for configuring token-based or username credential type RADIUS authentication servers.
Prerequisites
1. Admin access to the SonicWALL Aventail E-Class SRA appliance that is running on the network
2. Ensure SecureAuth IdP v9.0+ is running on the network
3. Admin access to the SecureAuth IdP RADIUS Server v2.3.9+ installed and running on the network
SecureAuth IdP RADIUS Server Configuration
On the RADIUS Clients page, add the SonicWALL Aventail appliance as a RADIUS client, using its NAS-IP address
SonicWall Aventail Configuration
Configure Token-based or Username Credentials for the RADIUS Server
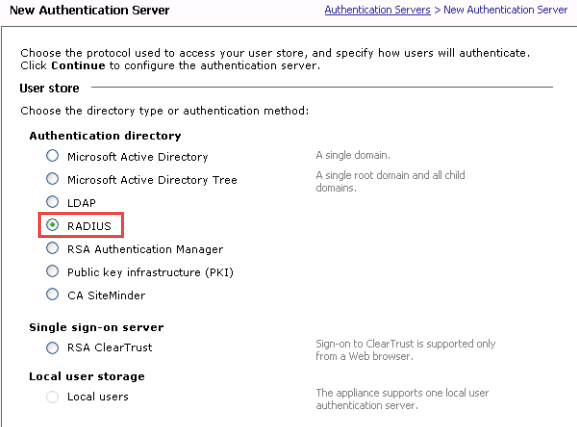 |
1. From the main navigation menu on the Aventail Management Console( AMC), select Authentication Servers and then New
2. In the User store section, select RADIUS as the type of Authentication directory
3. Select the Credential type for SecureAuthIDP and then clickContinue
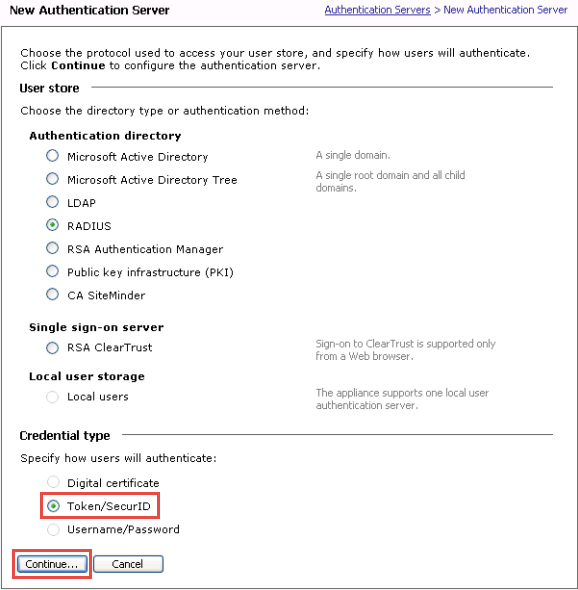
If Token / SecurID is selected...
follow the instructions for Token-based Credential Configuration
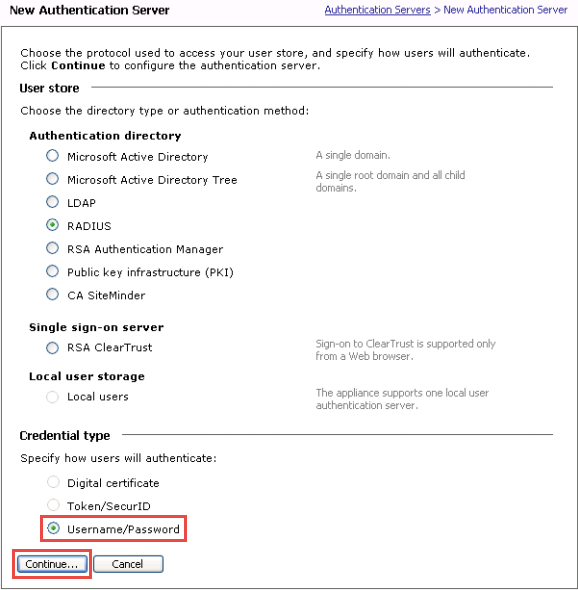
If Username / Password is selected...
follow the instructions for Username Credential Configuration
Token-based Credential Configuration
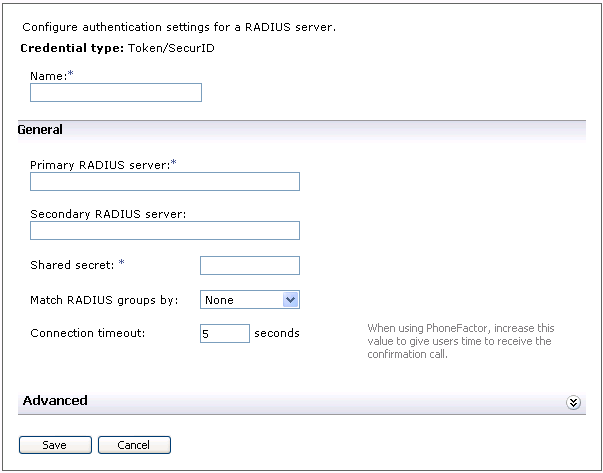 |
4. Enter a Name for the RADIUS authentication server
5. Type in the host name or IP address of the Primary RADIUS server
Specify port number 1812 as a colon-delimited suffix – this port is used for inbound RADIUS listening
6. Type in the host name or IP address of the secondary Secondary RADIUS server
If necessary, a port number can be appended following a colon ( : )
7. Type in the Shared secret password used to secure communications with the SecureAuth IdP RADIUS Server
This must be the same Shared Secret entered on the RADIUS Server Settings page on the SecureAuth IdP RADIUS Server
8. From the Match RADIUS groups by dropdown, select the attribute containing the groups of which the end-user is a member
Match RADIUS groups by | Result of selection |
|---|---|
None | Group attribute is ignored |
filterid attribute (11) | Match is made against FilterID attribute |
class attribute (25) | Match is made against Class attribute |
9. Enter the number of seconds comprising the length of time in the Connection timeout – this value specifies the maximum amount of time in which the authentication attempt to receive a reply from the RADIUS server will be valid
The default is 5 seconds, with a range from 5 to 300 seconds allowed
NOTE: SecureAuth recommends setting this value to at least 30 seconds to give end-users time to input their second authentication factor
10. (OPTIONAL) Click Advanced to expand that section to configure optional settings described in the next section of this document
11. Click Save
OPTIONAL: Configure Advanced RADIUS Settings
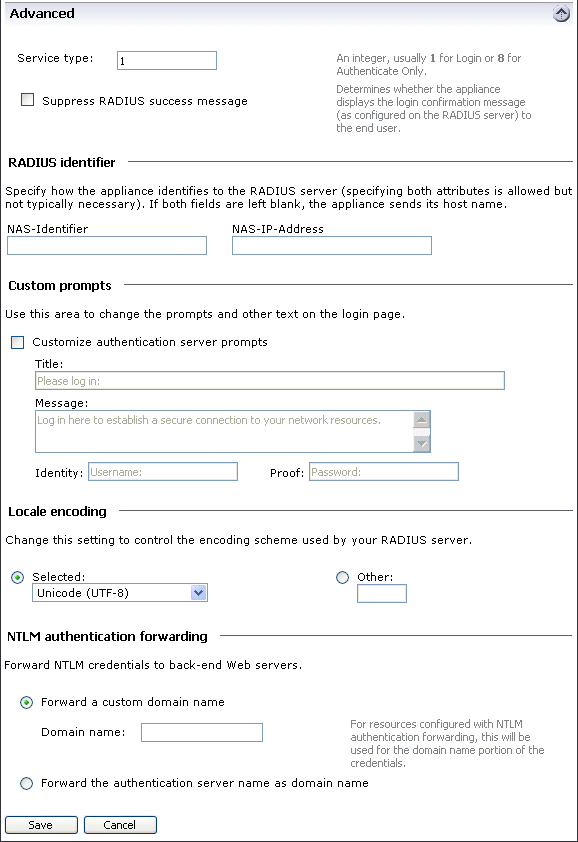 |
12. Enter the RADIUS Service type integer specifying the type of service being requested
For most RADIUS servers, type 1 is used for Login, and type 8 is used for Authenticate Only
13. Check the Suppress RADIUS success message box if messages that let end-users know if credentials are accepted should not appear
14. If the RADIUS Server is unable to accept the SonicWALL Aventail appliance host name, then enter either the NAS-Identifier or NAS-IP-Address
NOTE: Both entries can be made, but are not usually necessary
15. Select Customize authentication server prompts to change the prompts and other text that Windows users see when logging on the authentication server
For example, the Identity prompt could be changed so that the user who logs on using an employee identification sees Employee ID instead of Username
16. Click Save
Username Credential Configuration
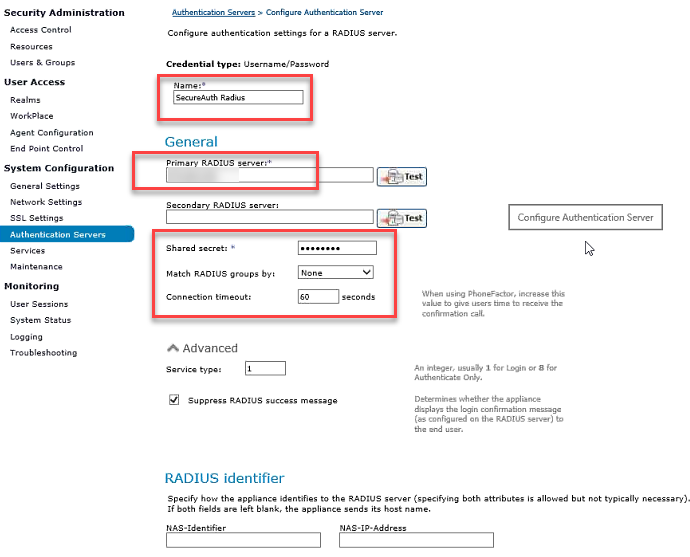 |
4. Enter a Name for the RADIUS authentication server – in this example, SecureAuth Radius
5. Type in the host name or IP address of the Primary RADIUS server
Specify port number 1812 as a colon-delimited suffix – this port is used for inbound RADIUS listening
6. Optionally type in the host name or IP address of the secondary Secondary RADIUS server
If necessary, a port number can be appended following a colon ( : )
7. Type in the Shared secret password used to secure communications with the SecureAuth IdP RADIUS Server
This must be the same Shared Secret entered on the RADIUS Server Settings page on the SecureAuth IdP RADIUS Server
8. From the Match RADIUS groups by dropdown, select the attribute containing the groups of which the end-user is a member
Match RADIUS groups by | Result of selection |
|---|---|
None | Group attribute is ignored |
filterid attribute (11) | Match is made against FilterID attribute |
class attribute (25) | Match is made against Class attribute |
9. Enter the number of seconds comprising the length of time in the Connection timeout – this value specifies the maximum amount of time in which the authentication attempt to receive a reply from the RADIUS server will be valid
The default is 5 seconds, with a range from 5 to 300 seconds allowed
NOTE: SecureAuth recommends setting this value to at least 30 seconds to give end-users time to input their second authentication factor
10. Click Save
Realms Configuration
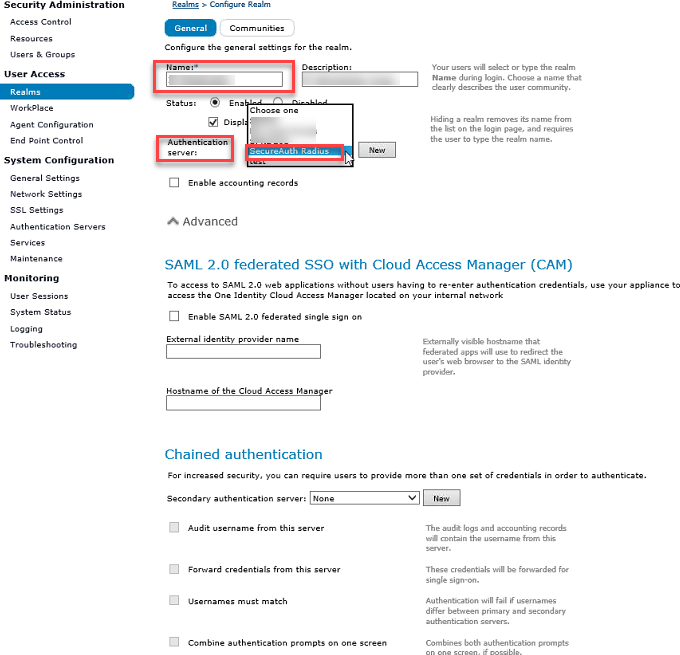 |
11. From the main navigation menu, click Realms
12. Click New to access the Configure Realm page, and configure General settings
13. Enter a Name for the SecureAuth IdP realm and optionally include a Description
14. Select the SecureAuth IdP RADIUS realm from the Authentication server dropdown – in this example, SecureAuth Radius
Group Authorization Configuration
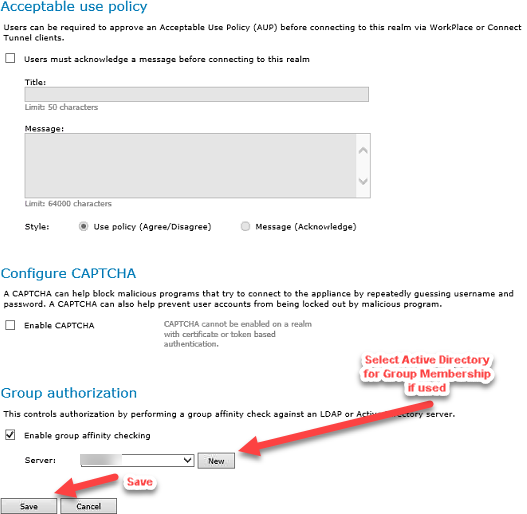 |
15. Under Advanced Options, in the Group authorization section, Enable group affinity checking if different servers handle authentication and authorization
16. Select the Active Directory that will perform group affinity checking from the Server dropdown
17. Click Save
OPTIONAL: Add Active Directory Group
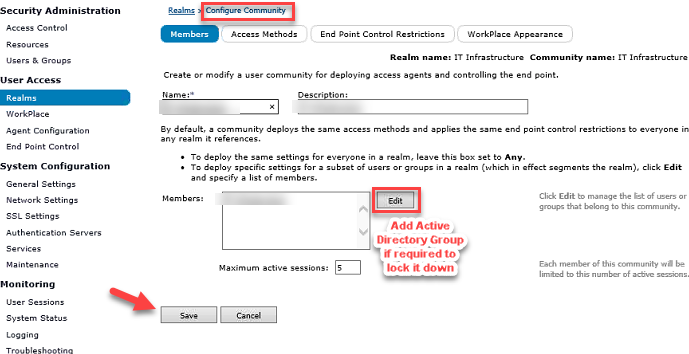 |
18. From the main navigation menu, click Realms and select the community for the realm
19. On the Configure Community page, the Members tab appears
20. The Members box includes the users or group that belong to this community
If necessary, click Edit and select the Active Directory (to perform group affinity checking) from the list of users and groups
21. Click Save
TROUBLESHOOTING: Configure Logging
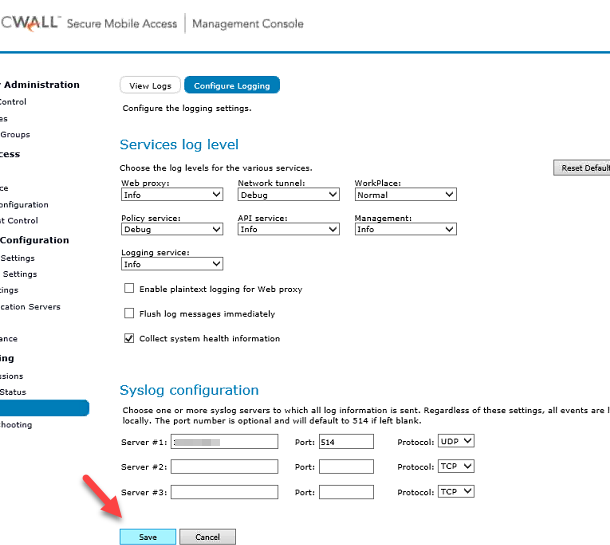 |
1. From the main navigation menu, click Logging
2. Click the Configure Logging tab
3. Select the appropriate level of message detail for the services on the appliance
4. In the Syslog configuration section, configure the appliance to send system logs to one or more syslog servers, entering the IP addresses and port numbers of the syslog servers
5. Click Save