ADP OpenIDConnect / OAuth2 integration guide
Introduction
Use this guide to configure a new ADP — OpenIDConnect/OAuth2 Integration.
Prerequisites
Have an ADP administrative account.
Create a New Realm for the ADP integration.
Configure the following tabs in the Web Admin before configuring the Post Authentication tab:
Overview — the description of the realm and SMTP connections must be defined.
Data — an enterprise directory must be integrated with SecureAuth IdP. Map the appropriate fields needed for this integration.
Workflow — the way in which users will access this application must be defined.
Multi-Factor Methods — the Multi-Factor Authentication methods that will be used to access this page (if any) must be defined.
SecureAuth IdP configuration steps
1. Log in to your SecureAuth IdP Admin Console.
Post Authentication
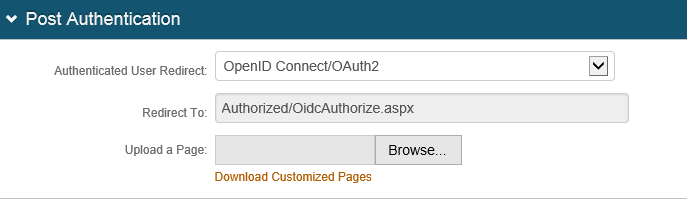
2. Navigate to the Post Authentication tab.
3. Select OpenID Connect/OAuth2 from the Authenticated User Redirect dropdown.
 |
User ID mapping
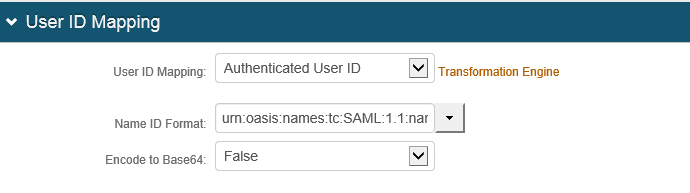
4. Select Authenticated User ID from the User ID Mapping dropdown.
Note: This Property needs to match up with an identical User ID on the ADP end, otherwise an error will occur after authentication.
5. Select urn:oasis:names:tc:SAML:2.0:nameid-format:unspecified from the Name ID Format dropdown.
6. Select False from the Encode to Base64 dropdown.
 |
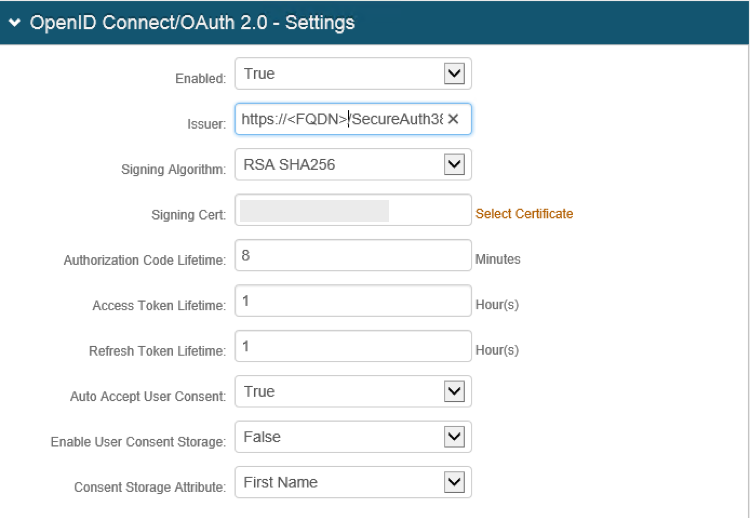
OpenID Connect / OAuth 2.0 settings
7. Select True from the Enabled dropdown.
8. Type/paste the URL for the SecureAuth IdP Realm into the Issuer text field (e.g., https://idp.secureauth.com/SecureAuthxx/).
9. Select RSA SHA256 from the Signing Algorithm dropdown.
10. Type/paste the appropriate certificate key, matching the key on the ADP side, into the Signing Certificate text field.
11. Enter the appropriate minutes and hours in the Authorization Code, Access Token, and Refresh Token Lifetime text fields, based upon the client’s specific security requirements.
12. Select True from the Auto Accept User Consent dropdown.
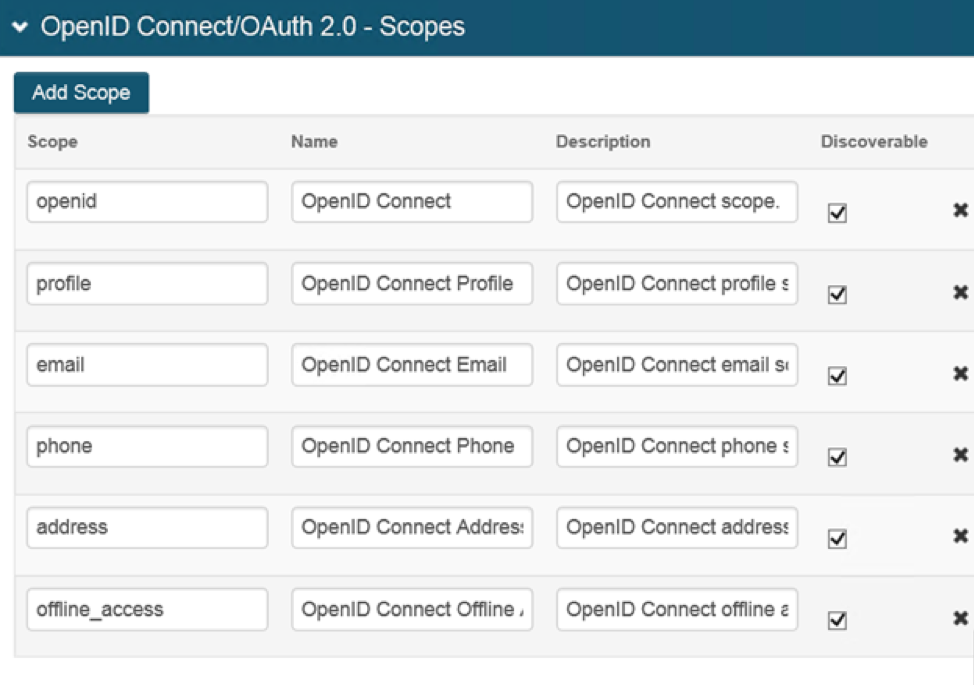
OpenID Connect / OAuth 2.0 scopes
The Discoverable checkboxes are checked for all scopes as per security requirements. The scopes on the ADP end and the SecureAuth end must match, however, otherwise scope errors will occur.
13. Check the Discoverable checkboxes for the openid, profile, and email scopes.
 |
 |
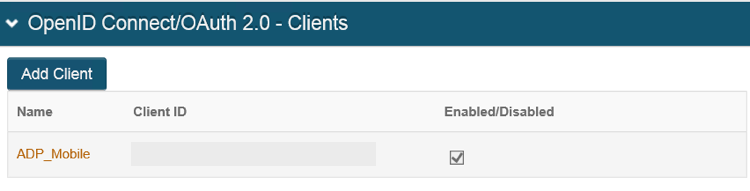
OpenID Connect/OAuth 2.0 Clients
14. Click on the Add Client tab to create a new client for the UI.
 |
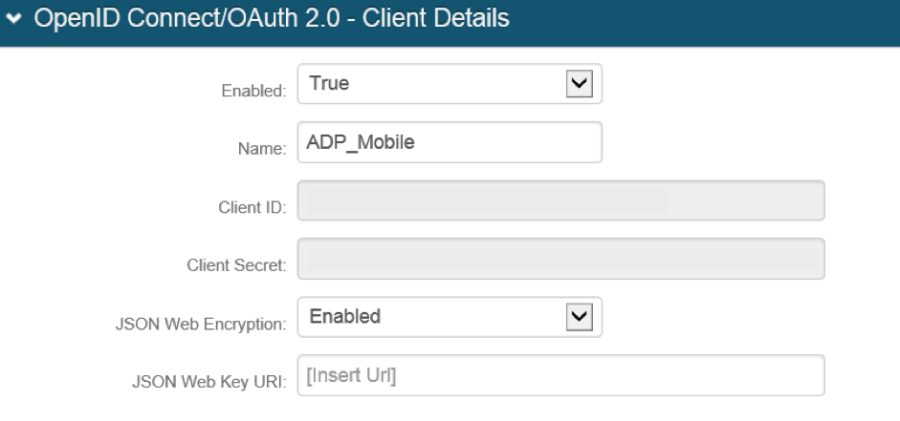
15. Select True from the Enabled Property dropdown.
16. Type/paste a meaningful name in the Name text field.
17. Click the Save button.
18. The system will automatically populate the Client ID and Client Secret fields.
19. Select Enabled from the JSON Web Encryption dropdown.
 |
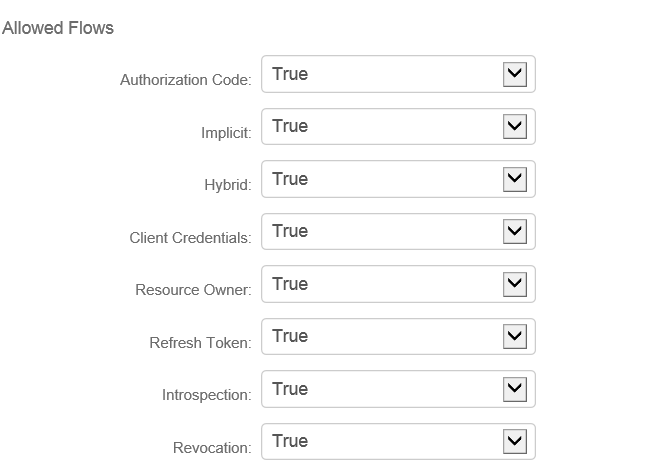
20. Select True from the Authorization Code dropdown.
21. Select True from the Refresh Token dropdown.
22. Other Workflows may be set to True depending upon specific requirements.
 |
23. Type/paste the ADP-provided URI — to which the system redirects the user after authentication on the SecureAuth IdP — into the Redirect URI text field (e.g., https://mobifed-iat.adp.com/oauth/client/v2/xxxxxxxxx).
24. Click Save after reviewing configurations.
 |
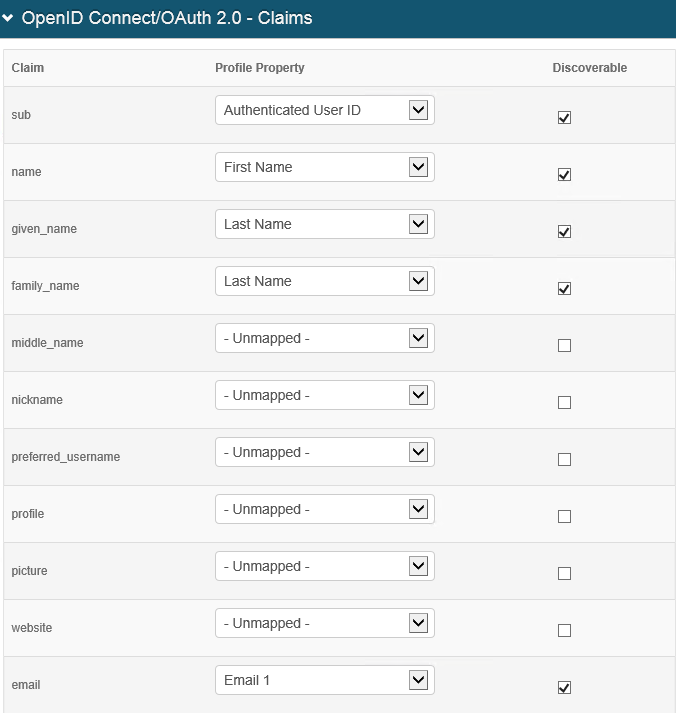
OpenID Connect/OAuth 2.0 Claims
Set the Claims fields as required on both the SecureAuth IdP end and on the ADP's end. These claims will appear when decoding the JSON Web Token (JWT) and are fed into the scopes previously set.
Note: In this example, these parameters will be displayed on the web browser after the workflow has been completed. The only mandatory claim is the sub claim. Also, these claims must be mapped appropriately in the Data tab.
25. Select Authenticated User ID from the sub dropdown and check the Discoverable checkbox.
26. Select First Name from the name dropdown and check the Discoverable checkbox.
27. Select Last Name from the given name dropdown and check the Discoverable checkbox.
28. Select Last Name from the family name dropdown and check the Discoverable checkbox.
29. Select Email 1 from the email dropdown and check the Discoverable checkbox.
 |
ADP configuration steps
1. Log in to the ADP Admin console.
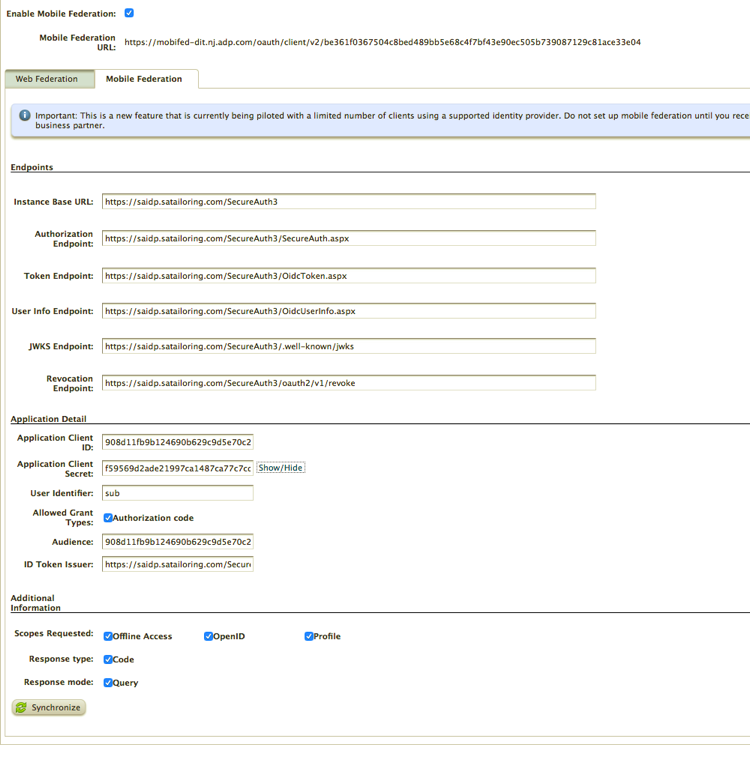
2. Check the Enable Mobile Federation checkbox.
3. In the Endpoints section, fill out the appropriate fields:
a. Type/paste the Fully Qualified Domain Name (FQDN) of the SecureAuth Server into the Instance Base URL text field (e.g., https://<<FQDN>/SecureAuthxx).
b. Type/paste the FQDN of the SecureAuth Server into the Authorization Endpoint text field. (e.g., https://<<FQDN>/SecureAuthxx/SecureAuth.aspx).
c. Type/paste the FQDN of the SecureAuth Server into the Token Endpoint text field. (e.g., https://<<FQDN>/SecureAuthxx/oidctoken.aspx).
d. Type/paste the FQDN of the SecureAuth Server into the UserInfo Endpoint text field (e.g., https://<<FQDN>/SecureAuthxx/oidcuserinfo.aspx).
e. Type/paste the FQDN of the SecureAuth Server into the JWKS Endpoint text field (e.g., https://<<FQDN>/SecureAuthxx/.well-known/jwks).
f. Type/paste the FQDN of the SecureAuth Server into the Revocation Endpoint text field (e.g., https://<<FQDN>/SecureAuthxx/OAuthRevocate.aspx).
4. In the Application Detail section, fill out the appropriate fields:
a. Type/paste the Client ID of the SecureAuth Realm into the Application Client ID text field.
b. Type/paste the Client Secret of the SecureAuth Realm into the Application Client Secret text field.
c. Type/paste sub into the User Identifier text field.
d. Check the Authorization Code checkbox next to Allowed Grant Types.
e. The other 2 fields — Audience and ID token Issuer — can be left with their generic values.
Note: The Endpoints are fixed and can be found in the SecureAuth OpenID Connect/OAuth 2.0 Documentation online.
5. Click Save after reviewing configurations.
 |