SecureAuth IdP Realm Guide
What is a Realm?
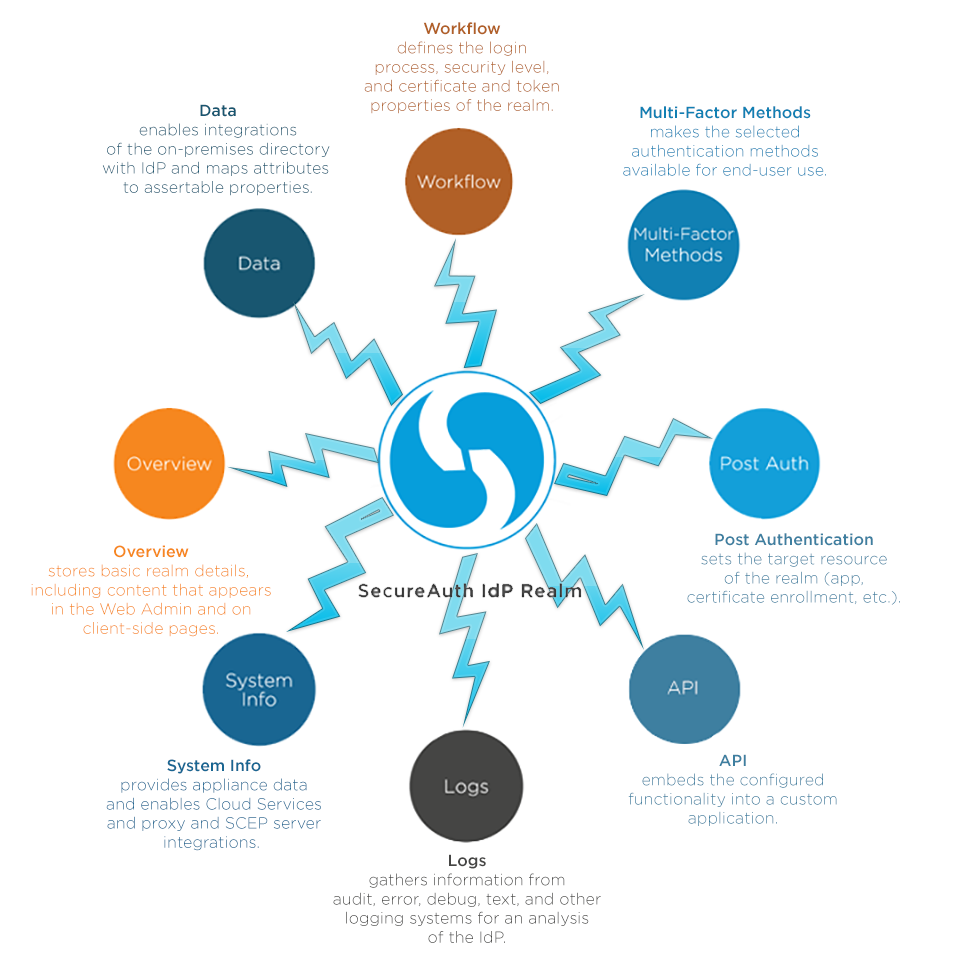 |
A realm is a configured workflow that leads end-users to a target resource (application, IdM page, certificate enrollment page, etc.). Each SecureAuth IdP realm is unique and can be designed to any preference or requirement.
A realm is composed of directory integration(s), available Multi-Factor Authentication methods, login requirements and structure, post-authentication destination, logging options, and any other necessary features or integrations (e.g. SMTP, Proxy, SCEP, Cloud Services, etc.).
Because each realm is configured distinctly, specific security and / or user-friendly requirements can be implemented to more appropriately manage access to corporate resources. For example, one realm can be configured for internal access to an application that enables Windows Desktop SSO; while a second realm can be configured for external access to the same application that requires additional Multi-Factor Authentication and Adaptive Authentication to detect any possible threats.
Creating Realms
In the SecureAuth IdP Web Admin, new realms can be created by duplicating an existing realm's configurations to be modified as needed, or by utilizing a Wizard Template.
Creating a new realm from an existing realm simply takes all of the realm's settings configured in the Web Admin and generates a copy. Once the copy is made, the administrator can modify any configurations to suit the new realm's purpose.
This option is ideal for realms using the same directory integrations, proxy settings, and other third-party product implementations to ensure consistency and to avoid unnecessary manual entry.
The Template takes the administrator through an application integration, starting with the target resource (application), and onto the directory integration, protocol values (SAML, WS-Federation, etc.), and workflow options (Multi-Factor Authentication requirements and methods).
This is a base realm configuration; and to enable other features of SecureAuth IdP, or to customize the realm further, additional configuration within the realm is required.
Create New Realm From Existing Steps
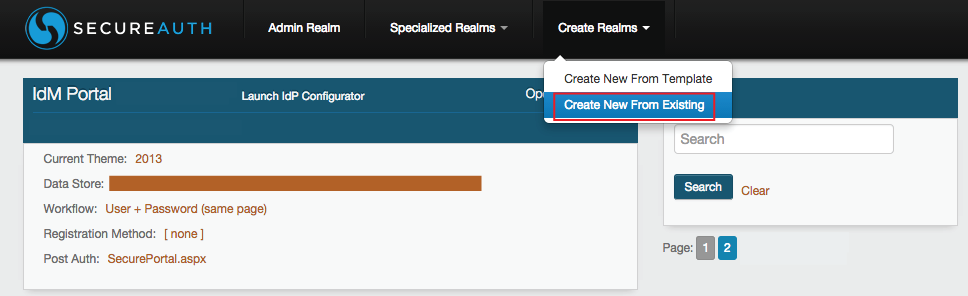 |
Click Create Realms in the top menu, and Create New From Existing to create a new realm by copying the configurations of another realm
Create Realm From Existing
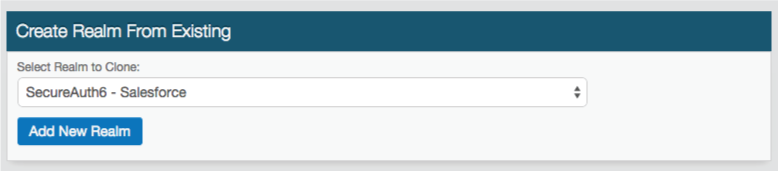 |
1. Select the SecureAuth IdP realm that contains the necessary configurations from the Select Realm to Copy dropdown
2. Click Add New Realm
3. A new realm will be created, and by clicking on the new realm on the Home Page, modifications can be made
Create New Realm From Template Steps
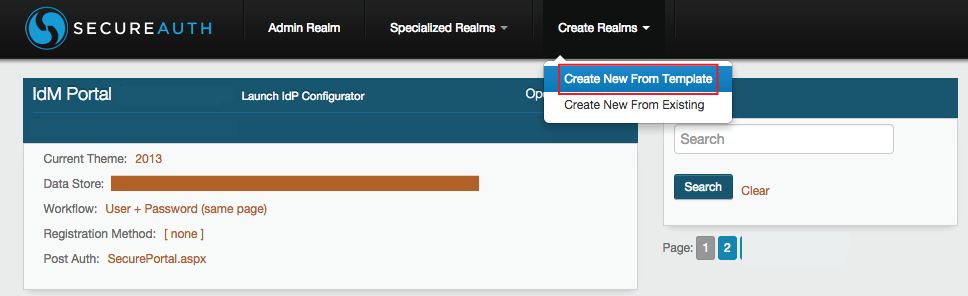 |
Click Create Realms in the top menu, and Create New From Template to create and configure a new realm with the SecureAuth IdP Web Admin Wizard
Apps
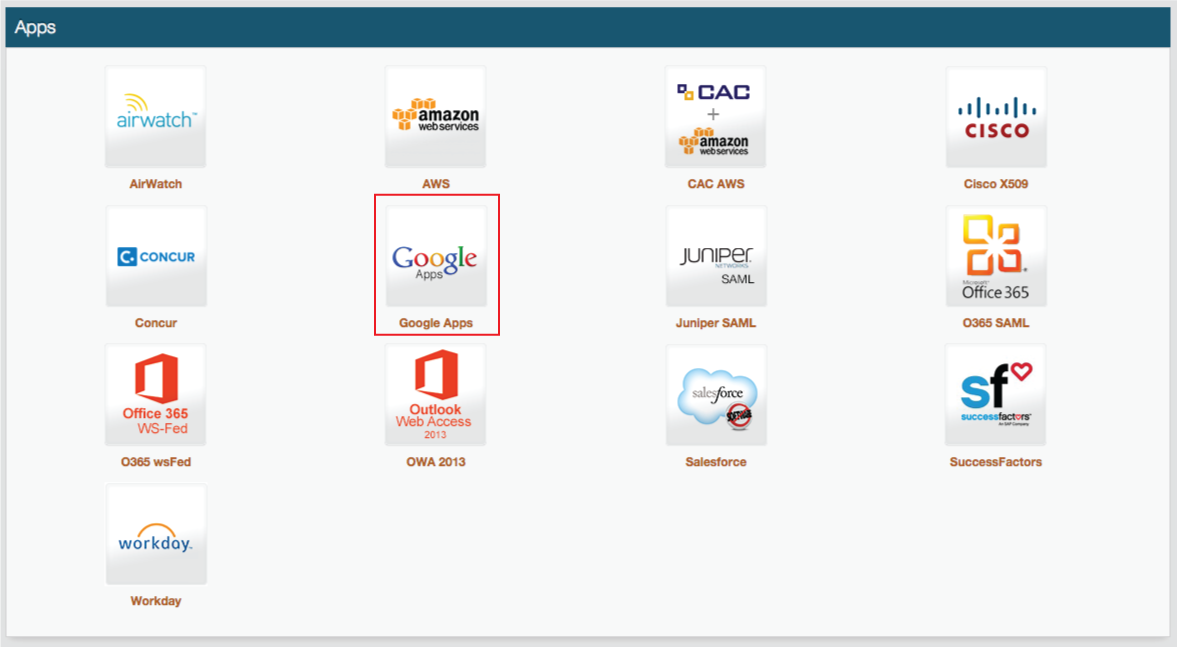 |
1. Select an application from the provided list to establish the target resource of the new realm
For this example, Google Apps is selected
Step 1. General
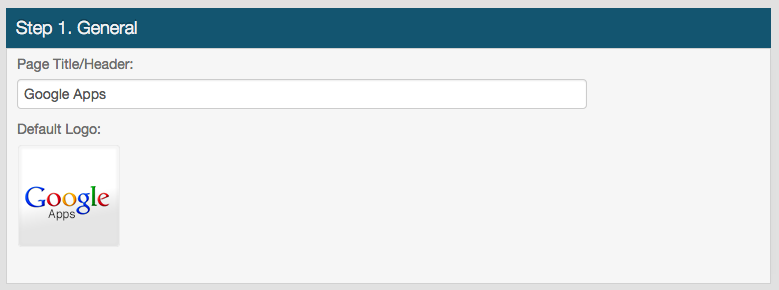 |
2. Provide a Page Title/Header, e.g. Google Apps
This will appear in the Web Admin and on the end-user login pages
Step 2. Active Directory
 |
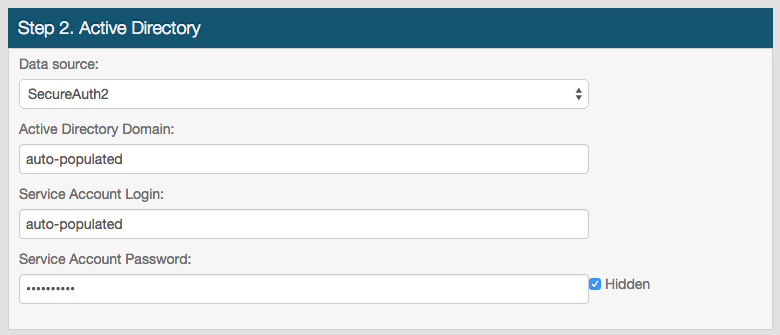 |
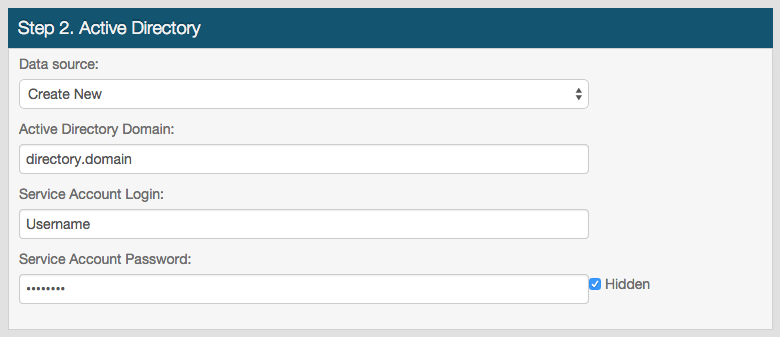
3. Select Create New from the Data Source dropdown if the Active Directory integration to be used for Google Apps has not been configured in another realm; or select the SecureAuth IdP realm that has the required configurations from the Data Source dropdown
If a SecureAuth IdP realm is selected, the other fields will auto-populate with the appropriate values
4. Provide the Active Directory Domain
5. Provide the username of the SecureAuth IdP data store service account in the Service Account Login field
A service account with read access is required to extract information for authentication and assertion, and (optional) write access is required to alter or add information to the data store from SecureAuth IdP (e.g. password update, provisioned devices, knowledge-based questions)
6. Provide the password that is associated to the above username in the Service Account Password field
Step 3. SAML
 |
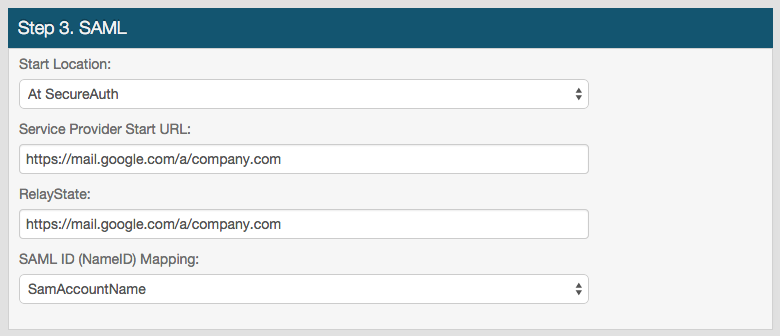 |
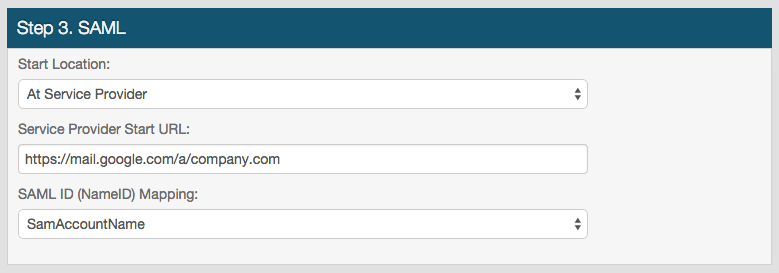
7. In the Start Location dropdown, select At Service Provider if the end-user will initiate the login process at Google Apps; select At SecureAuth if the end-user will initiate the login process at the SecureAuth IdP realm
8. Provide the Service Provider Start URL, which would be a vanity URL such as https://mail.google.com/a/company.com
9. Provide the RelayState if At SecureAuth was selected in step 7
This is the same as the SAML Target URL in the Web Admin realm configuration
10. Select how SecureAuth IdP will map to the directory user account from the SAML ID (NameID) Mapping dropdown
Step 4. Workflow
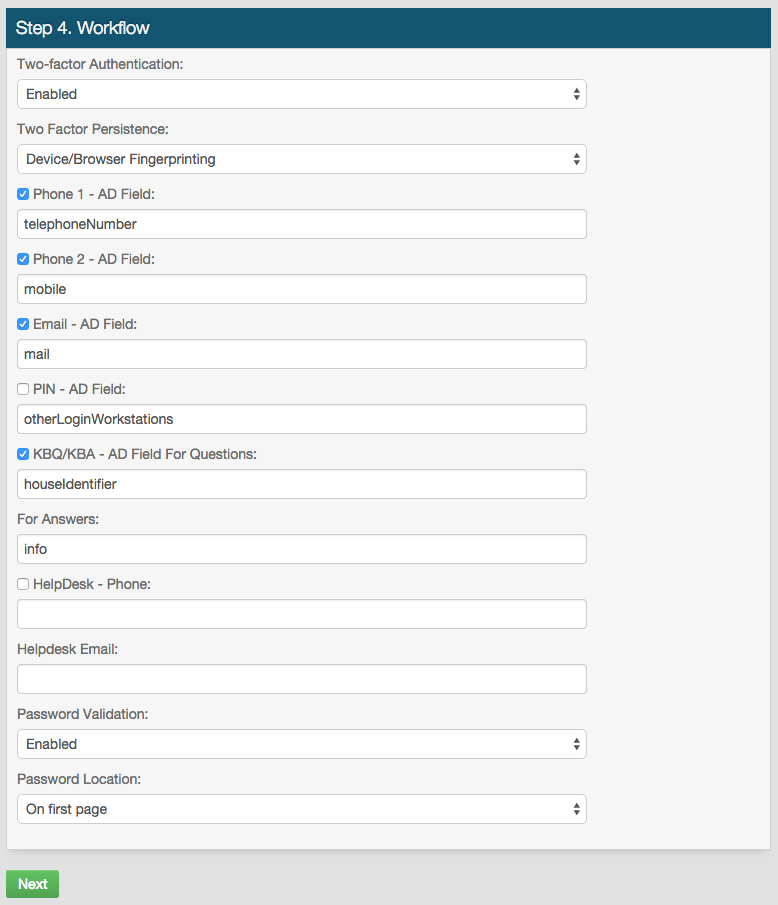 |
11. Select Enabled from the Two-factor Authentication dropdown to enable a Multi-Factor Authentication workflow for this realm
12. Select the type of persistent token that will be accepted and / or generated in this realm from the Two Factor Persistence dropdown
13. Check the boxes to enable SecureAuth IdP Properties that map to directory Fields (configured in the Data tab) to be used for Multi-Factor Authentication
For example, checking Phone 2 enables Voice, SMS / Text, or both OTP delivery to the phone number mapped to Phone 2
14. Select Enabled from the Password Validation dropdown to require a password in addition to the username and second factor
15. Select On Separate/Last Page from the Password Location dropdown to enable a Standard Authentication Mode workflow (username + second factor + password)
Select On first page to have the username and password prompts on the first page, and then the Multi-Factor Authentication process will follow
16. Click Next to review the configurations and from there, Submit the settings to create the realm
Notice
More configurations and settings may be required in addition to these Wizard steps
Accessing Realms
 |
Access realms from the Web Admin Home Page by selecting the title of the realm (e.g. Forgot Username)
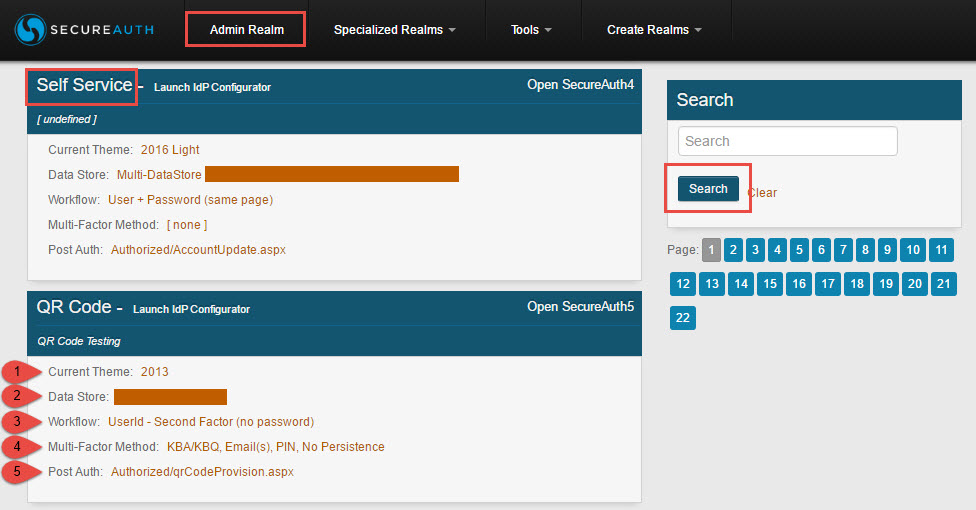
Within the realm overview presented on the Home Page, select the links to access a specific tab within the realm:
Select the Current Theme to access the Overview tab
Select the Data Store to access the Data tab
Select the Workflow to access the Workflow tab
Select the Multi-Factor Method to access the Multi-Factor Methods tab
Select the Post Auth to access the Post Authentication tab
Search through the configured realms to find the specific realm to access
Select Admin Realm at the top of the Home Page to access SecureAuth0
Access realms from within another realm by selecting the realm name in the left-side menu (e.g. SecureAuth2)
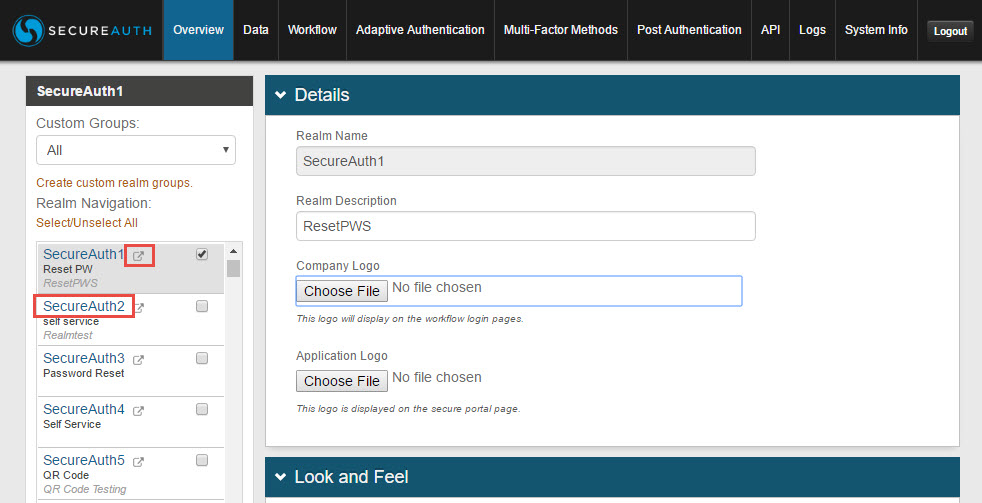 |
Click the  pop-out icon to view the client-side pages of the configured realms (username, Multi-Factor Authentication methods, password, and post-authentication pages)
Customizing Realms
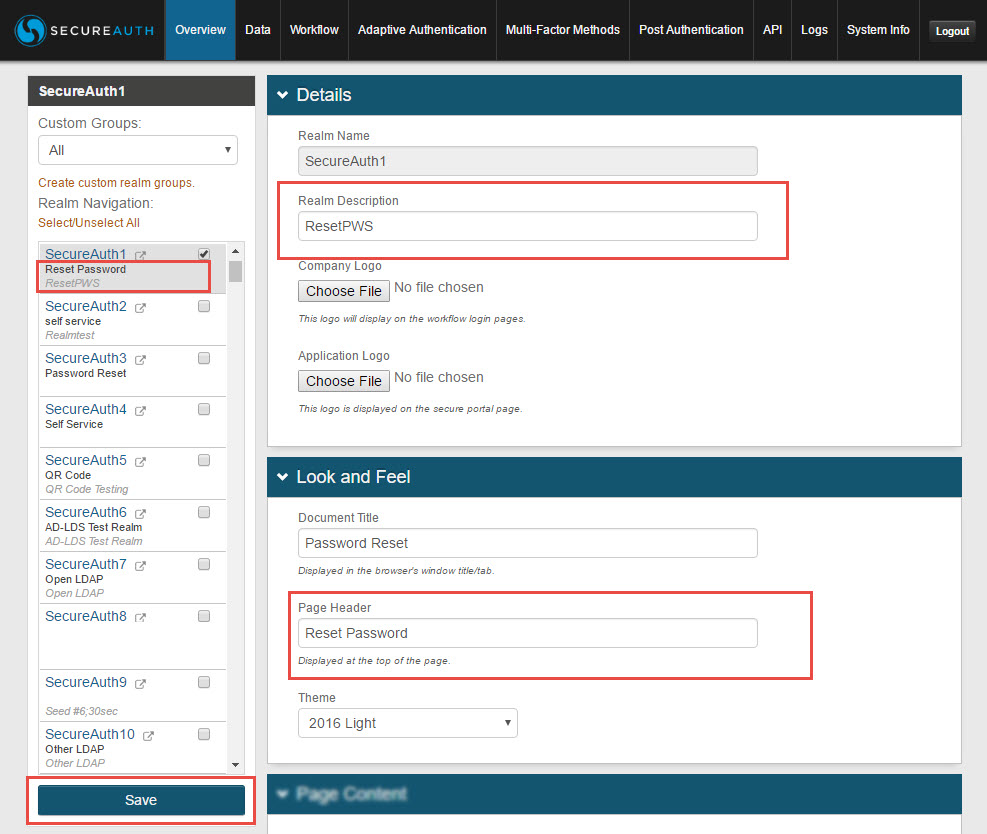 |
To internally and externally customize a realm, modifications can be made in the Overview tab
The Realm Description is used internally (displayed in the Web Admin only) to describe the purpose of the realm, e.g. Secure Access to App X
The Realm Description appears on the Web Admin Home Page under the Realm Title, and in the left-side menu
The Document Title is used externally (displayed client-side only) to title the browser tab of the end-user workflow pages
The Page Header is used internally and externally to title the realm and to title the end-user workflow pages
The Page Header appears as Realm Title on the Web Admin Home Page, and in the left-side menu
Click Save to execute any changes made in the realm
Notice
Refer to Overview tab configuration for full customization options; and refer to the Administration section of topics to continue configuring realms
Updating Web Config
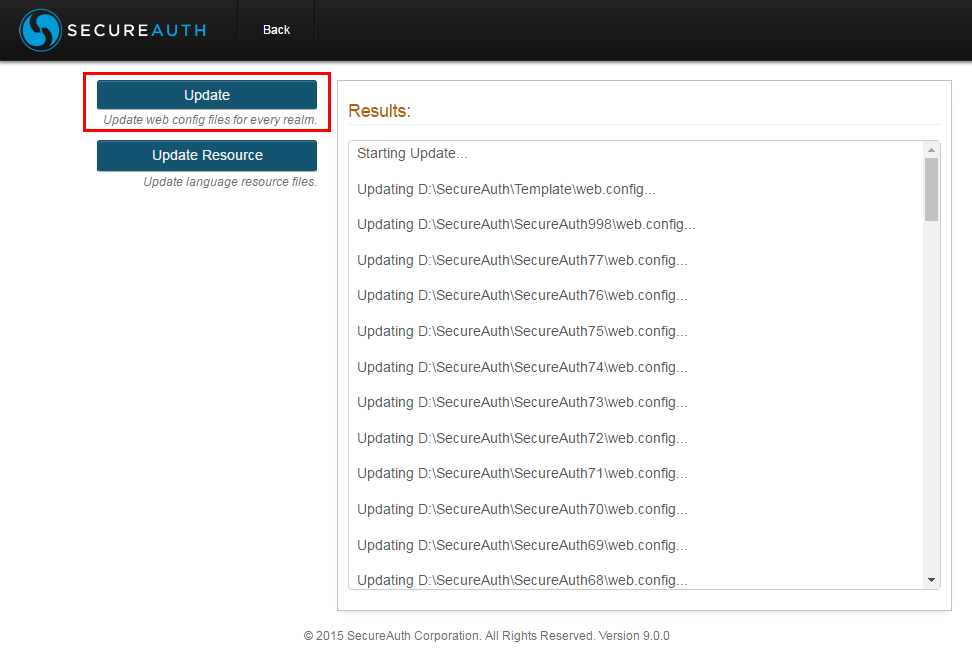 |
The web.config file of all realms needs to be updated when upgrading SecureAuth IdP to a newer version
Click Tools > Update Web Config to open the Web Config Update page
Click Update to update all web.config files at once
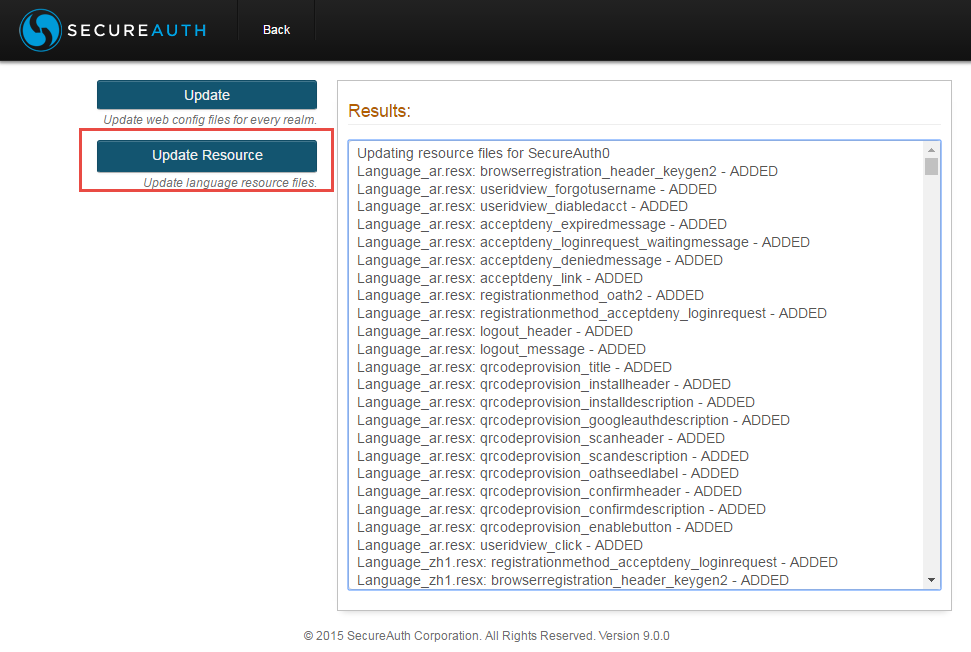
Click Update Resource to update the language resource DLL files of all realms
 |
Decrypting / Encrypting Realms
For certain use cases, such as troubleshooting or moving realms, decrypting realms is necessary
There are two ways to decrypt a realm in the Web Admin, and then one way to manually decrypt it if the Web Admin does not allow it:
Web Admin Decrypt Single Realm
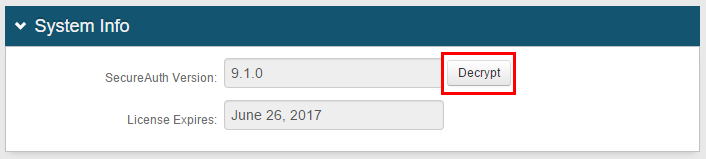 |
To decrypt a single realm, go to the System Info tab of the realm, and click Decrypt in the System Info section
Note
Encrypt the realms when finished by clicking Save in the realm, or by using the Decrypt Web Config page as demonstrated below
Web Admin Decrypt Multiple Realms
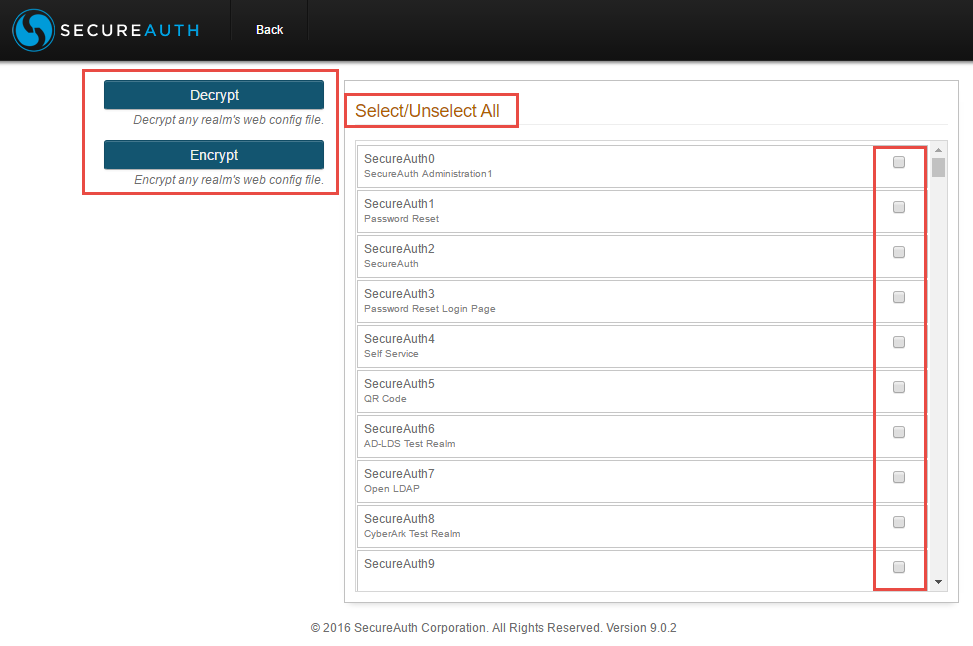 |
To decrypt multiple realms at a time, select Tools > Decrypt Web Config on the home page or go to https://< SecureAuthIdP FQDN>/SecureAuth0/decryptwebconfig.aspx
Check the realms to decrypt, or click Select / Unselect All, and then click Decrypt
Note
Encrypt the realms when finished by selecting the decrypted realms and clicking Encrypt
Realm Tips and Tricks
Copy Realm Information
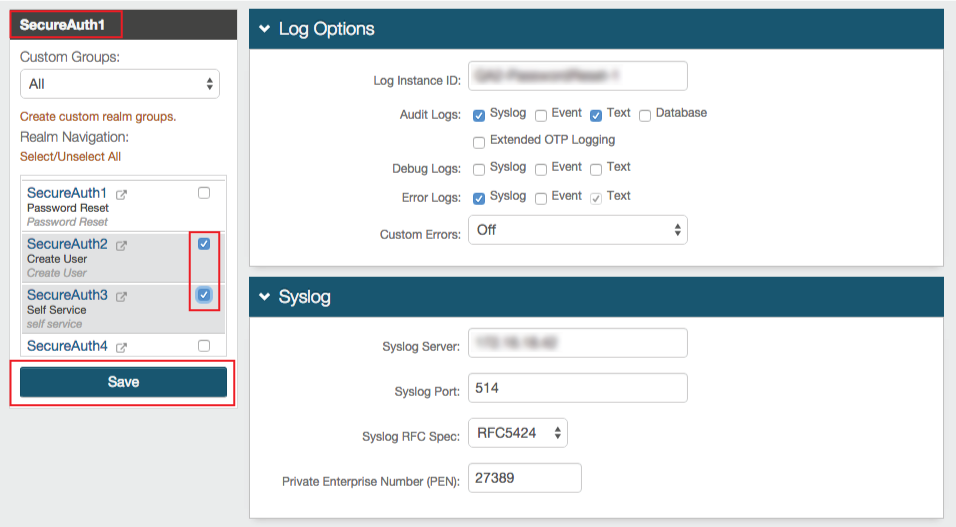 |
Creating a new realm from an existing realm copies the configuration and applies it to the new one; but for existing realms that require changes, the Web Admin allows the changes made in one realm to be applied to one or multiple other realms
For example, if the Logs configuration requires change in multiple, existing realms, then make the changes in one realm (e.g. SecureAuth1 in image example), select (check) the other realms to which the changes apply, and then click Save
Note
If making the changes for the first time in initial realm, then select the initial realm and all other realms, and then click Save
If simply copying the configuration of a tab in one realm to another realm, then deselect the initial realm (SecureAuth1), only select the other realms, and then click Save
NOTE: This method saves / copies the information of the current, open tab (Overview, Data, Workflow, Post Authentication, etc.) and not the entire realm configuration
Custom Realm Groups
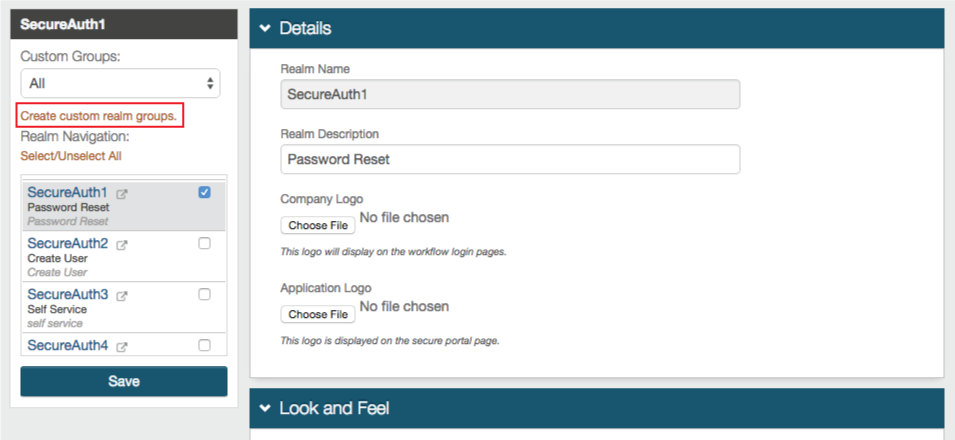 |
The Web Admin enables the use of Custom Realm Groups, which create an easier way to manage and organize specific types of realms
Once a custom realm group is created, it can be selected from the Custom Groups dropdown, which would then display only those realms in the group
For example, grouping SAML Integrations, realms with a specific directory integration, IdM Tools, etc. make it easier to find, manage, and modify similar configurations
1. To create a custom realm group, click Create custom realm groups in the left-side menu
Group Manager
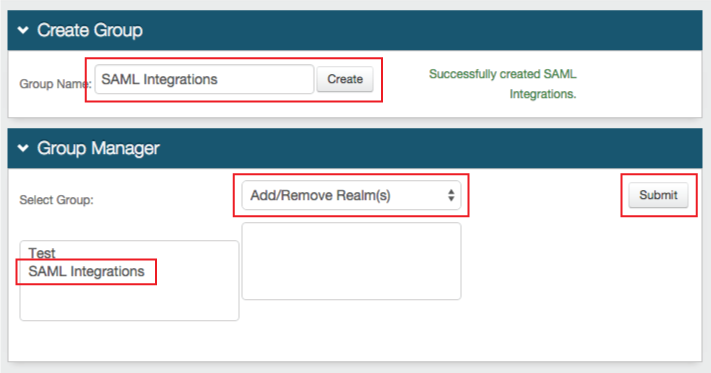 |
2. Provide a Group Name and click Create
3. Select the Group from the first box, then select Add / Remove Realm from the dropdown, and click Submit
The other dropdown options include Sort Realm(s) and Remove Group(s)
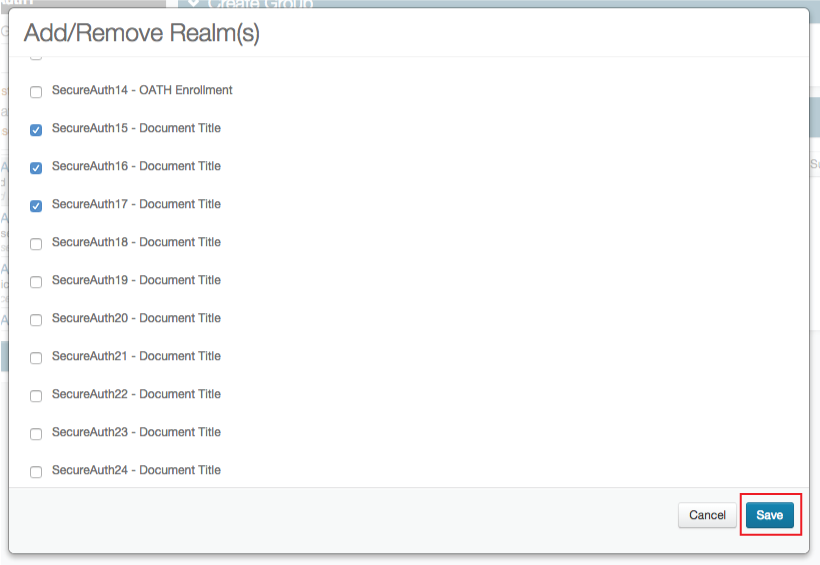
4. Select the realm(s) to be assigned to the group and click Save
 |