Multi-Workflow Begin Site Configuration Guide
Introduction
Use this guide to enable a SecureAuth IdP realm to utilize a Multi-Workflow begin site.
The multiple workflow configuration uses information from existing realms to redirect end-users to specifically designed workflows that can include access restrictions, stepped up authentication, analysis, and more. End-users start at the initial SecureAuth IdP realm (Realm A) and that realm then pulls information from the other realm(s) configured in the multiple workflow section to locate in which directory that user profile is. From there, SecureAuth IdP redirects the end-user to the appropriate realm (Realm B, Realm C, etc.) to undergo the configured workflow.
 |
When configuring for multiple workflows, be aware that multiple realms come into play. There is the original realm (Realm A) in which the configurations to create the multi-workflow are completed; the realms to copy, which are realms already existing in the SecureAuth IdP Web Admin that contain the directory integration and preferred workflow configurations; and the realms that are created from the multi-workflow configurations (Realm B, Realm C, etc.) that are configured with the appropriate directory integration and workflow options copied from the existing realms.
Prerequisites
1. Have on-premises data stores with which SecureAuth IdP can integrate
Refer to Data Tab Configuration for integration information
2. Create a New Realm or access an existing realm to which the multiple workflow configuration will be applied in the SecureAuth IdP Web Admin
3. Configure the Data Tab and the Workflow Tab of the realm(s) that are used in the multiple workflow configuration (directory integrations and Multi-Factor Authentication configuration)
SecureAuth IdP Configuration Steps
Note
These configuration steps are for the realm on which end-users land (Realm A) to be directed to the others realms in which the appropriate workflow is conducted (Realm B, Realm C, Realm D, etc.)
Workflow
Multiple Workflow Configuration
 |
1. Click View and Configure Multiple Workflow
Multiple Workflow Configuration
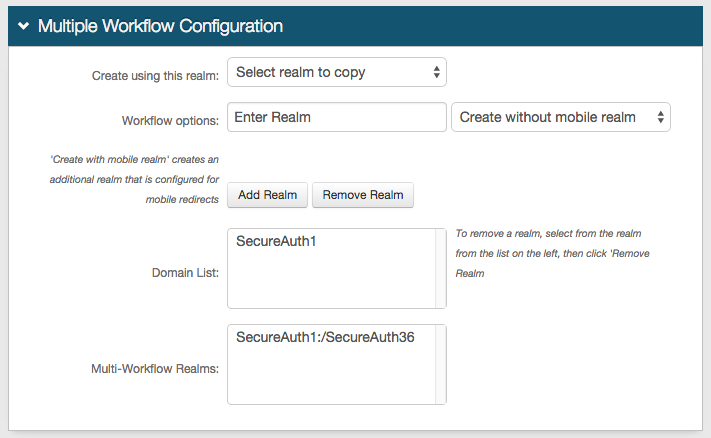 |
2. Select one of the realms in which the required directory integration and workflow configuration are applied from the Create using this realm dropdown
3. Provide the Realm Name or the Realm Description in the Workflow options field
4. Select Create with mobile realm from the dropdown if an additional realm for mobile access is to be created
5. Click Add Realm and see the Workflow options value appear in the Domain List field and the new workflow direction appear in the Multi-Workflow Realms field
6. Repeat steps 2-5 for additional realms to copy and to which end-users will be redirected upon landing on Realm A
Tip
To remove a realm from the multiple workflow configuration, select the realm in the Domain List and click Remove Realm
Notice
The second realm name (SecureAuth36 in the image) is the new realm created
This is the realm to which users will be redirected to from Realm A
Warning
Click Save once the configurations have been completed and before leaving the Multiple Workflow Configuration page to avoid losing changes
Custom Front End
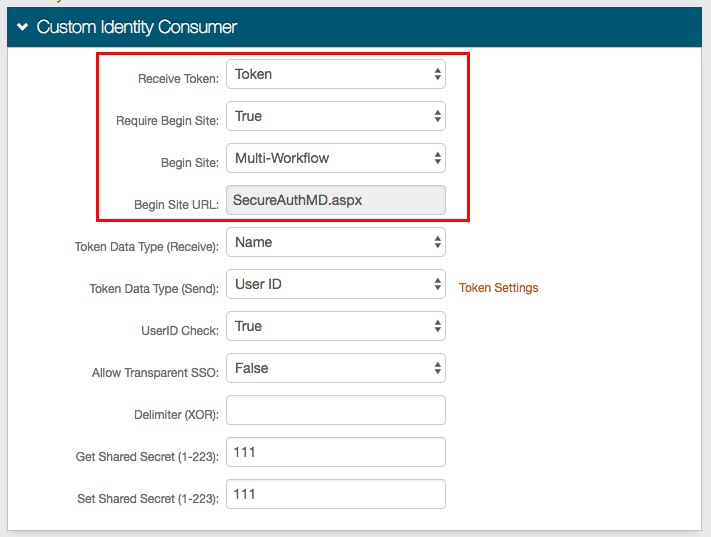 |
7. Select Token from the Receive Token dropdown
8. Select True from the Require Begin Site dropdown
9. Select Multi-Workflow from the Begin Site dropdown, and the Begin Site URL auto-populates to SecureAuthMD.aspx
Warning
Click Save once the configurations have been completed and before leaving the Workflow page to avoid losing changes
Additional Configuration Steps
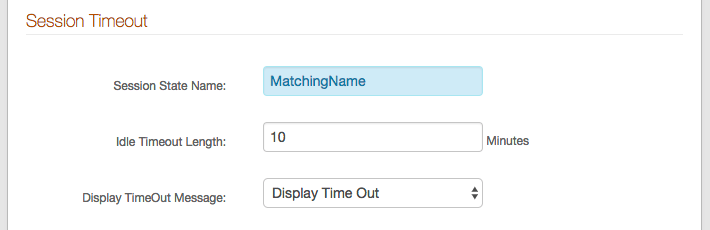 |
In each of the realms (Realm A, Realm B, Realm C, etc.) that are a part of the multi-workflow configuration, set the Session State Name in the Workflow section under Session Timeout of the Workflow tab to the same name (any preferred name)