Ellucian Colleague (SP-Initiated) SAML integration guide
Introduction
Use this guide to enable Single Sign-on (SSO) access via SAML to Ellucian Colleague.
Prerequisites
1. Have an Ellucian Colleague Instance and a SecureAuth Appliance.
2. Have administrative access to Ellucian Colleague.
3. Create a New Realm for the Ellucian Colleague integration.
4. Configure the following tabs in Web Admin before configuring the Post Authentication tab:
A) Overview — the description of the realm and SMTP connections must be defined.
B) Data — an enterprise directory must be integrated with SecureAuth IdP.
C) Workflow — the way in which users will access this application must be defined.
D) Multi-Factor Methods — the Multi-Factor Authentication methods that will be used to access this page (if any) must be defined.
SecureAuth IdP configuration steps
1. Log in to your SecureAuth IdP Admin Console.
Post Authentication
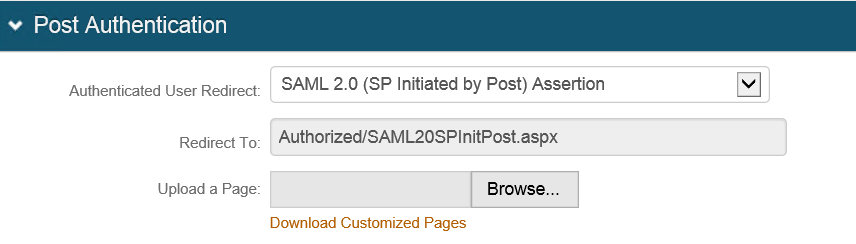
2. Navigate to the Post Authentication tab.
3. Select SAML 2.0 (SP Initiated by POST) Assertion from the Authenticated User Redirect dropdown.
 |
User ID mapping
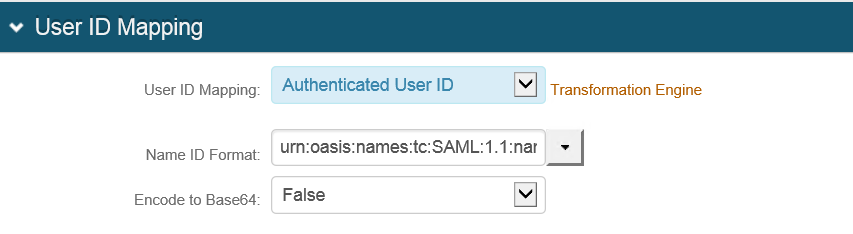
4. Select Authenticated User ID for the User ID Mapping dropdown. The user can choose to map other parameters, too.
5. Select urn:oasis:names:tc:SAML:1.1:nameid-format:unspecified from the Name ID Format dropdown.
6. Select False from the Encode to Base64 dropdown.
 |
SAML Assertion / WS Federation
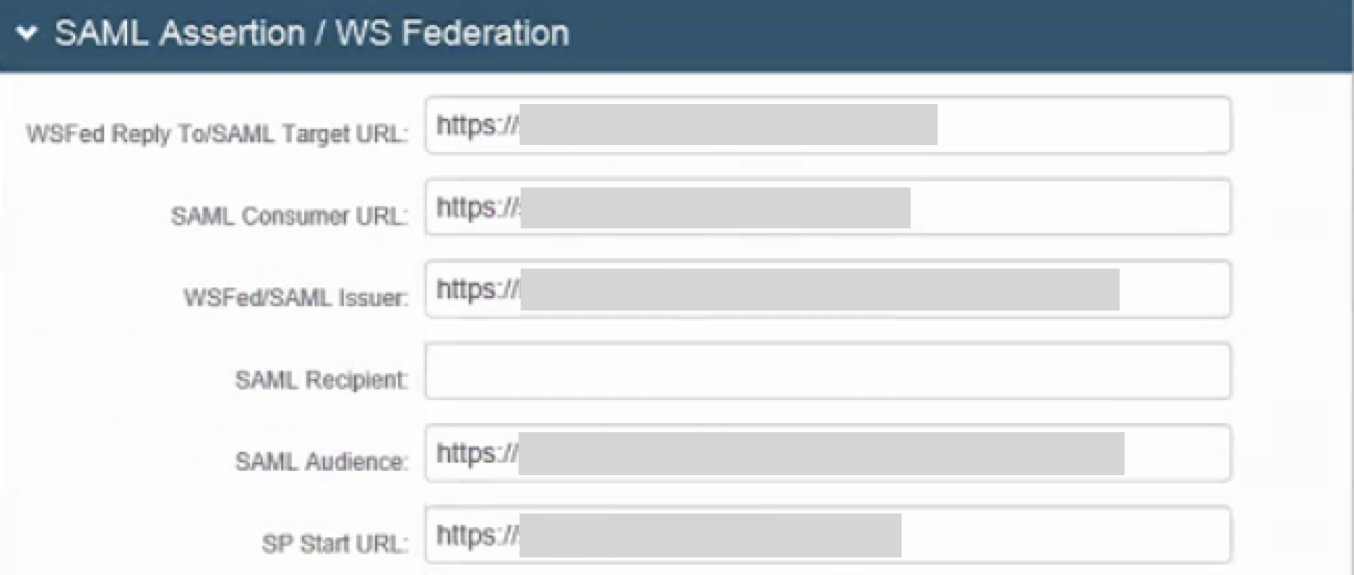
7. Type/paste the Base URL of the Ellucian Colleague in the WSFed Reply To/SAML Target URL text field (e.g., https://<FQDN_of_Public_URL>/xxxxxxxx/).
8. Type/Paste the Base URL provided by Ellucian Colleague in the SAML Consumer URL text field. This is the URL to which the SAML Response will be sent (e.g., https://<FQDN_of_Public_URL>/xxxxxxxx/).
9. Type/paste a URL into the WSFed/SAML Issuer text field that matches the value on the Ellucian Colleague end. This URL consists of the Fully Qualified Domain Name (FQDN) of the SA Appliance followed by the Realm Number (e.g., https://<FQDN_SA_IDP>/SecureAuthxx/).
10. Type/paste a URL into the SAML Audience text field that matches the value on the Ellucian Colleague side. This URL consists of the FQDN of the SA Appliance followed by the Realm Number (e.g., https://<FQDN_SA_IDP>/SecureAuthxx/).
11. Type/paste the Login URL of the Ellucian Colleague into the SP Start URL text field (e.g., https://<FQDN_of_Public_URL>/xxxxxxxx/).
 |
12. Select True from the Sign SAML Assertion dropdown.
13. Select True from the Sign SAML Message dropdown.
 |
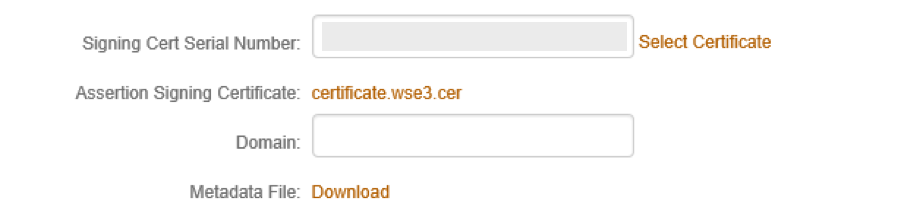
14. Leave the generated Signing Cert Serial Number as the default value, unless there is a third-party certificate being used for the SAML assertion.
Note: If using a third-party certificate, click Select Certificate and choose the appropriate certificate.
 |
15. Click the Save button.
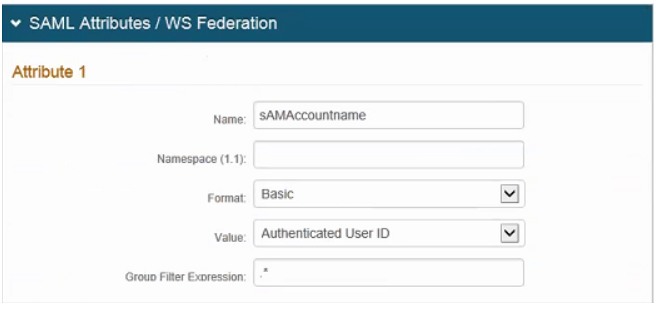
SAML Attributes / WS Federation
16. Type/paste "sAMAccountname" in the Name text box.
17. Select Basic from the Format dropdown.
18. Select Authenticated User ID from the Value dropdown.
Ellucian Colleague configuration steps
1. Log in to the Ellucian Colleague Admin page and navigate to the SAML Section under the Main Menu.
 |
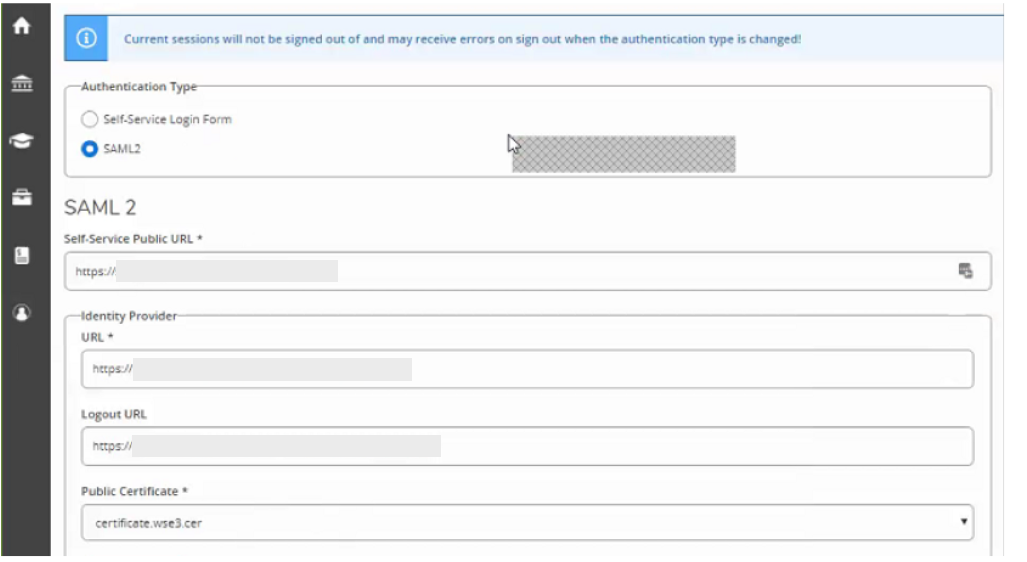
2. Click the SAML2 radio button in the Authentication Type section.
3. Type/paste the Login URL for the Ellucian Colleague Page for End Users in the Self-Service Public URL field.
4. Type/paste the SecureAuth for End Users Login URL into the URL text field under the Identity Provider section (e.g., https://<FQDN_SA_IdP>/SecureAuthxx/).
5. Type/paste the Identity Provider URL appended with restart.aspx into the Logout URL text field so that the SSO cookie will be cleared out (e.g., https://<FQDN_SA_IdP>/SecureAuthxx/restart.aspx).
6.Import the Public Certificate from SecureAuth into the Public Certificate text field.
 |
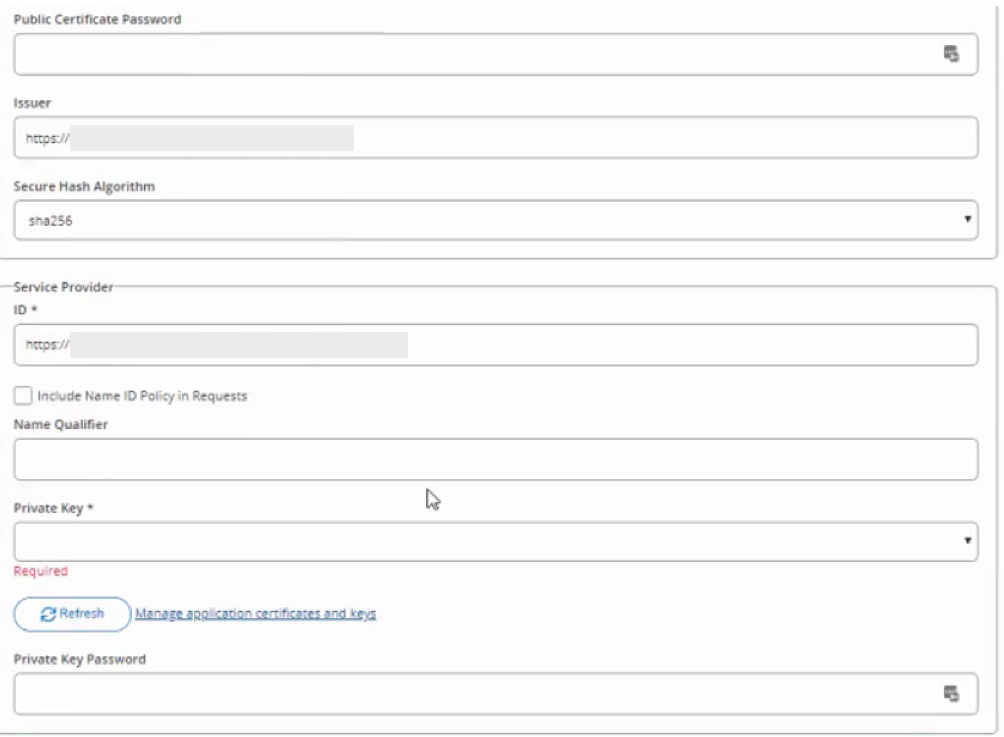
7. Type/paste the WSFed/SAML Issuer URL from the IdP into the Issuer text field. (e.g., https://<FQDN_SA_IdP>/SecureAuthxx/).
8. Select sha256 from the Secure Hash Algorithm dropdown.
9. Type/paste the SAML Audience field from the IdP into the Service Provider ID text field (e.g., https://<FQDN_SA_IdP>/SecureAuthxx/).
10. Verify the settings and click Save.
11. Test the SSO.
 |