OpenID Connect and OAuth 2.0 configuration
This guide outlines the configuration of SecureAuth IdP as an OpenID Connect Provider and OAuth 2.0 Authorization Server.
Prerequisites
SecureAuth IdP version 9.1 or later
Knowledge of OpenID Connect and OAuth 2.0
Configure the Data tab in the SecureAuth IdP Web Admin with a directory integration
SecureAuth IdP configuration
Once the directory integration is successful, go to the Data tab.
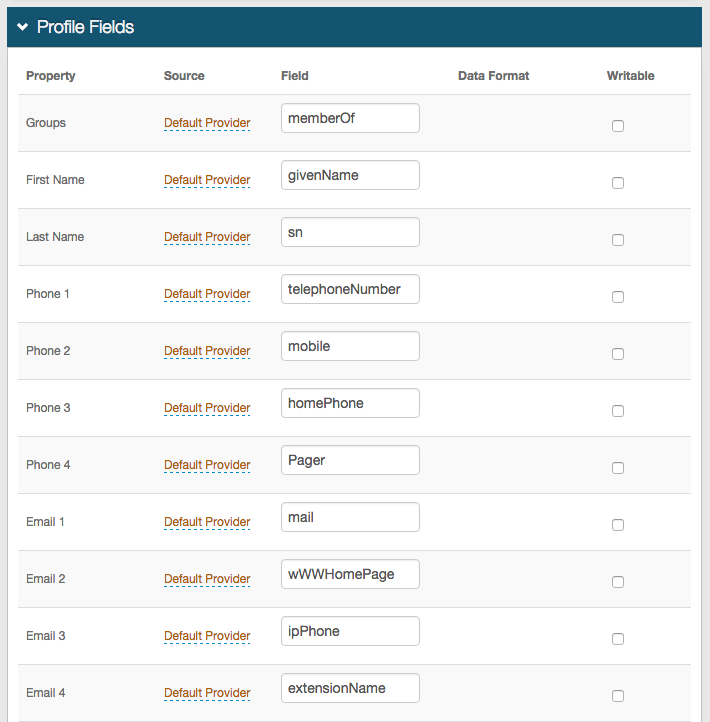
In the Profile Fields section, map the attributes from the profile fields to the SecureAuth IdP Profile Properties that will be used as OpenID Connect Claims.
The standard OpenID Connect Claims supported by SecureAuth IdP can be used as a reference.
Save the configuration.
Go to the Post Authentication tab.
In the Post Authentication section, set the following:
Authenticated User Redirect
Set to OpenID Connect/OAuth2.

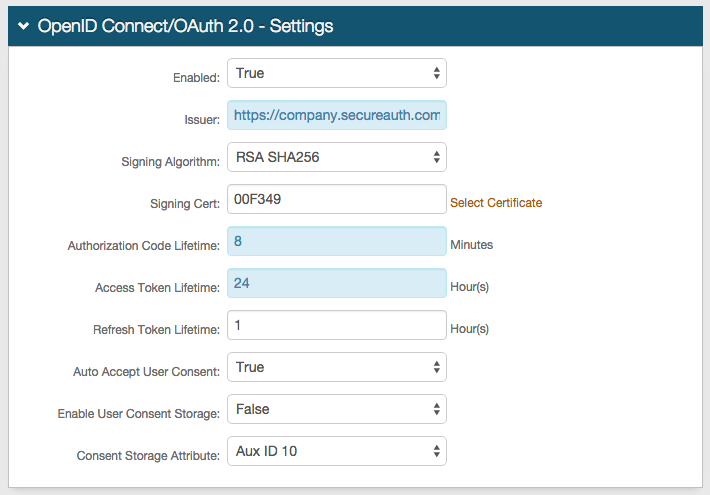
In the OpenID Connect / OAuth 2.0 - Settings section, set the following:
Enabled
Set security enhancement to enable (True) or disable (False) OpenID Connect and OAuth2 endpoints.
Issuer
Set the value used in the 'iss' claim.
Signing Algorithm
Set the signing algorithm used for signing JSON web tokens as one of the following:
RSA SHA256 uses the X.509 certificate selected for Signing Cert
HMAC SHA256 uses the client secret for signing
Signing Cert
Certificate used to sign JSON Web Tokens produced by SecureAuth IdP.
Authorization Code Lifetime
Length of time for Authorization Code lifetime in minutes.
Access Token Lifetime
Length of time for Access Token lifetime in hours.
The system is set with a default clock skew at 5 minutes (see https://docs.microsoft.com/en-us/dotnet/api/microsoft.identitymodel.tokens.tokenvalidationparameters.defaultclockskew?view=azure-dotnet).
For example, if you set the Access Token Lifetime with a value of .25 for an intended token expiration at 15 minutes, it will actually expire at 20 minutes due to the default clock skew.
Refresh Token Lifetime
Length of time for Refresh Token lifetime in hours.
Auto Accept User Consent
When set to True, users are not prompted to grant consent to a client for a given request. Acceptance is assumed granted and tokens are issued.
Enable User Consent Storage
When set to True, user consent granted to a client is stored as an encrypted and compressed string value in the attribute specified at Consent Storage Attribute.
Consent Storage Attribute
Data store attribute mapped to profile Property which saves the user's consent.
Note
The Consent Storage Attribute must be a Single-Value directory string attribute type (for example, houseIdentifier, adminDescription).
A single consent from the OIDC client starts at ~277 bytes, which means the attribute needs a minimum value of 1.
Each additional consent from an OIDC client increments by ~60 bytes.
The maximum supported value for the attribute assigned to store the User Consent depends on how many OIDC clients your organization expects end users to connect to.
Example:
"houseIdentifier" has a maximum value of 32768 bytes. so it could theoretically store 542 different consents.
(32768 minus 277, then divided by 60 = 542)
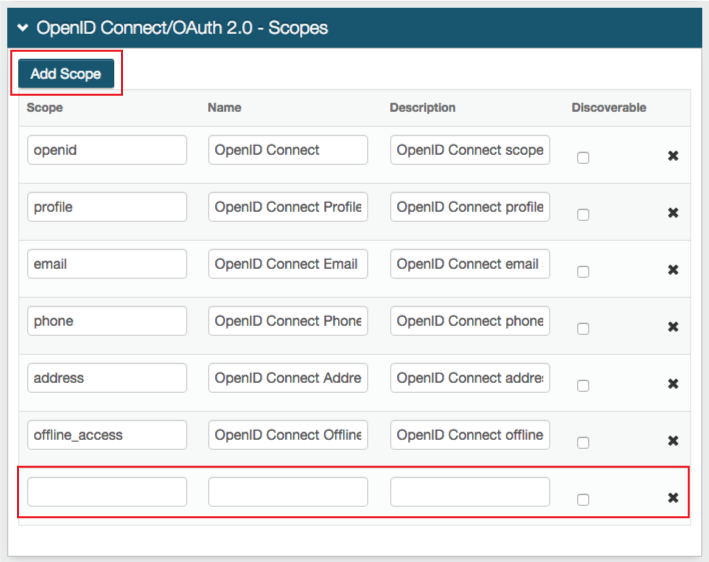
In the OpenID Connect / OAuth 2.0 - Scopes section, by default, a set of OpenID Connect scopes are preconfigured and required in certain OpenID Connect flows. To add a scope, click Add Scope and set the following:
Scope
Value passed to the endpoints during authorization requests. This value must be URL-safe and not include spaces.
Name
User-friendly display name in list of scopes from which access is requested on the user consent page.
Description
User-friendly description of scope in list of scopes from which access is requested on the user consent page.
Discoverable
When the check box is selected, the associated scope value is listed at the Discovery Configuration endpoint.
Save the configuration.
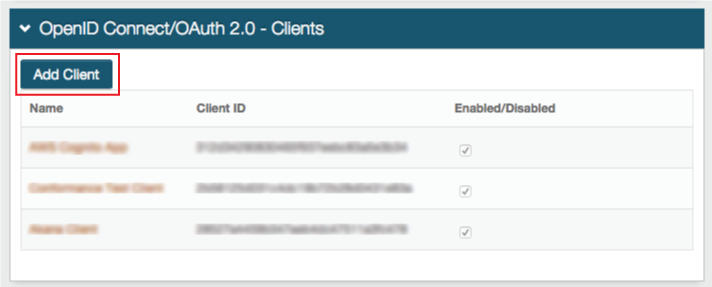
In the OpenID Connect / OAuth 2.0 - Clients section, click Add Client.
In OpenID Connect / OAuth 2.0 - Client Details, set the following:
Enabled
Security enhancement to enable (True) or disable (False) the client.
Name
User-friendly name of the client requesting access to display on the user consent page.
Client ID
Automatically created unique identifier of the client.
Client Secret
Automatically created unique secret of the client.
JSON Web Encryption
Indicate whether the JSON web encryption settings for the client is Enabled or Disabled.
JSON Web Key URI
When JSON Web Encryption is enabled for the client, enter the web key URL.
Allowed Flows - To indicate which flows the client is allowed to use, set to True or False
Authorization Code
Indicate whether client can use the Authorization Code flow.
Implicit
Indicate whether client can use the Implicit flow.
Hybrid
Indicate whether client can use the Hybrid flow.
Client Credentials
Indicate whether client can use the Client Credentials flow.
Resource Owner
Indicate whether client can use the Resource Owner flow.
Refresh Token
Indicate whether client can use the Refresh Token flow.
Introspection
Indicate whether client can use the Introspection flow.
Revocation
Indicate whether client can use the Revocation flow.

Save the configuration.
OPTIONAL. In the OpenID Connect / OAuth 2.0 - Client Scope Restrictions section, to restrict a client from using one or more of the defined Scopes, click Add Restricted Scope and add the Scope value.

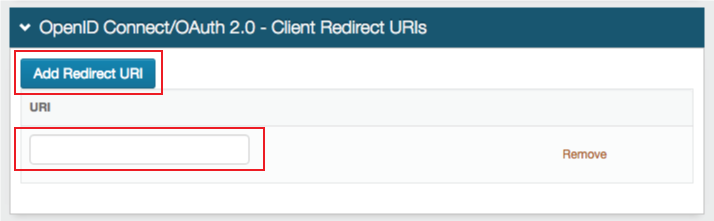
OPTIONAL. In the OpenID Connect / OAuth 2.0 - Client Redirect URIs section, to let a client use the Authorization Code or Implicit flows, click Add Redirect URI and add the allowed URI value (must include https)
Save your edits before leaving the Clients page.
In the Open ID Connect ID Token Claims section, do the following:
Map the Claim to the Profile Property. A value of Unmapped indicates the claim will not be included in the produced JSON Web Token.
To list the associated Claim at the Discovery Configuration endpoint, select the Discoverable check box.

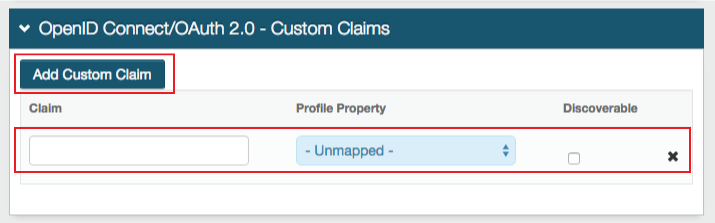
In the Open ID Connect ID Token Custom Claims section, to create Custom Claims, click Add Custom Claim and set the following:
Claim
Provide unique name for the Custom Claim.
Profile Property
Select a Profile Property to complete the mapping.
Note
SecureAuth supports creating Custom Claims to include in the 'id_token' for OpenID Connect flows.
Claim names cannot include spaces.
Save the configuration.


Application X configuration steps
Use the Client ID and Client Secret from the SecureAuth IdP Web Admin to configure applications that are OpenID Connect / OAuth 2.0 ready.