Web Proxy Server Configuration Guide (version 9.1+)
Introduction
Use this guide to integrate a web proxy with SecureAuth IdP.
Prerequisites
Ensure an established Proxy Server is up and running
SecureAuth IdP Configuration Steps
Warning
These configuration settings must be completed in each realm that uses the proxy, and in the Admin Realm (SecureAuth0)
System Info
WSE 3.0 / WCF Configuration
1. Select False from the following dropdowns:
Certificate Use WSE 3.0
Telephony Use WSE 3.0
SMS Use WSE 3.0
Push Use WSE 3.0
Geo-Location Use WSE 3.0
SecureAuth Threat Service Use WSE 3.0
Trx Use WSE 3.0
2. Set the corresponding URLs as follows:
a. Set Certificate URL to https://cloud.secureauth.com/certservice/cert.svc
b. Set Telephony URL to https://cloud.secureauth.com/telephonyservice/telephony.svc
c. Set SMS URL to https://cloud.secureauth.com/smsservice/sms.svc
d. Set Push URL to https://cloud.secureauth.com/pushservice/push.svc
e. Link-to-Accept URL to https://cloud.secureauth.com
f. Phone Fraud Service URL to https://cloud.secureauth.com/fraudprevention/api/v1/phoneprofile
g. Set Geo-Location URL to https://cloud.secureauth.com/ipservice/ipgeolocation.svc
h. Set SecureAuth Threat Service URL tohttps://cloud.secureauth.com/ipservice/ipevaluation.svc
i. Set Trx Log Service URL to https://cloud.secureauth.com/trxservice/trx.svc
Proxy Server Configuration
 |
3. Select True from the Use Proxy Server dropdown
4. Set the Proxy Server Address to the proxy's IP Address or FQDN
5. Set the Proxy Server Port to the TCP port on which the web proxy server is configured to respond, e.g. 8080
6. Provide the Proxy Username if the proxy requires authentication
7. Provide the Proxy Password if the proxy requires authentication
IP Configuration
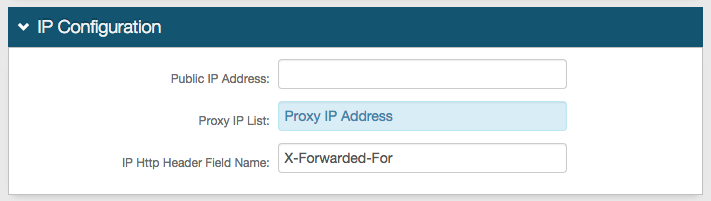 |
8. List the proxy IP Address in the Proxy IP List field
Warning
Click Save once the configurations have been completed and before leaving the System Info page to avoid losing changes
Links
 |
9. Click Click to edit Web Config file
Web Config Editor
 |
10. Search for wse3IP. There should be 2 lines. Set them to:
<add key="wse3IP" value="False" /><add key="wse3IPEvaluation" value="False" />
Warning
Click Save once the configurations have been completed and before leaving the Web Config Editor page to avoid losing changes