F5 BIG-IP (Base64 Encoded Password in SAML Response) Integration Guide
Use this guide to enable Multi-Factor Authentication to F5 BIG-IP, and to encode the user password in Base64 and include it in the SAML response to enable F5 BIG-IP to decode it for SSO use in backend resources.
Prerequisites
Have a SecureAuth IdP and F5 BIG-IP SP-initiated SAML partnership established – refer to F5 BIG-IP (SP-initiated) Integration Guide (SAML).
Have a F5 BIG-IP SAML Authentication Server up and running.
For more information about supported encryption methods, see the F5 article: BIG-IP System Federation for SP- and IdP-Initiated Connections
Contact SecureAuth Support to download the b64.zip file. You will use the b64.xslt code in the transformation engine steps to send customized user information within SAML assertions.
Create a New Realm for the F5 BIG-IP integration in the SecureAuth IdP Web Admin.
Configure the following tabs in the Web Admin before configuring the Post Authentication tab:
Overview – the description of the realm and SMTP connections must be defined
Data – an enterprise directory must be integrated with SecureAuth IdP
Workflow – the way in which users will access this application must be defined
Multi-Factor Methods – the Multi-Factor Authentication methods that will be used to access this page (if any) must be defined
Note
With this configuration, it will prompt the end user for their password if they get to the F5 BIG-IP application from the Secure Portal.
SecureAuth IdP Configuration Steps
Go to the Workflow tab.
Set Token Data Type (Send) to User ID.

Save your changes.
Go to the Post Authentication tab.
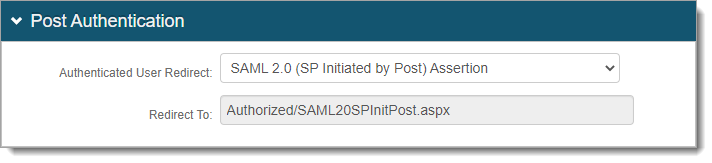
In the Post Authentication section, set the following configurations.
Authenticated User Redirect
Set to SAML 2.0 (SP initiated by Post) Assertion.
Redirect To
This is set by default to Authorized/SAML20SPInitPost.aspx.
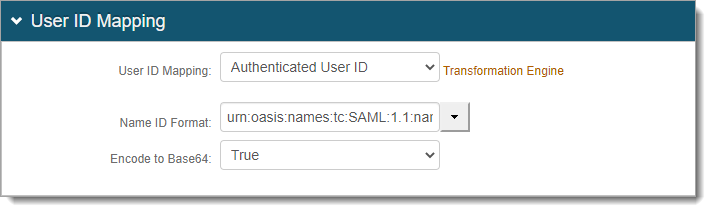
In the User ID Mapping section, set the following configurations.
User ID Mapping
Set to Authenticated User ID (default).
Encode to Base64
Set to True.
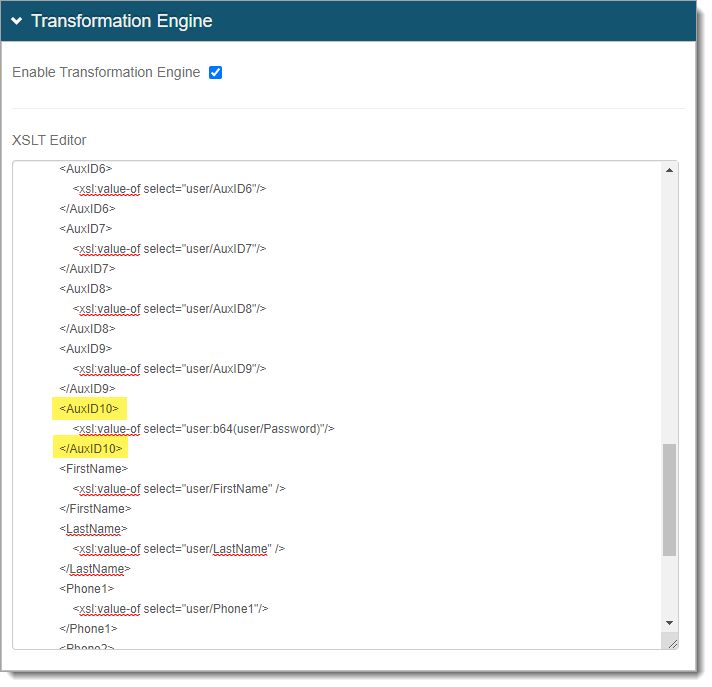
Click the Transformation Engine link and do the following.
Select the Transformation Engine check box.
Copy and paste the b64.xslt code from the zip file you downloaded in Prerequisites.
Make sure the mapping matches the Value set in the SAML Attributes / WS Federation section in step 9.
It can be mapped to any value from Aux ID 1 to Aux ID 10.
For example, if you mapped the SAML attribute for the Password to Aux ID 10, the mapping must match, like the following code example.
<AuxID10>
  <xsl:value-of select="user:b64(user/Password)"/>
</AuxID10>
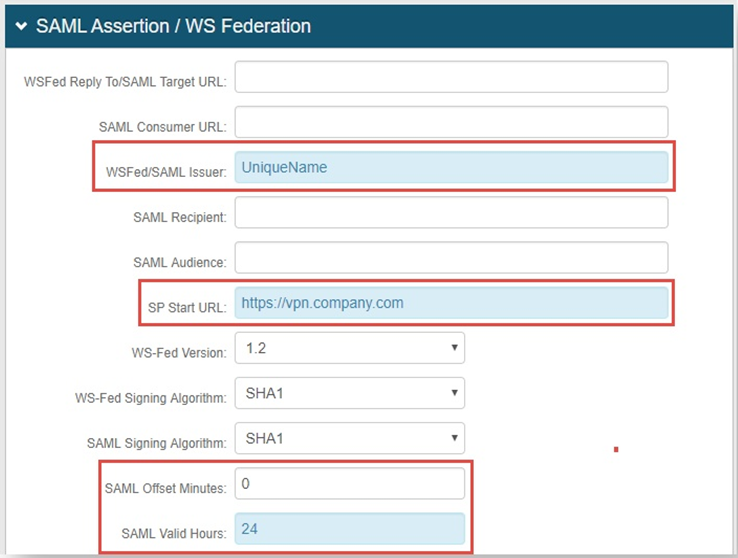
In the SAML Assertion / WS Federation section, set the following configurations.
WSFed/SAML Issuer
Set to a UniqueName that is shared with F5 BIG-IP.
This value must match exactly on the F5 BIG-IP side and on the SecureAuth IdP side.
SP Start URL
Provide the URL to enable SSO and to redirect users appropriately to access F5 BIG-IP Virtual Server (or VIP) URL.
SAML Offset Minutes
Set the time in minutes to compensate for differences in the time set on the devices.
SAML Valid Hours
Set the time in hours to limit the length of time for which the SAML assertion is valid.
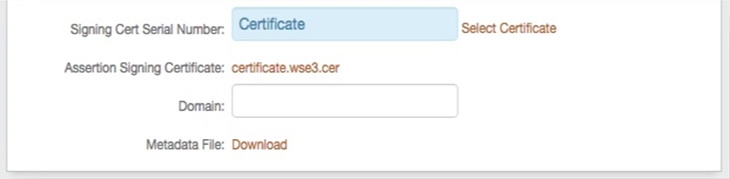
Signing Cert Serial Number
Select the certificate to be used to sign the SAML assertion, which is the same certificate that will be uploaded to the F5 BIG-IP SAML Authentication Server.
Metadata File
Download this certificate in Base64 format, and store it either on a local PC or on the F5 appliance.
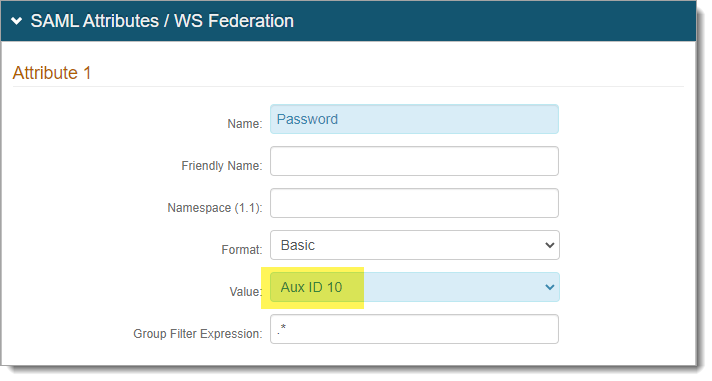
In the SAML Attributes / WS Federation section, add an attribute and set the following configurations.
Name
Set to Password.
Namespace (1.1)
Leave empty.
Format
Set to Basic.
Value
Set to any Aux ID value from Aux ID 1 to Aux ID 10.
The Aux ID settings must match in the Transformation Engine in step 7.
NOTE: Be sure the Aux ID value is not already being used on this realm.
Save your changes.
F5 BIG-IP Configuration Steps
On the F5 side, make the following configurations.
Create an SSO Configuration
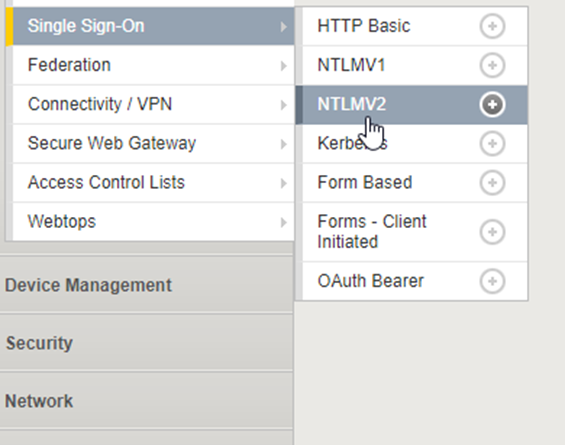
Log on to the F5 Management Console and go to Access.
Select Single Sign-On>NTLMV2.
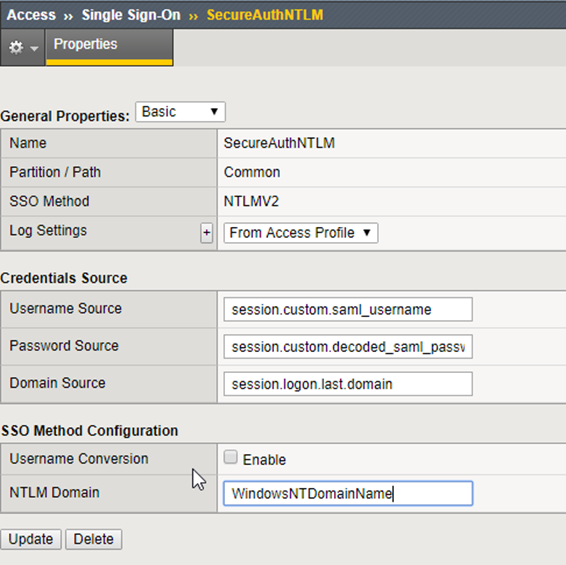
Create a new NTLMV2 SSO Configuration that has the same settings shown in the image – these variables will be used in the iRules section, defined later
Set the NTLM Domain name to the NetBIOS name of the domain to be used for authentication.
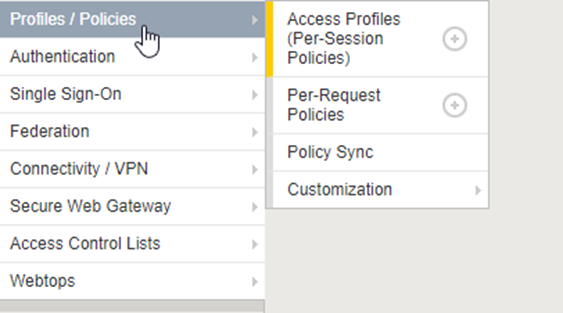
Create a New Access Profile / Policy
Create a new Access Profile from the Profiles / Policies menu.
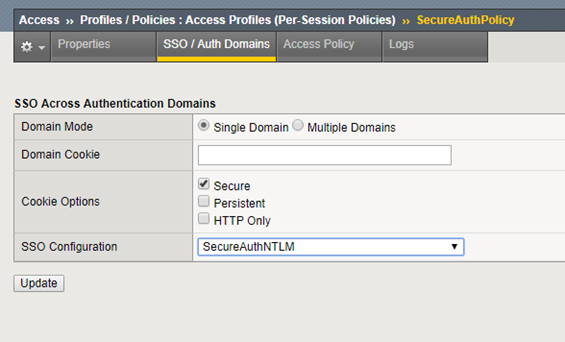
In the SSO / Auth Domains section, select the SSO Configuration created in the previous section (Create an SSO Configuration, in step 3).
Edit the Profile's Access Policy
Click Access Policy and edit the access policy in the Visual Policy Editor (VPE).
NOTE: The SAML Auth box represents the existing SAML SP-initiated settings of F5 BIG-IP which is a prerequisite and can be configured using the instructions in F5 BIG-IP (SP-initiated) Integration Guide (SAML) .
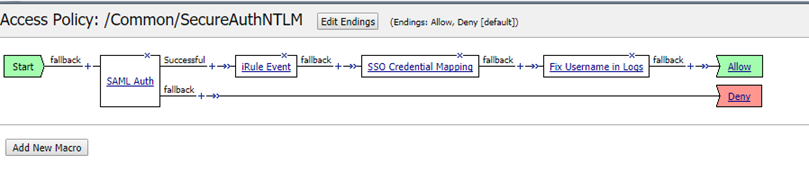
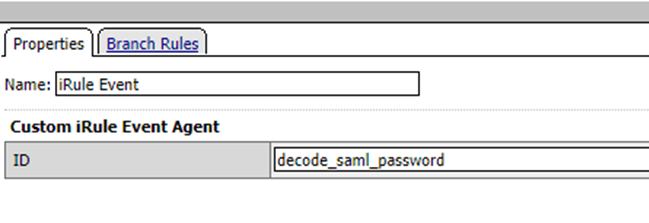
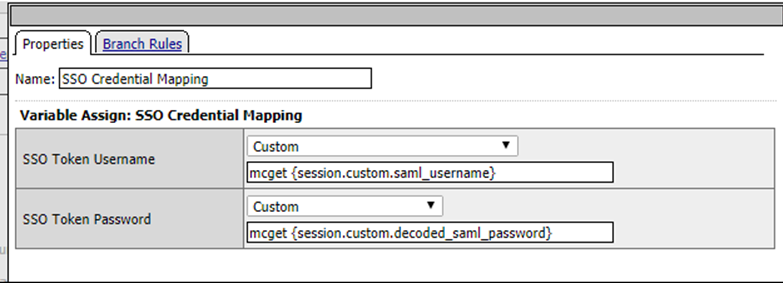
Add an iRule event and set the ID to decode_saml_password.
Ensure the SSO Credential Mapping matches the custom variable values as shown in this image.
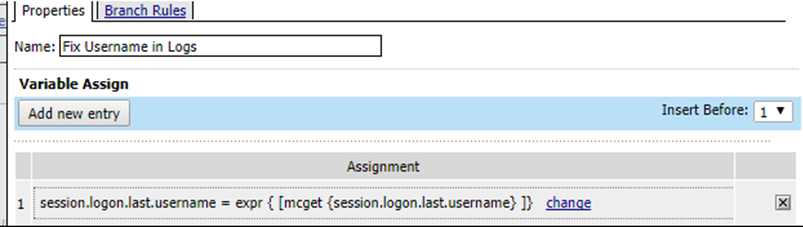
Add a Variable Assign entry on the VPE and set this variable so that the username appears correctly in the logs.
Create an iRule
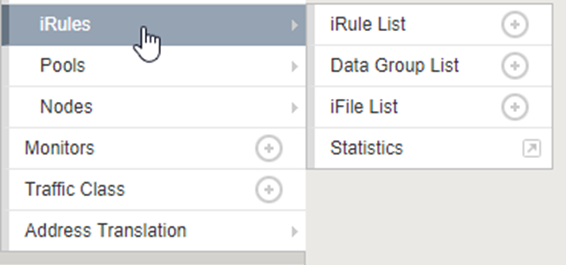
Click Local Traffic and then iRules.
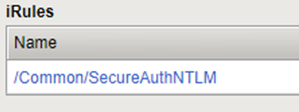
Copy and paste this iRule (see code block below) in the New iRule editor window.
when ACCESS_POLICY_AGENT_EVENT {
  if { [ACCESS::policy agent_id] eq "decode_saml_password" } {
    set saml_password [ACCESS::session data get session.saml.last.attr.name.Password]
    set decoded_saml_password [b64decode $saml_password]
    ACCESS::session data set -secure session.custom.decoded_saml_password $decoded_saml_password
    ACCESS::session data set session.custom.saml_username [ACCESS::session data get session.saml.last.nameIDValue]
    ACCESS::session data set session.logon.last.username [ACCESS::session data get session.saml.last.nameIDValue]
  }
}
Add the Access Policy and iRule to the F5 Virtual IP
Add the Access Policy to the F5 Virtual IP.

Add the iRule to the F5 Virtual IP.
Test the Configuration Settings
Test the configuration by trying to log in to the F5 VIP URL.