iOS G Suite Provision Configuration Guide
Introduction
Use this guide to enable the provisioning of end-users' iOS devices to access G Suite (formerly Google Apps) without requiring the Google password or manual setup.
Prerequisites
1. Ensure the device is running iOS v5.0+
2. Create a Service Account with G Suite (see G Suite API Configuration Steps below)
3. Delegate domain-wide authority to the G Suite Service Account (see G Suite API Configuration Steps below)
4. Set up a directory Service Account with read and write access for SecureAuth IdP
5. Create a New Realm for the iOS G Suite Provision in the SecureAuth IdP Web Admin
6. Configure the following tabs in the Web Admin before configuring the Post Authentication tab:
Overview – the description of the realm and SMTP connections must be defined
Data – an enterprise directory must be integrated with SecureAuth IdP
Workflow – the way in which users will access this application must be defined
Multi-Factor Methods – the Multi-Factor Authentication methods that will be used to access this page (if any) must be defined
Apple Configuration Configuration Steps
 |
1. Download the Apple Configurator 2 from Apple
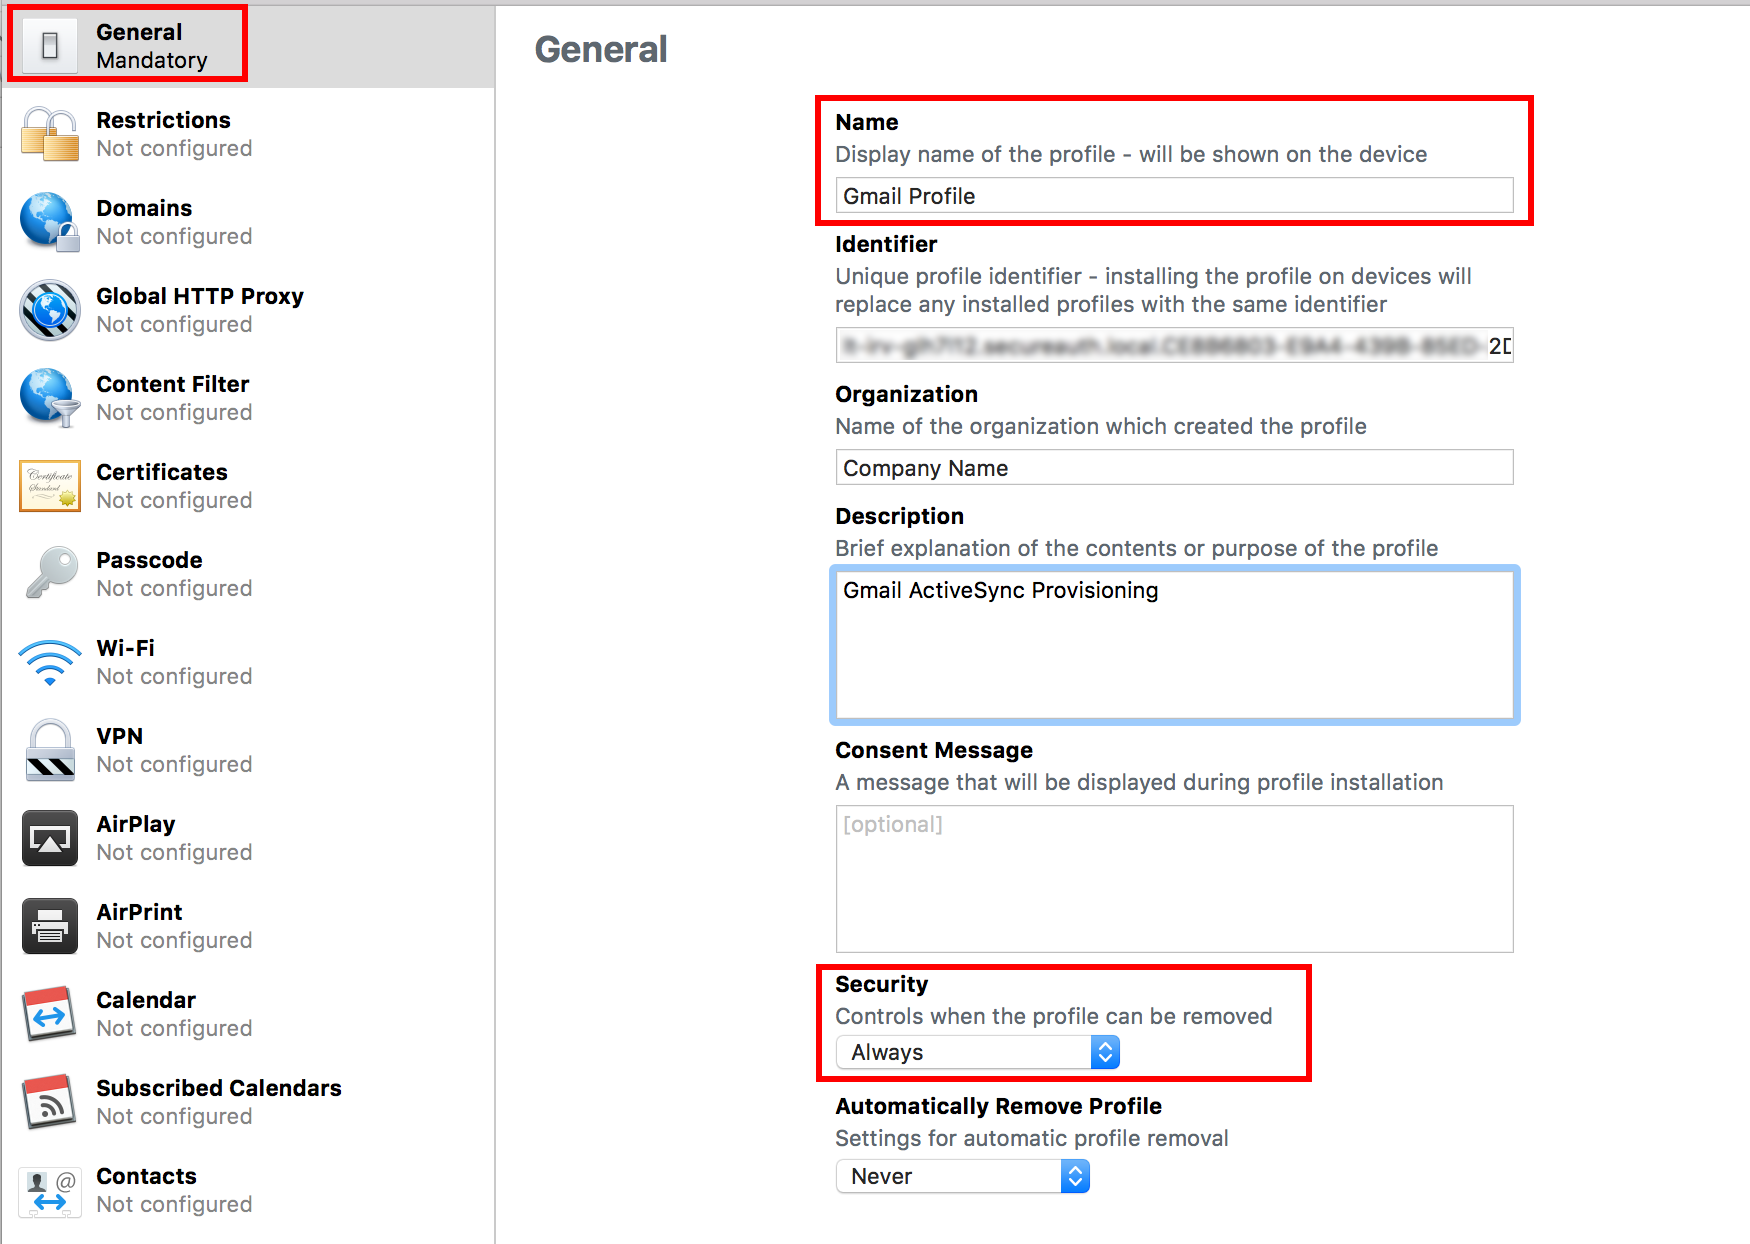
2. Click File > New Profile (or CMD + N)
3. In the General section, provide a Name for the profile, e.g. Gmail Profile
4. (OPTIONAL) Set the Organization, Description, and Consent Message fields to preferred values
5. Select Always from the Security dropdown
Exchange ActiveSync
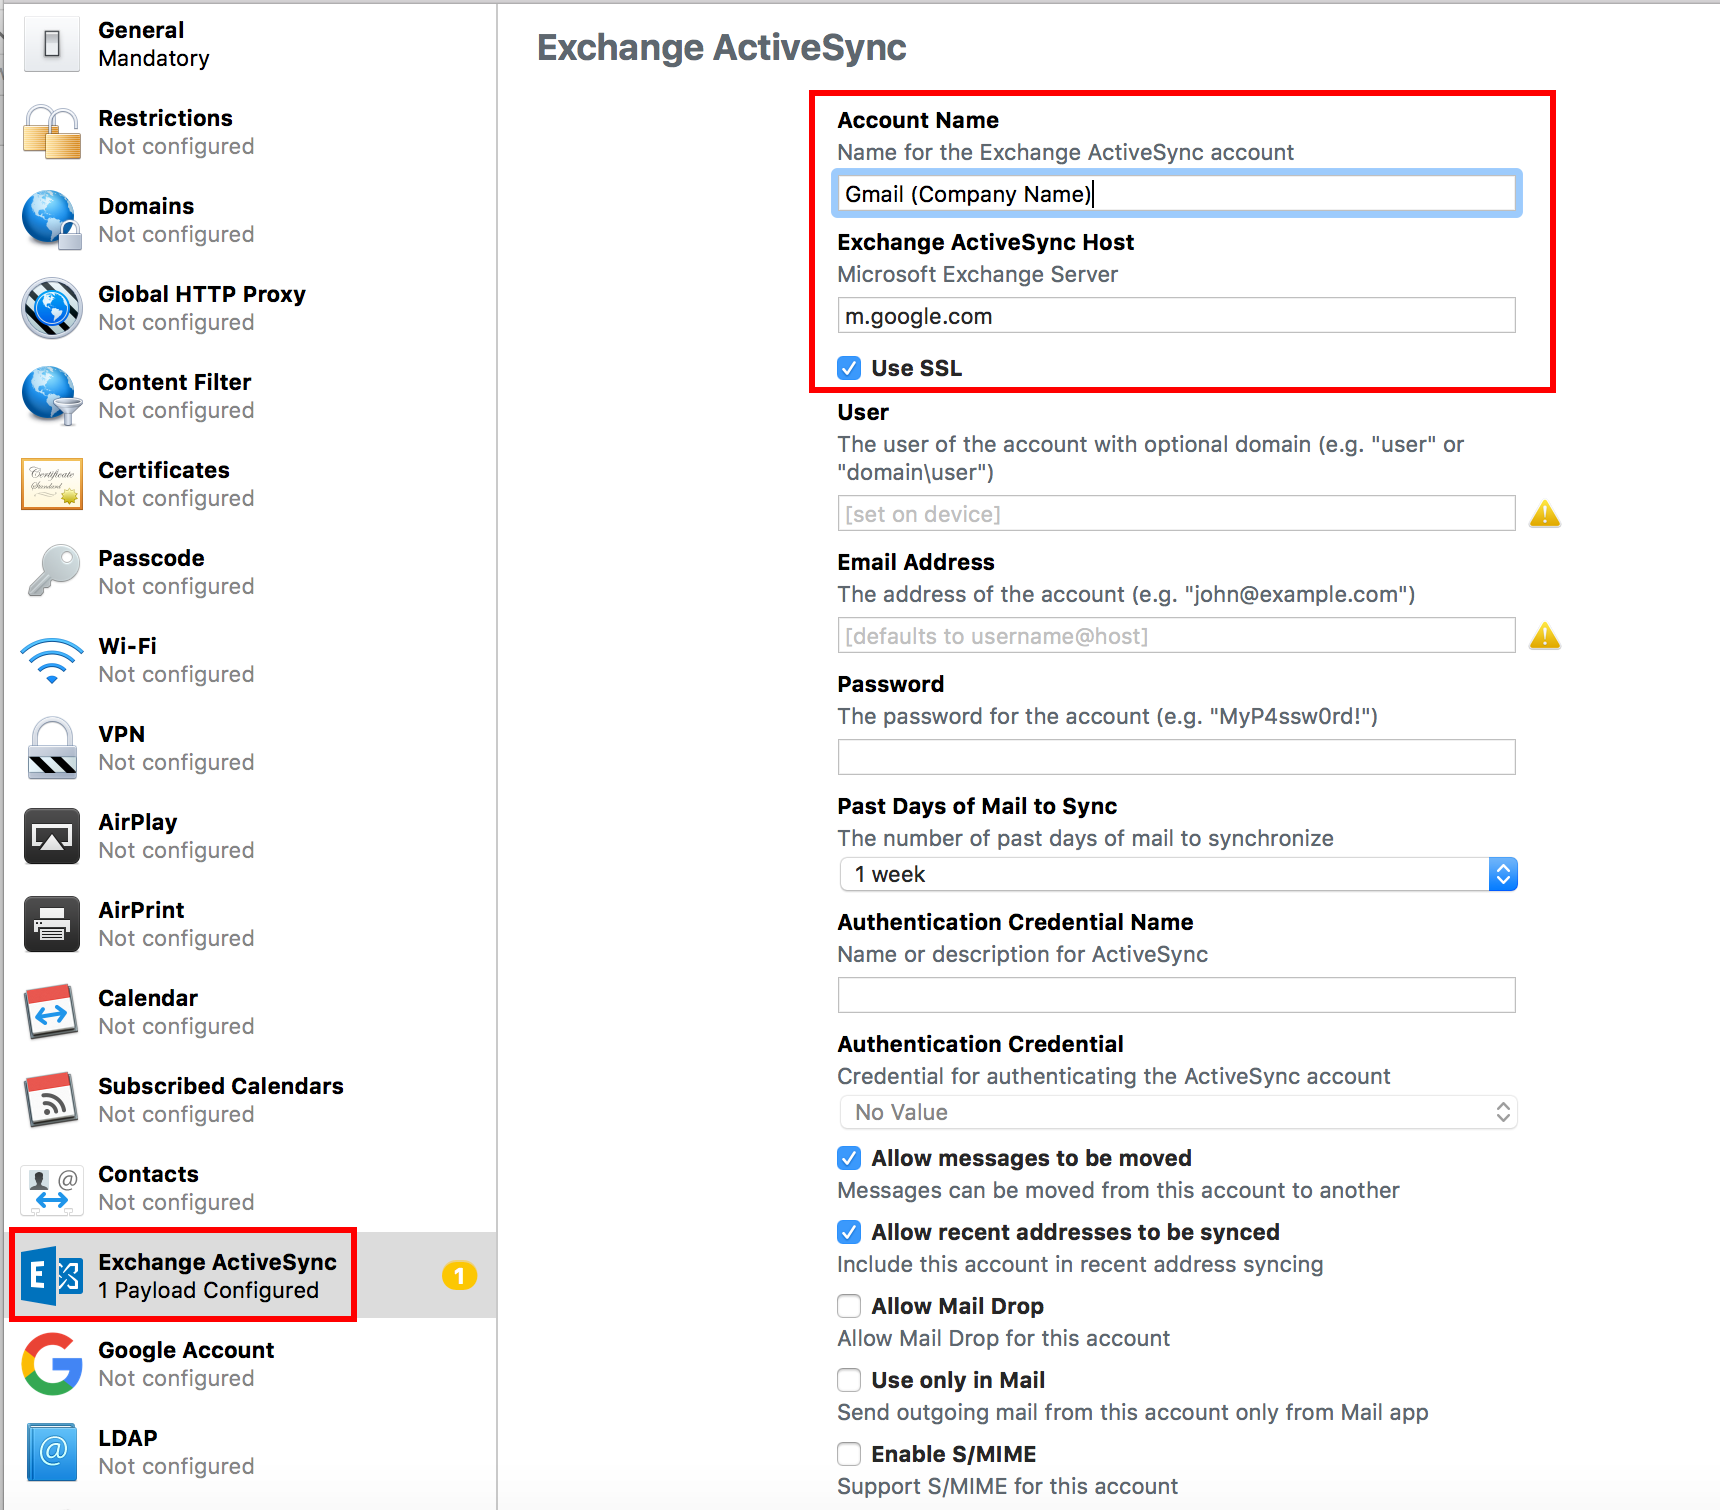 |
6. In the Exchange ActiveSync section, provide an Account Name for the Exchange ActiveSync account, e.g. Gmail ACME
7. Set the Exchange ActiveSync Host to m.google.com
8. Check the Use SSL box
Notice
Leave the remaining fields blank as they are automatically populated during the provisioning process
9. Save (CMD + S; or close the window, which opens the prompt) the profile and keep the .mobileconfig file available for the SecureAuth IdP Configuration Steps (below)
G Suite API Configuration Steps
Create Project
 |
1. Log into the Google Developers' Console , and navigate to IAM & Admin > Projects from the three bars menu
2. Select Create Project
These steps can also be completed by opening the Projects dropdown menu at the top, and selecting Create project
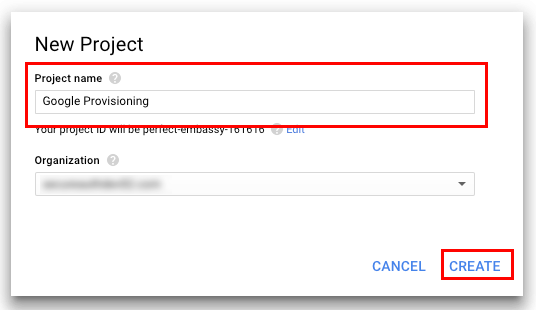 |
3. Provide a Project Name, and select an Organization if the project is not already being created within one
4. Click Create
Enable Admin SDK
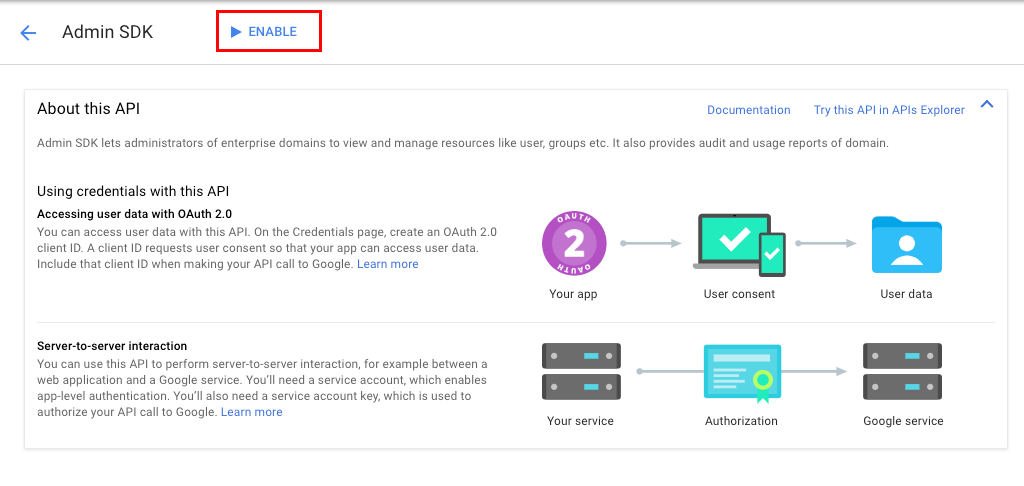 |
5. In the Libraries section, search for Admin SDK, and select the option
6. On the Admin SDK page, click Enable
Create Service Account
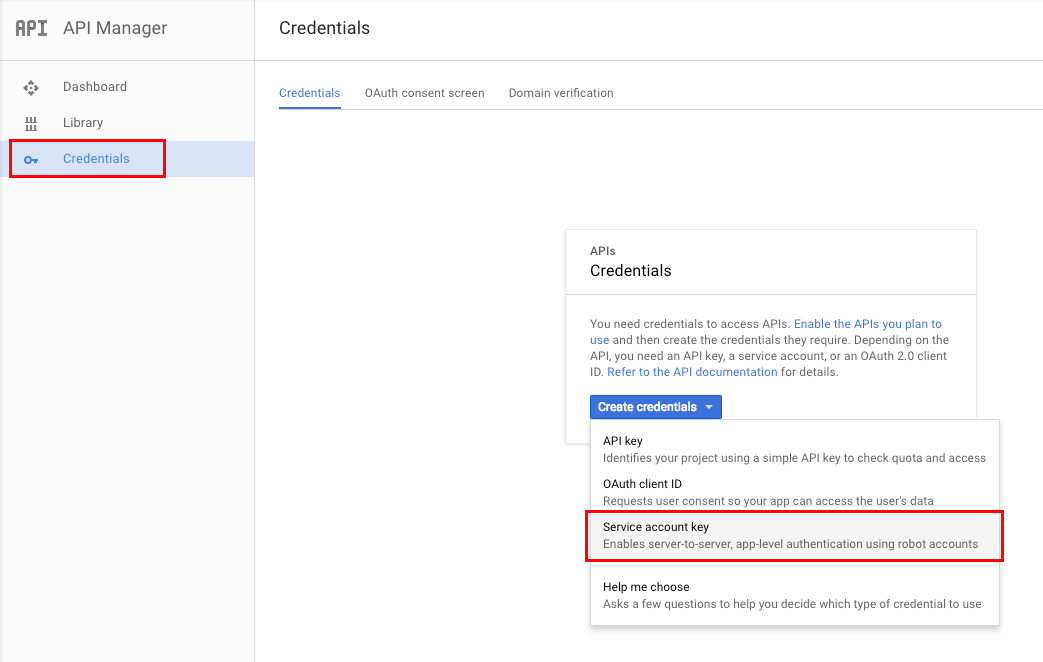 |
7. On the API Manager page (accessible via the three bars menu), navigate to the Credentials section, and click Create Credentials
8. Select Service Account Key
Create Service Account Key
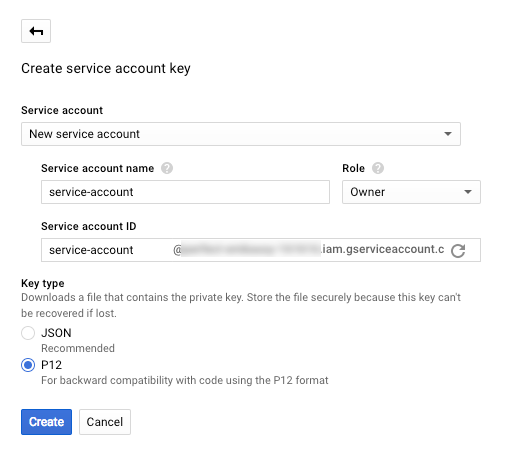 |
9. Select New service account from the Service Account dropdown, and provide a Service Account Name
10. Select Project > Owner from the Role dropdown
11. Select P12, and click Create
12. Save the p12 file that downloads, which is uploaded to the SecureAuth appliance (see steps below), note the Private Key Password, and click Close
 |
Manage Service Account
 |
13. On the Credentials page, click Manage Service Accounts
14. Click the three dots on the newly-created service account, and select Edit
Edit Service Account
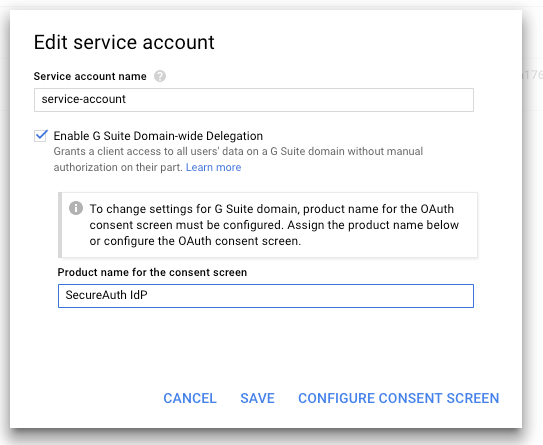 |
15. Check Enable G Suite Domain-wide Delegation and provide a Product name for the consent screen
16. Click Save
Tip
Click Configure Consent Screen to set additional (optional) preferences for the consent page; or access the configuration at API Manager > Credentials > OAuth Consent Screen
 |
Back on the Service Accounts page, a new DwD section appears for the service account
17. Click View Client ID
Credentials
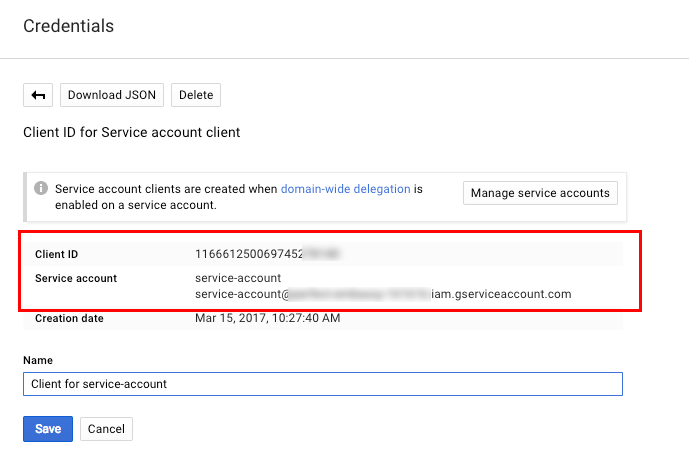 |
18. Note the Client ID, which is used in the G Suite Administrative Configuration Steps (below), and the Service Account email address, which is used in the SecureAuth IdP Configuration Steps (below)
G Suite Administration Configuration Steps
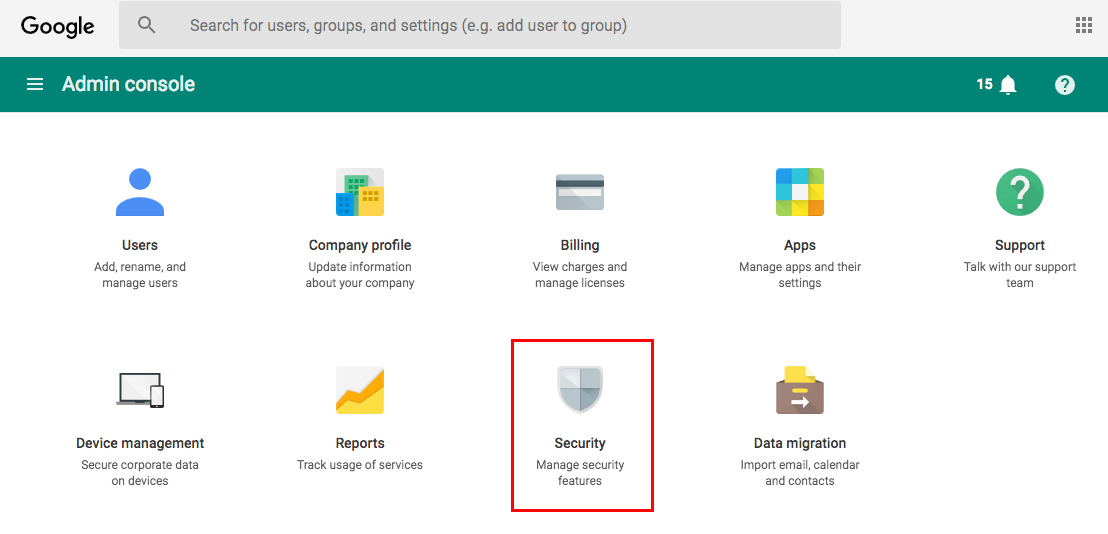 |
19. Log into the G Suite Administrative Console and select Security
Security - Advanced Settings
 |
20. Under Advanced Settings, select Manage API Client Access
Manage API Client Access
 |
21. Set the Client Name to the Client ID obtained in the G Suite API Configuration Steps (step 18)
22. Set the One or More API Scopes to https://www.googleapis.com/auth/admin.directory.user and click Authorize
SecureAuth IdP Configuration Steps
Data
 |
Note
This step is for Active Directory data stores only
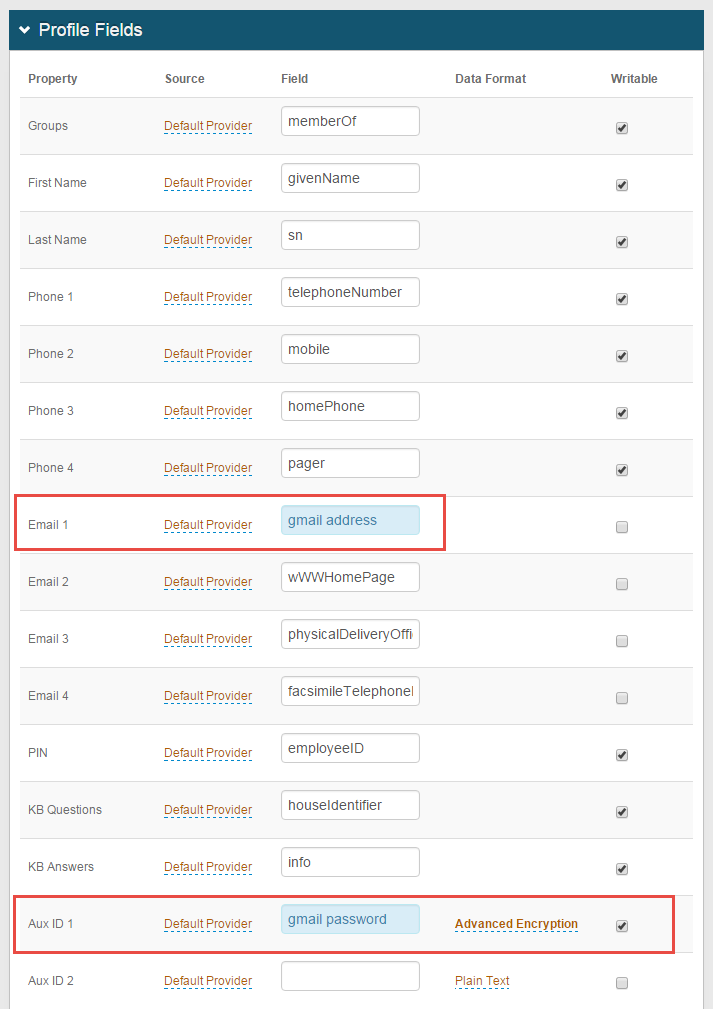
1. In the Profile Fields section, map the directory field that contains the user's Gmail address to the SecureAuth IdP Property, e.g. Email 1
Tip
Be sure that the Gmail Address includes the domain name, e.g. user@company.com
2. Map the directory field that contains the user's Gmail password to the SecureAuth IdP Property, e.g Aux ID 1
3. Select Advanced Encryption from the Data Format dropdown, and check Writable
Warning
Click Save once the configurations have been completed and before leaving the Data page to avoid losing changes
Post Authentication
 |
4. Select iOS G Suite Provision from the Authenticated User Redirect dropdown in the Post Authentication tab in the Web Admin
5. An unalterable URL is auto-populated in the Redirect To field, which appends to the domain name and realm number in the address bar (Authorized/iOSProvisionEmail.aspx)
6. A customized post authentication page can be uploaded, but it is not required
User ID Mapping
 |
7. Select the SecureAuth IdP Property that corresponds to the directory field that contains the Gmail address (Email 1)
Google Apps Functions
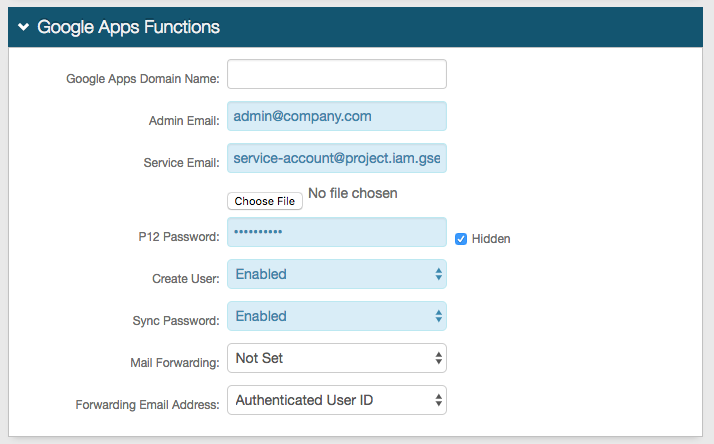 |
8. Leave the Google Apps Domain Name field blank
9. Set the Admin Email to the G Suite Administrative email account
10. Set the Service Email to the Service Account email address obtained from the G Suite Steps above (step 18)
11. Click Choose File and select the p12 File obtained in the G Suite Steps above (step 12)
12. Set the P12 Password to the Private Key Password obtained in the G Suite Steps above (step 12)
13. Select Enabled from the Create User dropdown if SecureAuth IdP is to automatically create the G Suite user account (if it does not already exist)
14. Select Enabled from the Sync Password dropdown if SecureAuth IdP is to conduct a one-way synchronization of the user's directory password to G Suite
To synchronize on specific dates versus every time the password changes, map a directory field to the Ext. Sync Pwd Date property in the Data tab
If no field is mapped, then the password synchronizes every time
Tip
G Suite requires passwords with a minimum of 8 characters
15. Select Enabled from the Mail Forwarding dropdown if another email address will receive messages; select Disabled to disable the feature; or select Not Set if SecureAuth IdP is to not be included in this feature
16. Select the Profile Field that contains the user's Forwarding Email Address
iPhone / Android
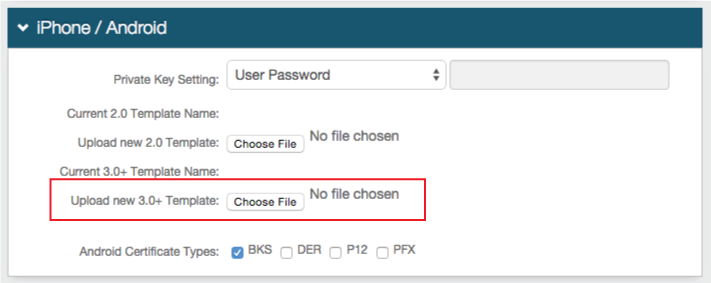 |
17. Click Choose File to Upload new 3.0+ Template, and select the Gmail Profile file saved in the Apple Configurator Configuration Steps (step 9)
iOS Profile Provision for Google Apps
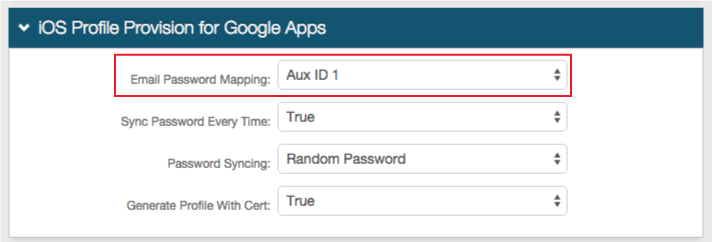 |
18. Select Aux ID 1 (or the Profile Property that contains the user's Gmail password) from the Email Password Mapping dropdown
19. Select True from the Sync Password Every Time to synchronize the password every time from G Suite to the iOS device
If True is selected, and Random Password is selected from the Password Syncing dropdown (step 20 below), then only one iOS device can be used at a time
If False is selected, and Random Password is selected, then multiple iOS devices can be used at a time
If User Password is selected from the Password Syncing dropdown, then users can employ multiple iOS devices no matter the selection in this step
20. Select Random Password from the Password Syncing dropdown to provision the device with a Google password unknown to the user
Select User Password to provision the device with the user's Gmail password
21. Select True from the Generate Profile with Cert dropdown to generate a certificate with the profile (if connection requires it)
Warning
Click Save once the configurations are completed and before leaving the Post Authentication page to avoid losing changes
Forms Auth / SSO Token
 |
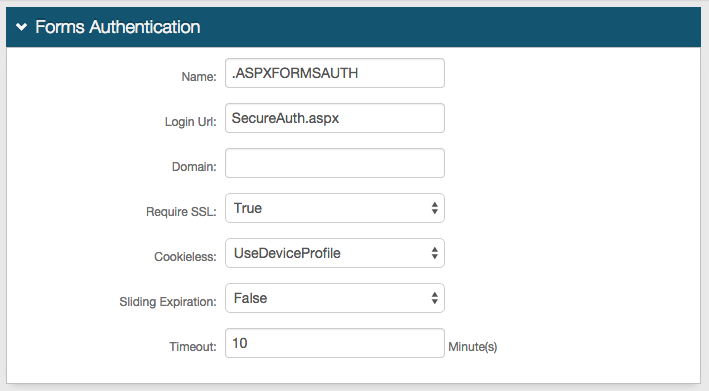
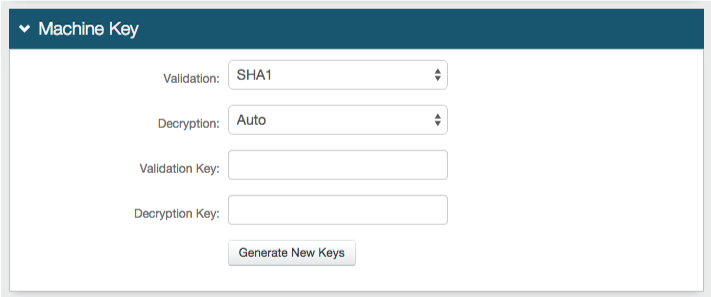
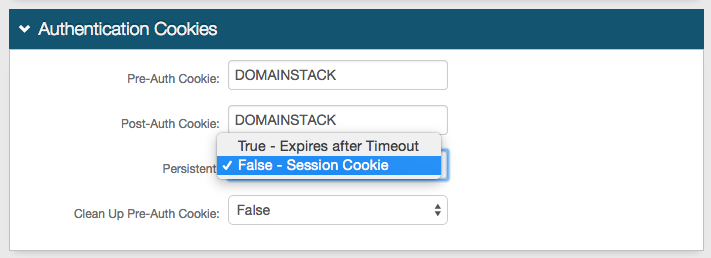
22. Click View and Configure FormsAuth keys / SSO token to configure the token/cookie settings and to configure this realm for Single Sign-on (SSO)
These are optional configurations
