Trouble Provisioning Windows OTP Client v1.0
Introduction
When provisioning the SecureAuth OTP Windows Desktop Client Application (version 1), an error may appear after the user has completed the Multi-Factor Authentication process.
This is a known issue that first appeared in SecureAuth IdP Version 8.1.
Applies to
SecureAuth OTP Windows Desktop Client Application (version 1) running on
SecureAuth IdP Version | OS Version |
|---|---|
8.1+ |
|
Recommendation
SecureAuth recommends upgrading to SecureAuth Passcode for Windows App (version 2)
Notice
The app is available from the SecureAuth Client Applications downloads page
If end-users are unable to update the app, apply the workaround steps
Workaround for Windows OTP Client Application (version 1)
To work around the issue with Windows OTP Client provisioning, a change must be made to the OATH Provisioning Realm (e.g. SecureAuth998) web.config file
Warning
The instructions below require the admin to change settings in the web.config file for the OATH Provisioning Realm. SecureAuth strongly encourages making a minimum backup of the SecureAuth IdP environment with the SecureAuth Backup Tool. This option archives all of the web.config files, providing the ability to restore the previous settings should a problem occur with the changes.
System Info
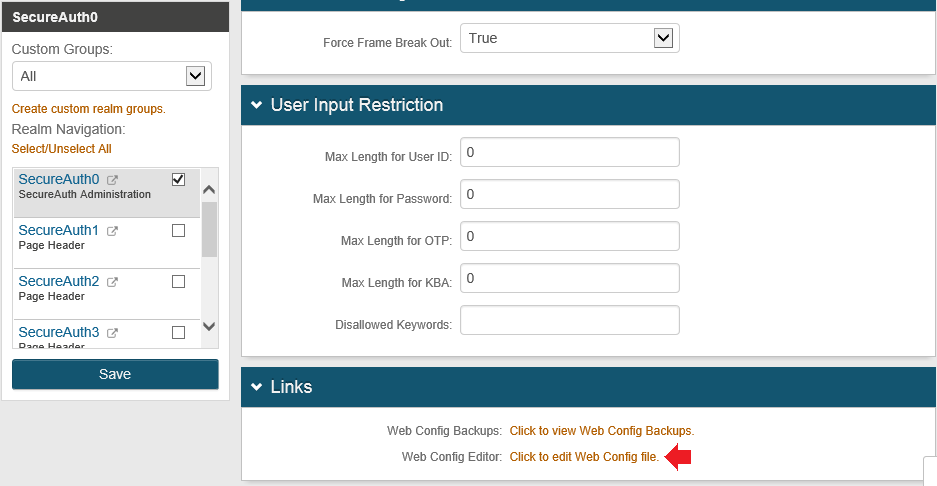 |
1. Log into the SecureAuth IdP Web Admin, and on the OATH Provisioning Realm (e.g. SecureAuth998), select the System Info tab
2. In the Links section, select Click to edit Web Config file
Web Config Editor
3. Search for (CTRL + F / CMD + F) <httpCookies httpOnlyCookies="true" requireSSL="true" />
4. Update the line to <httpCookies httpOnlyCookies="false" requireSSL="true" />
Warning
Click Save once the configuration is complete and before leaving the Web Config Editor page to avoid losing changes
Additional Steps
Under certain conditions, the provisioning process may still encounter an error even after the above changes have been made to the OATH Provisioning Realm's web.config file. To correct the issue, delete the profile information associated with the application.
Notice
Administrator rights on the workstation are required to complete the following steps
 |
1. Ensure the Windows SecureAuth OTP Client Application is not running
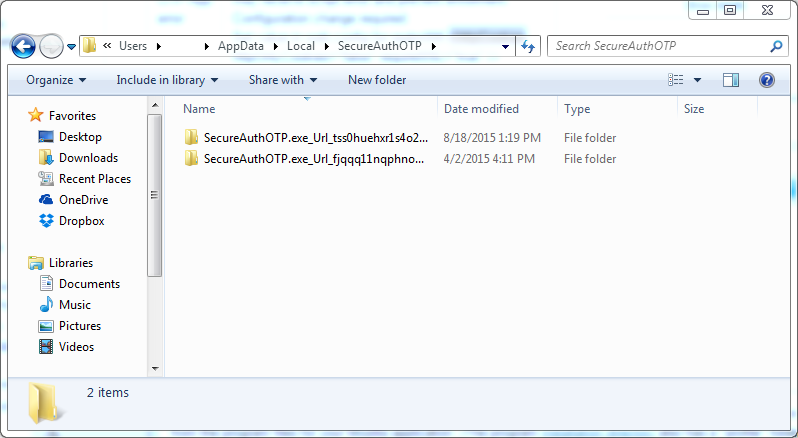
2. Locate the user's AppData folder (C:\Users\<username>\AppData\Local)
3. Delete the SecureAuthOTP directory
4. Restart the Windows SecureAuth OTP Client Application and attempt the provisioning process once more