Pulse Secure (SP-initiated) integration guide (SAML 2.0)
Introduction
Use this guide to enable Multi-Factor Authentication and Single Sign-on (SSO) via SAML 2.0 to Pulse Secure VPN.
Prerequisites
Pulse Secure 6.3 or later installed and running
SecureAuth IdP 9.x deployed, with a new realm created for the integration with Pulse Secure
SecureAuth IdP Web Admin tabs configured: Overview, Data, Workflow, Multi-Factor Methods
SecureAuth IdP Web Admin configuration steps
Post Authentication tab
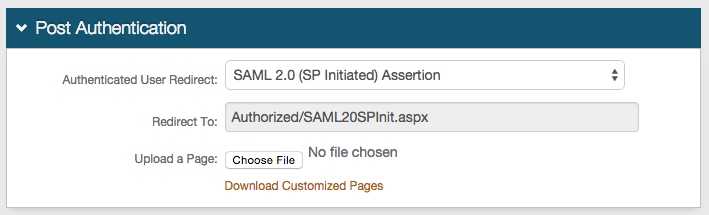
1. In the Post Authentication section, select SAML 2.0 (SP-initiated) Assertion page from the Authenticated User Redirect dropdown.
The unalterable URL that auto-populates the Redirect To field will append to the domain name and realm number on the address bar (Authorized/SAML20SPInit.aspx).
 |
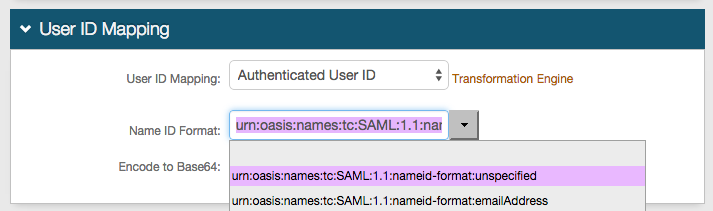
2. In the User ID Mapping section, select Authenticated User ID from the User ID Mapping dropdown.
In typical scenarios, the Authenticated User ID is sent; however, if the Pulse Secure ID is contained in a different SecureAuth IdP Propertyconfigured on the Data tab, choose that value instead from the dropdown.
3. Select urn:oasis:names:tc:SAML:1.1:nameid-format:unspecified from the Name ID Format dropdown (default).
If required by Pulse Secure, choose the option supplied by the Service Provider (SP).
4. Select False from the Encode to Base64 dropdown.
 |
5. In the SAML Assertion / WS Federation section, set the WSFed Reply To/SAML Target URL to the Pulse Secure Signing-in URL
e.g. https://ive.company.com/saml
6. Set the SAML Consumer URL to the Fully Qualified Domain Name (FQDN) of the Pulse Secure server, followed by /dana-na/auth/saml-consumer.cgi
e.g. https://ive.company.com/dana-na/auth/saml-consumer.cgi
7. Set the WSFed/SAML Issuer to a Unique Name to be shared with Pulse Secure.
The WSFed/SAML Issuer must match exactly on the SecureAuth IdP side and the Pulse Secure side.
8. Provide the SP Start URL to enable SSO and to redirect users appropriately to access Pulse Secure.
This would be the Pulse Secure VPN domain URL.
9. Set the SAML Offset Minutes to account for time differences between devices.
10. Set the SAML Valid Hours to limit the time for which the SAML assertion is valid.
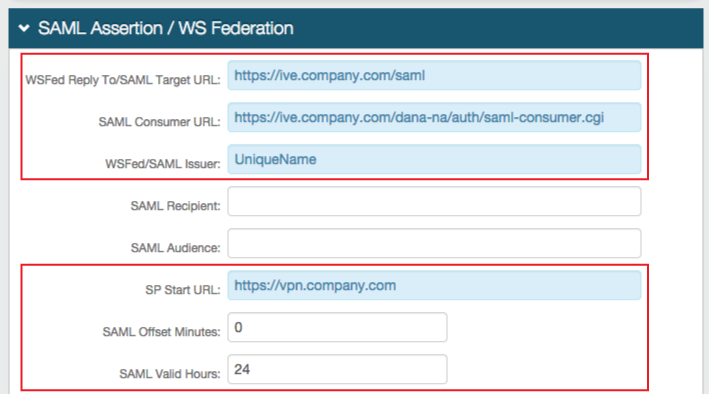 |
11. No configuration is required for the SAML Recipient or SAML Audience fields.
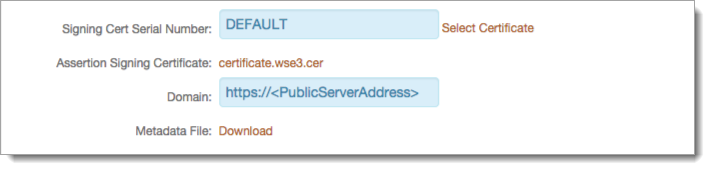
12. Leave the Signing Cert Serial Number as the default value, unless using a third-party certificate for the SAML assertion.
If using a third-party certificate, click Select Certificate and choose the appropriate certificate.
13. Download the Assertion Signing Certificate to be used in the Pulse Secure configuration.
 |
14. Save the configuration before leaving the Post Authentication page.
Pulse Secure configuration steps
Server creation configuration
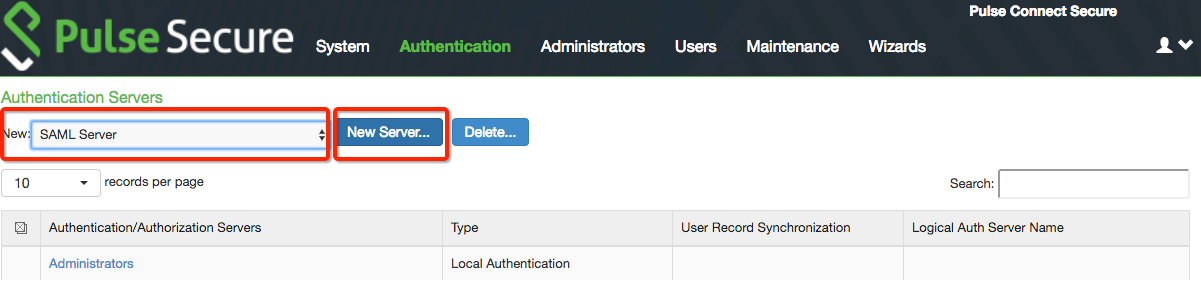
1. Log on the Pulse Secure admin console, and select Auth Servers under Authentication.
2. Select SAML Server from the New dropdown.
3. Click New Server... to create a new SAML Server.
 |
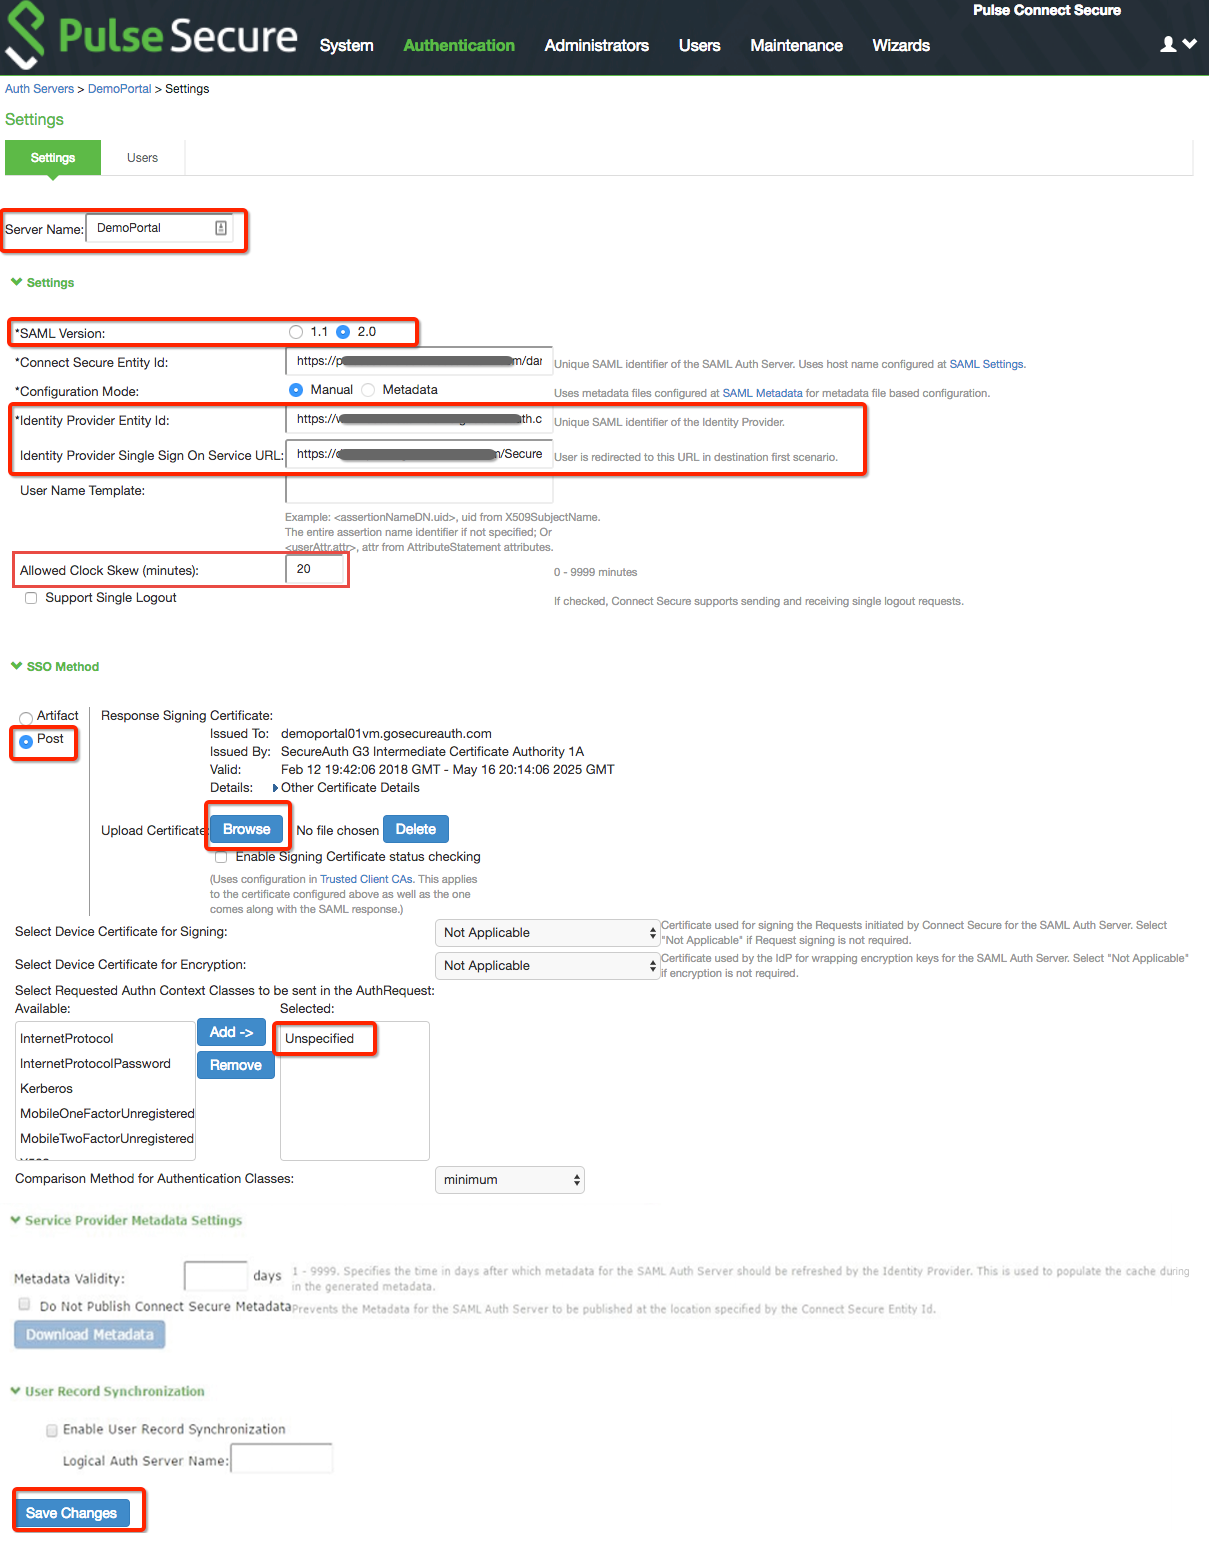
4. Set a Server Name for the SAML server.
5. Select 2.0 from the SAML Version options.
6. Set the Identity Provider Entity Id to the same Unique Name set in step 7 on the SecureAuth IdP configuration steps.
7. Set the Identity Provider Single Sign On Service URL to the FQDN of the SecureAuth IdP appliance, followed by the realm number of the Pulse Secure integrated realm configured in SecureAuth IdP configuration steps.
e.g. https://secureauth.company.com/secureauth2/secureauth.aspx
8. Specify the maximum allowed time difference between the system clock and the SAML IdP server clock in the Allowed Clock Skew (minutes) field.
9. Select Post from the SSO Method section.
10. Click Browse and upload the Assertion Signing Certificate that was downloaded in step 13 of the SecureAuth IdP configuration steps.
11. Add Unspecified to the Selected list for Select Requested Authn Context Classes to be sent in the AuthRequest.
12. Click Save Changes.
 |
Authentication realm configuration
13. Under Users, select User Realms and click New User Realm...
 |
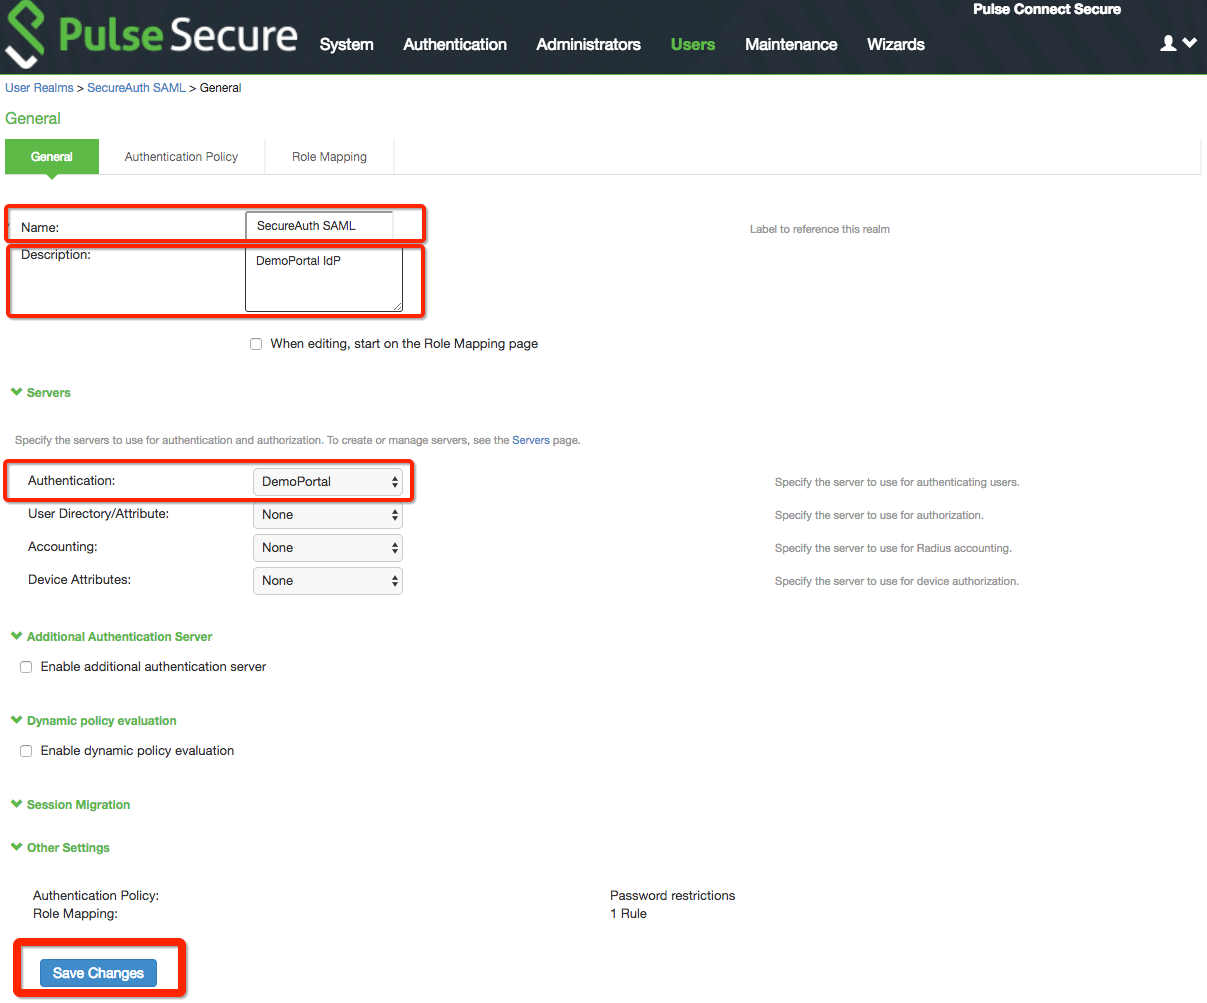
14. On the General tab, set a Name for the new realm and provide a Description.
15. Select the new server (created in the previous steps) from the Authentication dropdown.
16. Click Save Changes.
 |
User Role configuration
17. Under Users, select User Roles and click New User Role...

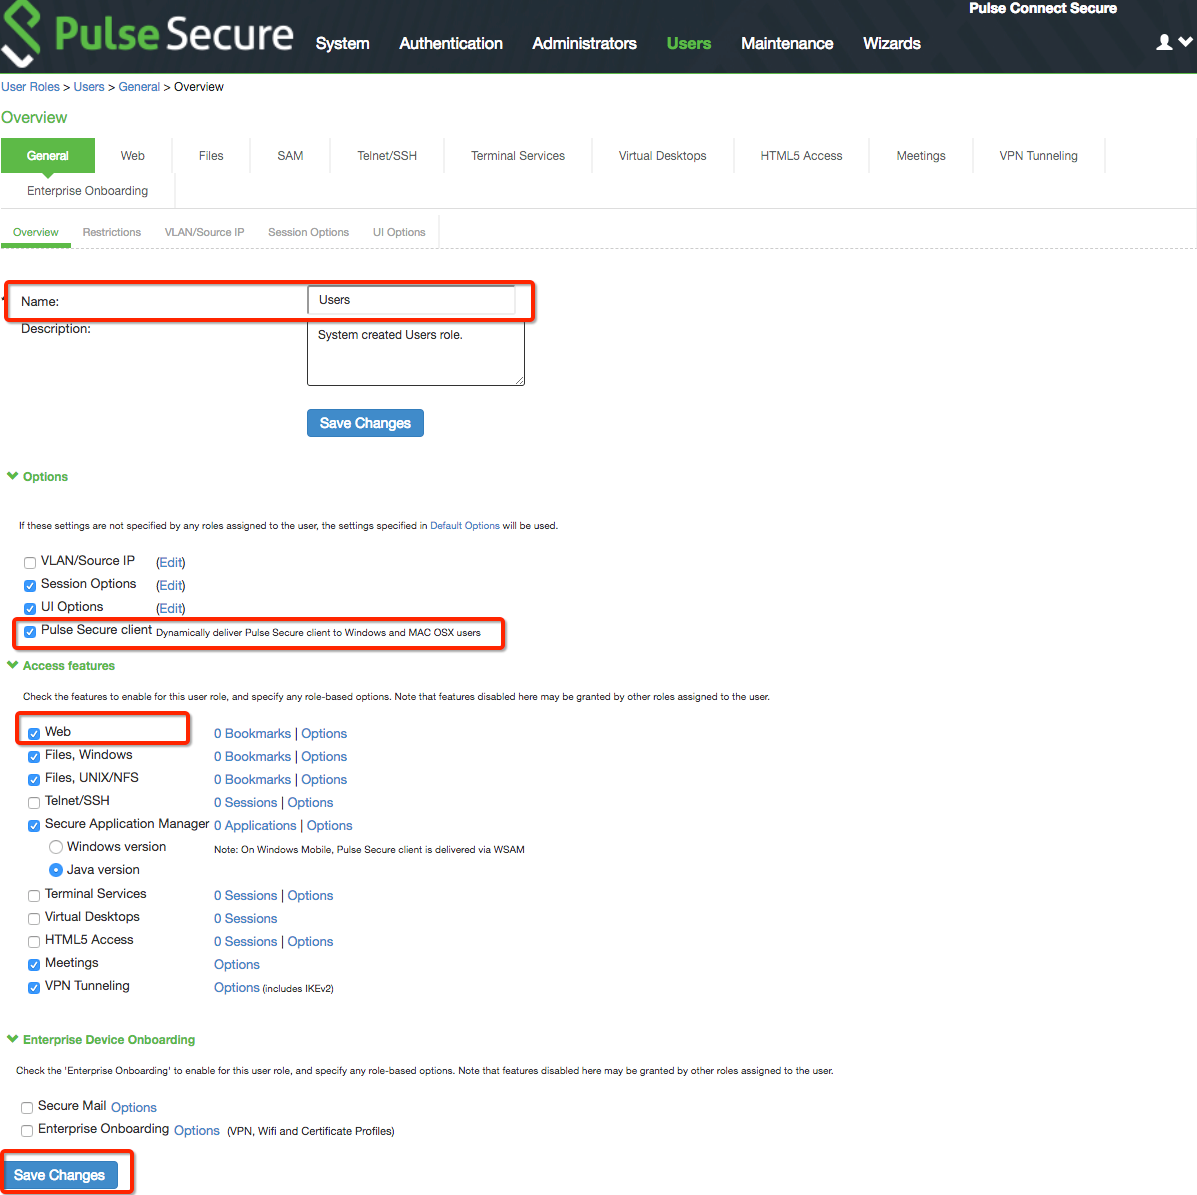
18. On the General tab, set a Name for the new role and provide a Description.
19. Select Pulse Secure client on the Options section.
20. Select Web on the Access features section.
21. Click Save Changes.
 |
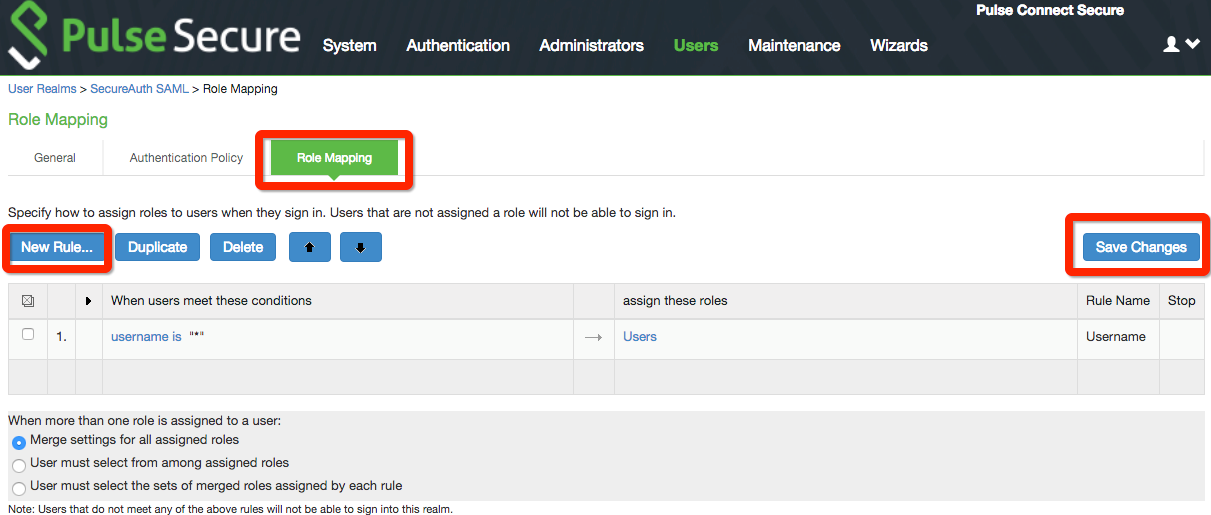
Apply new role to authentication realm
22. To apply the new role to the new realm, click Role Mapping.
23. Click New Rule... to create a new rule for the new role.
24. Click Save Changes.
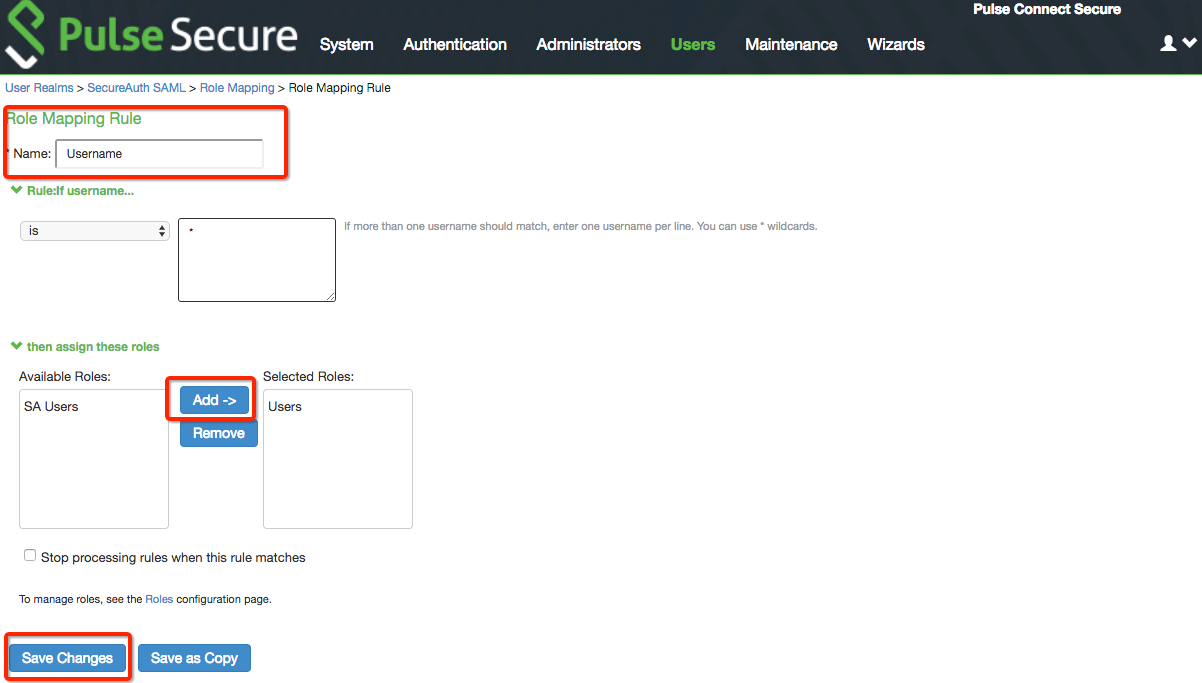
 |
25. Set a Name for the Role Mapping Rule, and design the new rule as desired.
26. Select the new role from the Available Roles list, and click Add.
27. Click Save Changes.
 |
Sign-in Policy configuration
28. Under Authentication, select Signing In and click Sign-in Policies.
29. On the Sign-In Policies tab, click New URL... to create the new signing-in policy.
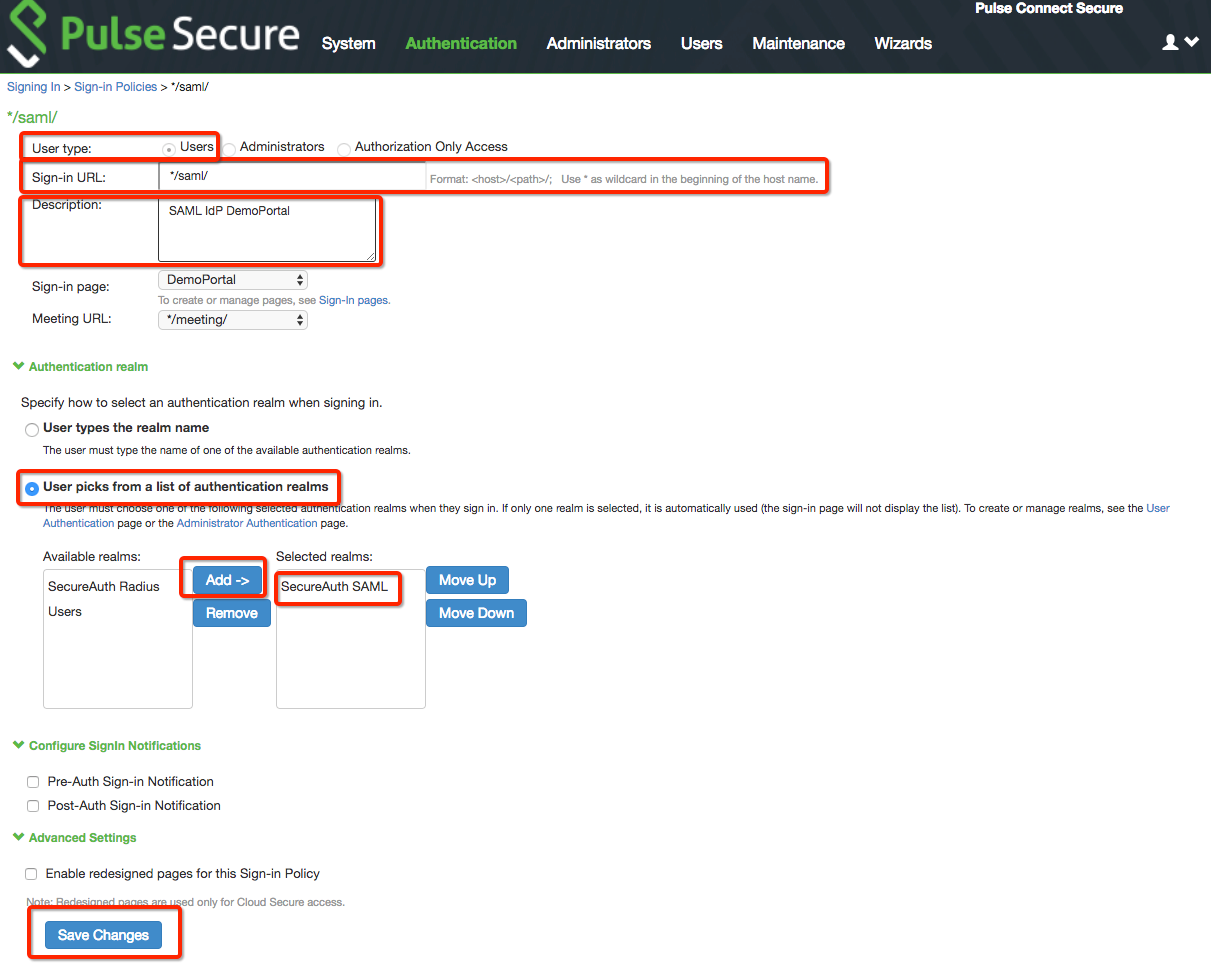
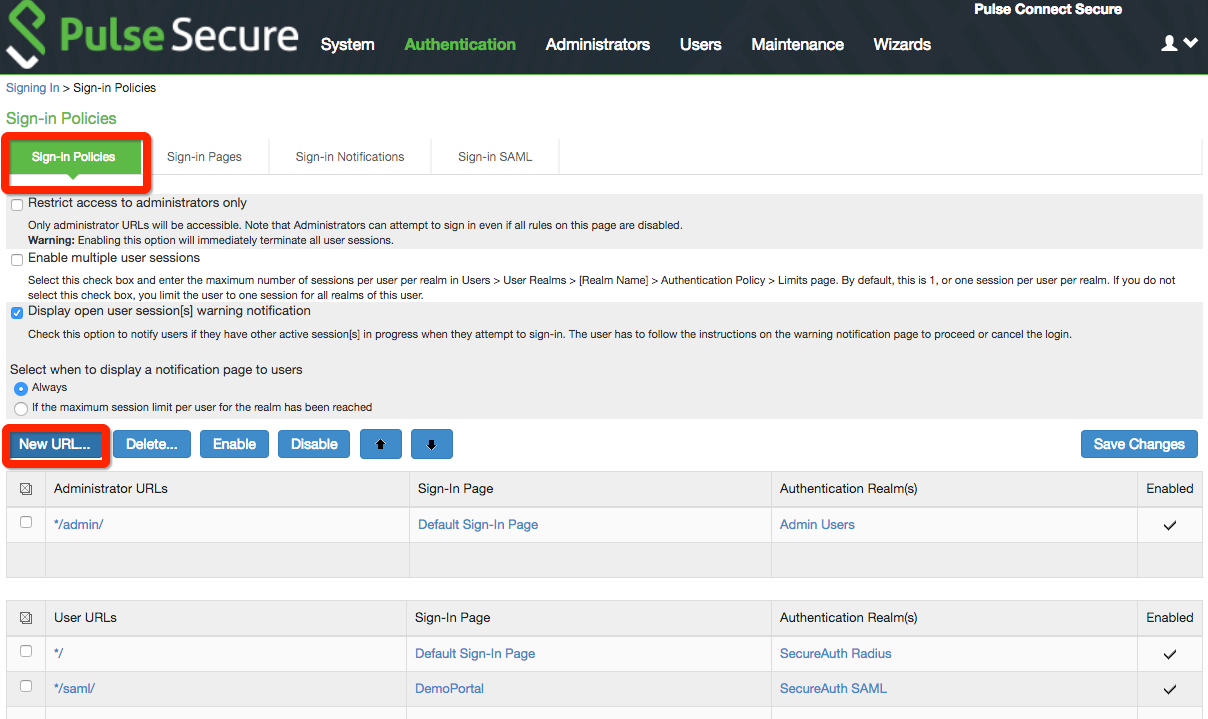 |
30. Select Users as the User type option.
31. Set the Sign-in URL to */saml and provide a Description.
32. Select User picks from a list of authentication realms.
33. Select the new realm created in the previous steps, and click Add.
34. Click Save Changes.
 |
Troubleshooting / common issues
Second factor SAML password loop
Problem: The integration of SecureAuth IdP and Pulse Secure enables the option to enter the password on Pulse Secure, which allows users to relay that password to applications via SSO.
There is a known issue in which a user who enters a bad password is prompted again for the password, but the SAML assertion of the UserID has been lost, so an endless loop occurs.
Resolution: Admins should modify the custom login page to enable Pulse Secure to look for error 1002, and then redirect users back to the SecureAuth IdP login page.
Example
<%IF LoginPageErrorCode == 1002 %>
<input type="hidden" name="realm" value="<% RealmList.0 %>">
<meta http-equiv="refresh" content="1;url=https://SecureAuthIdPFQDN/secureauthX/secureauth.aspx">
Referring to the sample code block above, replace SecureAuthIdPFQDN with the actual FQDN of the SecureAuth IdP appliance
e.g. secureauth.company.com
Replace the X with the actual realm number of the Pulse Secure integration
e.g. secureauth 2