F5 BIG-IP (SP-initiated) Integration Guide (SAML)
Introduction
Use this guide to enable Multi-Factor Authentication and Single Sign-on (SSO) access via SAML to F5 BIG-IP.
Prerequisites
1. Have F5 BIG-IP version 11.3.x or higher (must support SAML)
2. Create a New Realm for the F5 BIG-IP integration in the SecureAuth IdP Web Admin
3. Configure the following tabs in the Web Admin before configuring the Post Authentication tab:
Overview – the description of the realm and SMTP connections must be defined
Data – an enterprise directory must be integrated with SecureAuth IdP
Workflow – the way in which users will access this application must be defined
Multi-Factor Methods – the Multi-Factor Authentication methods that will be used to access this page (if any) must be defined
SecureAuth IdP Configuration Steps
Post Authentication
 |
1. Select SAML 2.0 (SP Initiated) Assertion Page from the Authenticated User Redirect dropdown in the Post Authentication tab in the Web Admin
2. An unalterable URL will be auto-populated in the Redirect To field, which will append to the domain name and realm number in the address bar (Authorized/SAML20SPInit.aspx)
3. A customized post authentication page can be uploaded, but it is not required
User ID Mapping
 |
4. Select Authenticated User ID from the User ID Mapping dropdown
In typical scenarios, the Authenticated User ID is sent; however, if the F5 BIG-IP ID is contained in a different SecureAuth IdP Property, select that value from the dropdown
5. Select urn:oasis:names:tc:SAML:1.1:nameid-format:unspecified from the Name ID Format dropdown (default)
Select a different option if F5 requires it, which the Service Provider (SP) will provide
6. Select False from the Encode to Base64 dropdown
SAML Assertion / WS Federation
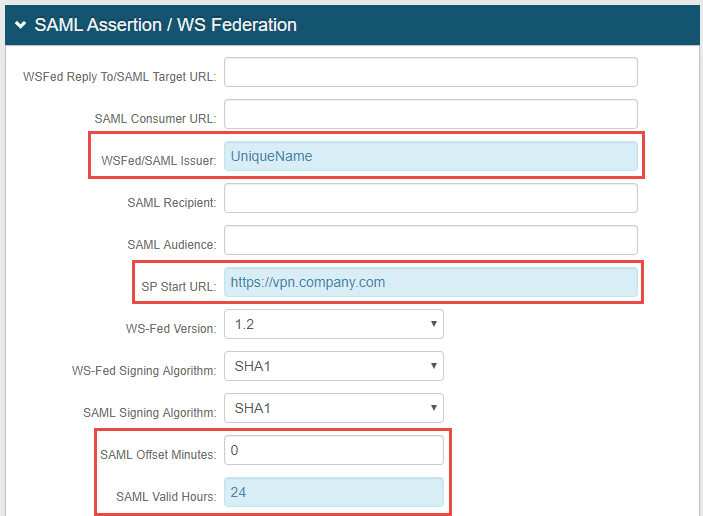 |
7. Set the WSFed/SAML Issuer to a Unique Name that will be shared with F5 BIG-IP
The WSFed/SAML Issuer must match exactly on the SecureAuth IdP side and the F5 side
8. Provide the SP Start URL to enable SSO and to redirect users appropriately to access F5 BIG-IP
This would be the F5 BIG-IP VPN domain URL
9. Set the SAML Offset Minutes to make up for time differences between devices
10. Set the SAML Valid Hours to limit for how long the SAML assertion is valid
Note
No configuration is required for the WSFed Reply To/SAML Target URL, SAML Consumer URL, SAML Recipient, or SAML Audience fields
 |
11. Leave the Signing Cert Serial Number as the default value, unless there is a third-party certificate being used for the SAML assertion
If using a third-party certificate, click Select Certificate and choose the appropriate certificate
12. Download the Assertion Signing Certificate, which will be imported into F5 BIG-IP
13. Provide the Domain in order to Download the Metadata File to send to F5 (if required)
Warning
Click Save once the configurations have been completed and before leaving the Post Authentication page to avoid losing changes
Forms Auth / SSO Token
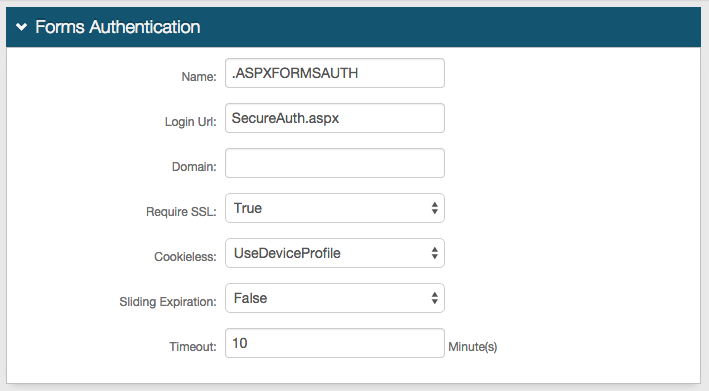
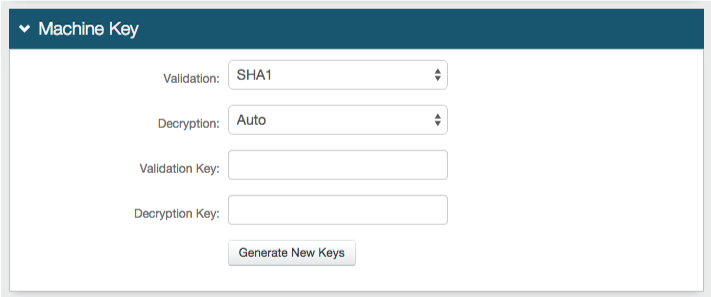
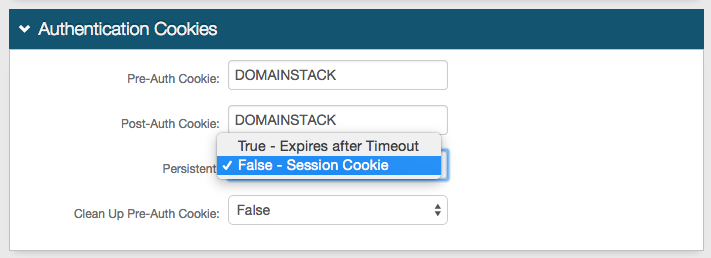
Optionally, in the Forms Auth / SSO Token section, click the View and Configure FormsAuth keys/SSO token link to configure the token/cookie settings and configure this realm for SSO.
 |
F5 Big IP Configuration Steps
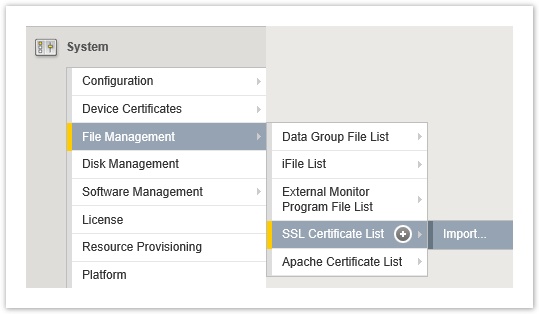 |
1. Import the Signing Certificate from the SecureAuth IdP Web Admin (step 12)
Under System, click File Management, then SSL Certificate List, and Import
Create New SAML IdP Connector
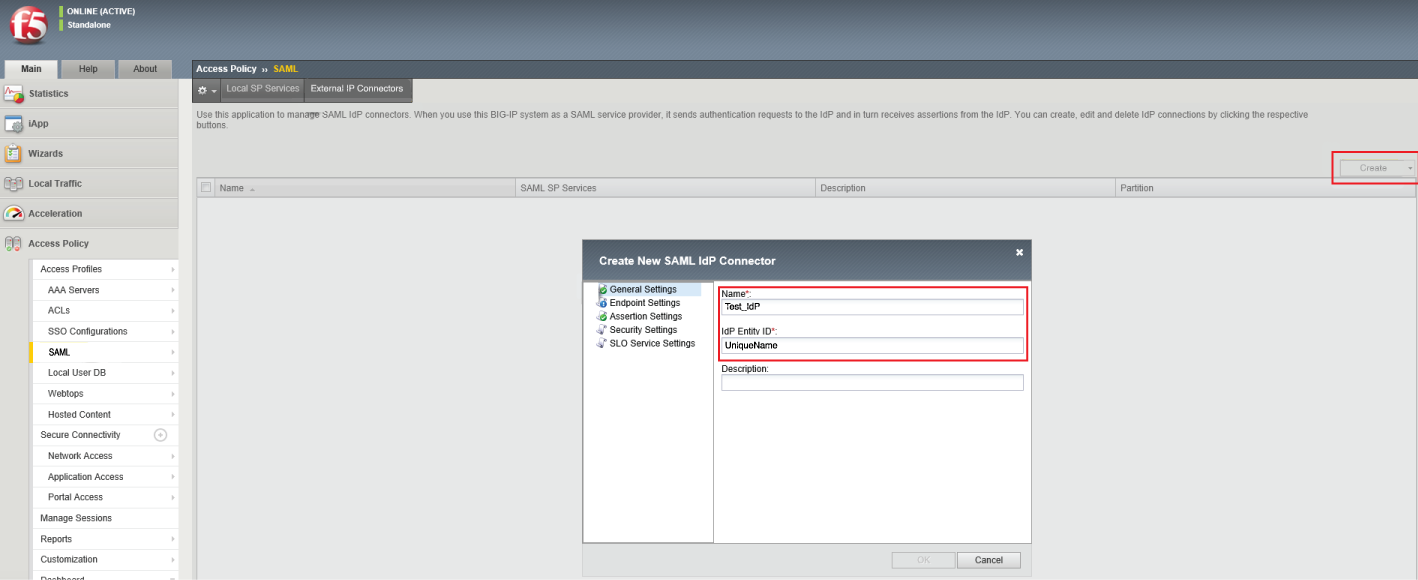 |
2. Log into F5 BIG-IP Management Console
3. Click Access Policy, then go into the SAML section
4. In the External IP Connectors tab, click Create
5. Click General Settings in the left-side menu of the Create New SAML IdP Connector windown
6. Set the Name to any static name
7. Set the IdP Entity ID to the same value established for the WSFed/SAML Issuer field in the SecureAuth IdP Web Admin (step 7)
The IdP Entity ID and the WSFed/SAML Issuer values must match exactly
Endpoint Settings
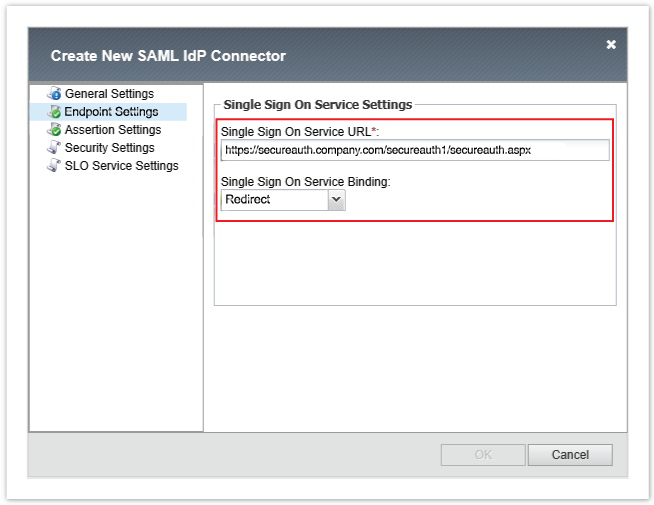 |
8. Click Endpoint Settings in the left-side menu
9. Set the Single Sign On Service URL to the Fully Qualified Domain Name (FQDN) of the SecureAuth IdP appliance and the F5 BIG-IP integrate realm number, followed by /secureauth.aspx
For example, https://secureauth.company.com/secureauth1/secureauth.aspx
10. Select Redirect from the Single Sign On Service Binding dropdown
Assertion Settings
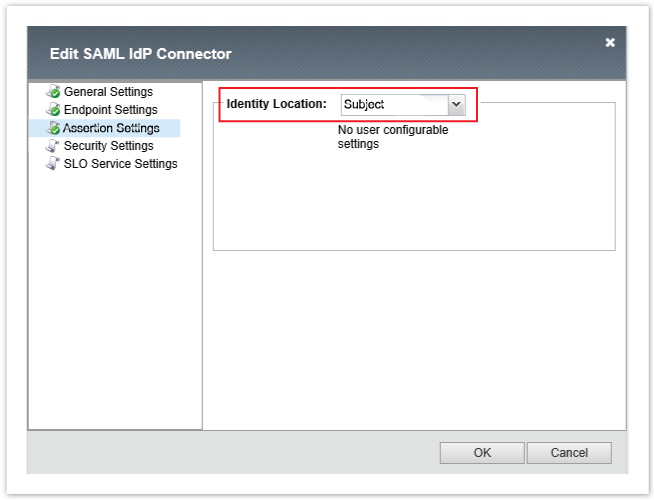 |
11. Click Assertion Settings in the left-side menu
12. Select Subject from the Identity Location dropdown
Security Settings
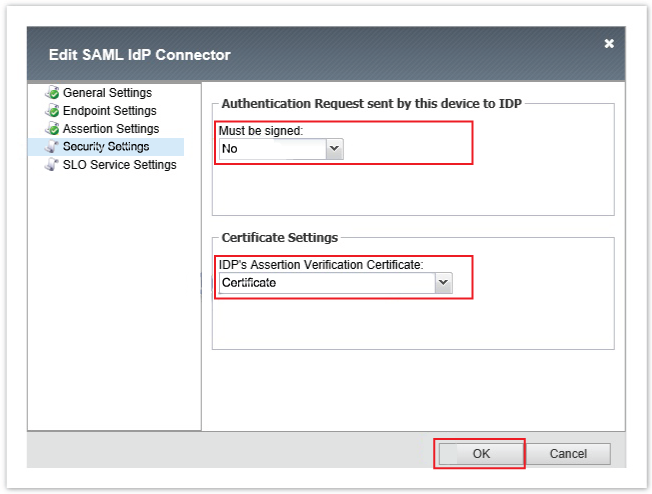 |
13. Click Security Settings in the left-side menu
14. Select No from the Must be signed dropdown
15. Select the Certificate to be used for SAML transactions from the IDP's Assertion Verification Certificate
Whichever certificate used here must also be on the SecureAuth IdP appliance
The certificate used in the SecureAuth IdP Web Admin (step 12) can be used here
Export the certificate without the private key in Base64 format, and upload it to the F5 BIG-IP server, from where it can be selected in the dropdown
16. Click OK
Create New SAML SP Service
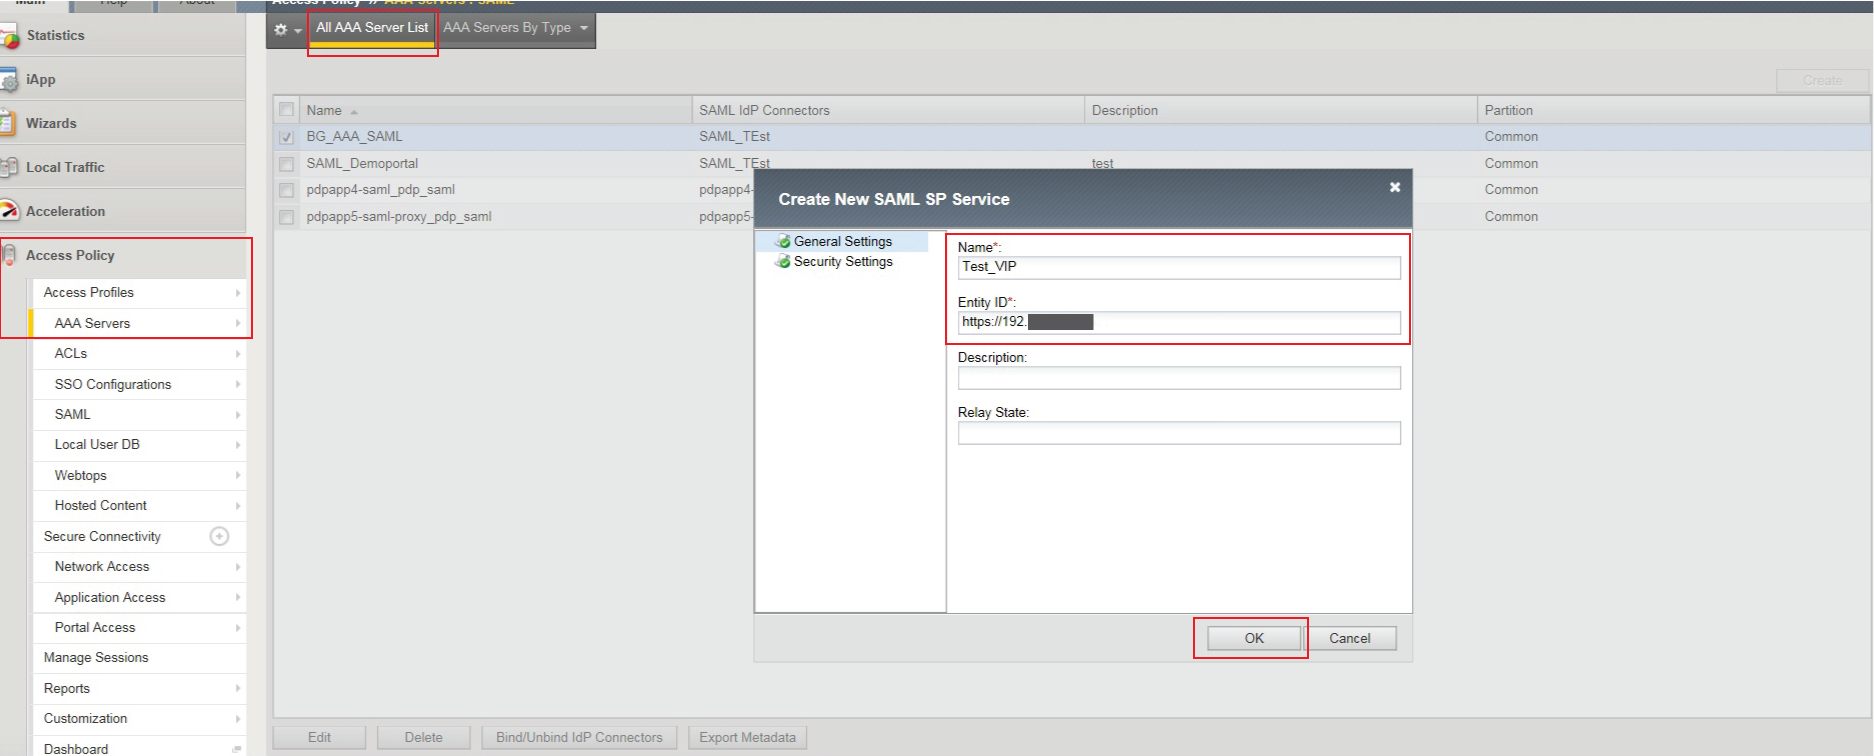 |
17. In the admin console, select AAA Servers under Access Policies, and click SAML then Create
18. Provide a Name for the new SAML SP Service
19. Set the Entity ID to the VIP URL or the F5 VIP IP Address that end-users utilize to access the resources
20. Click OK
Bind IdP Connector
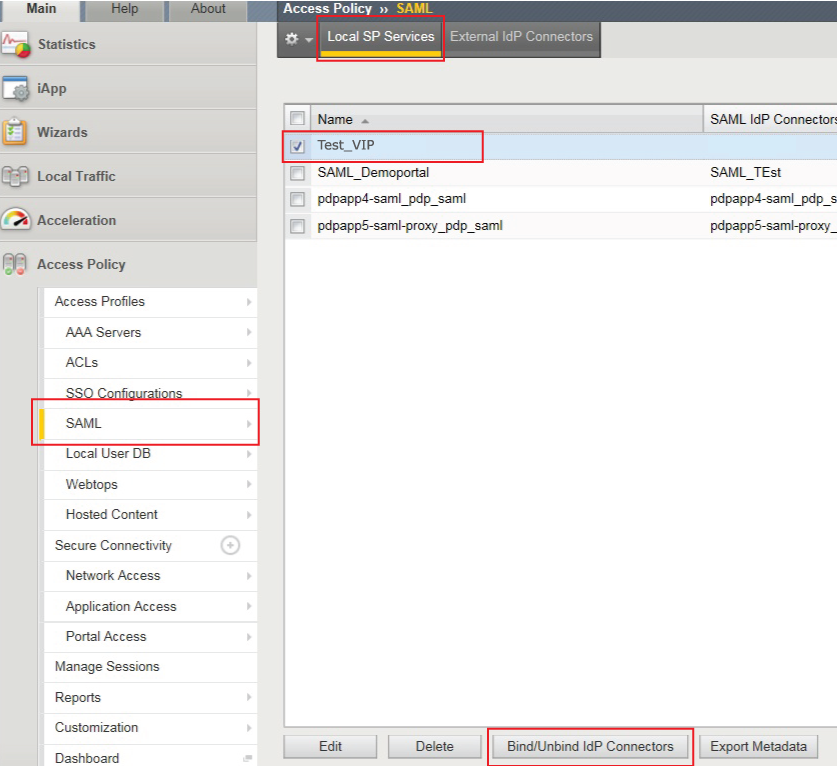 |
21. Select the newly created SAML SP Service and click Bind/Unbind IdP Connectors
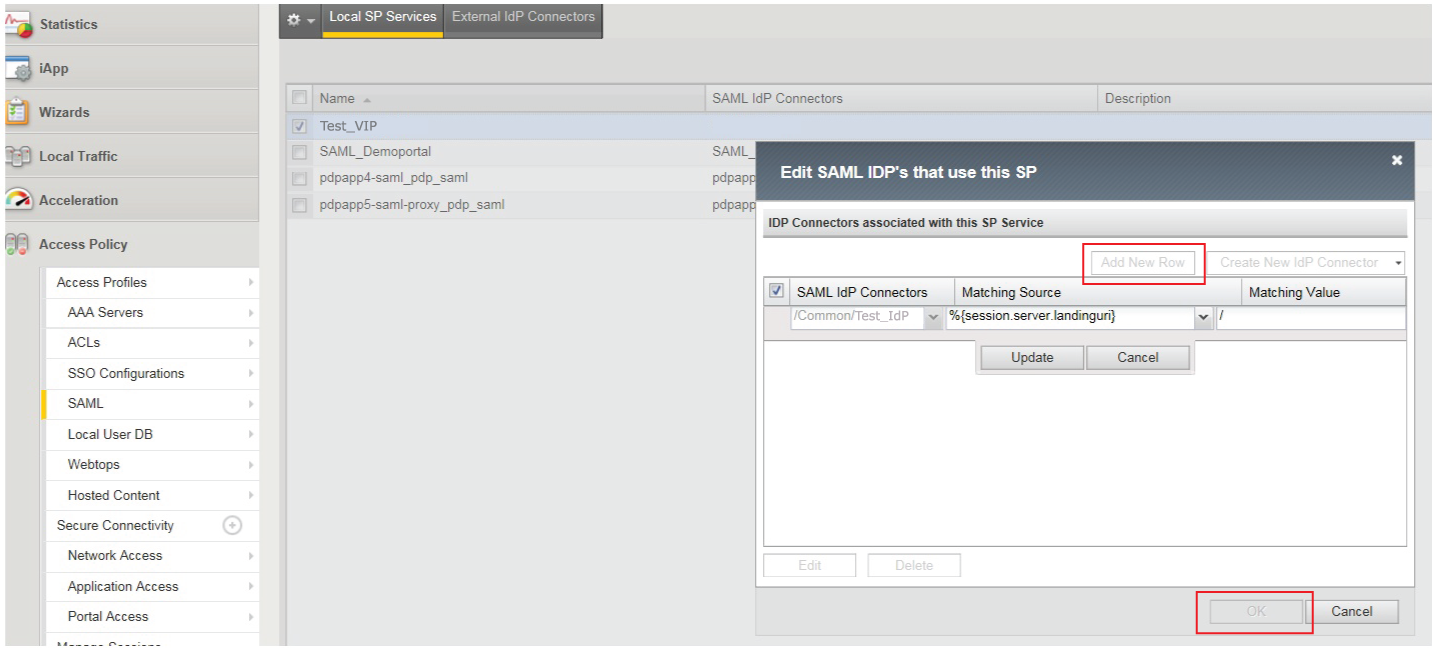 |
22. Click Add New Row
23. Select the IdP Connector created in steps 5-16 from the SAML IdP Connectors dropdown
24. Set the Matching Source to %{session.server.landinguri}
25. Set the Matching Value to /
26. Click OK
Access Policy
 |
This is a sample Access Policy diagram
27. Create a new Access Policy / Profile by clicking Access Policy, then Access Profiles, and then Create
28. Click Edit
Variable Assign
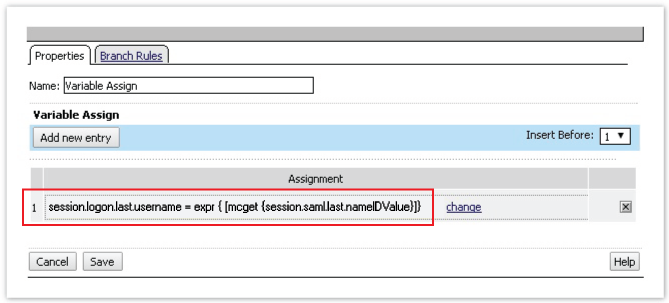 |
29. Configure a Variable Assign step
30. Set the assignment to session.logon.last.username = expr { [mcget {session.saml.last.nameIDValue}]}
Logon Page
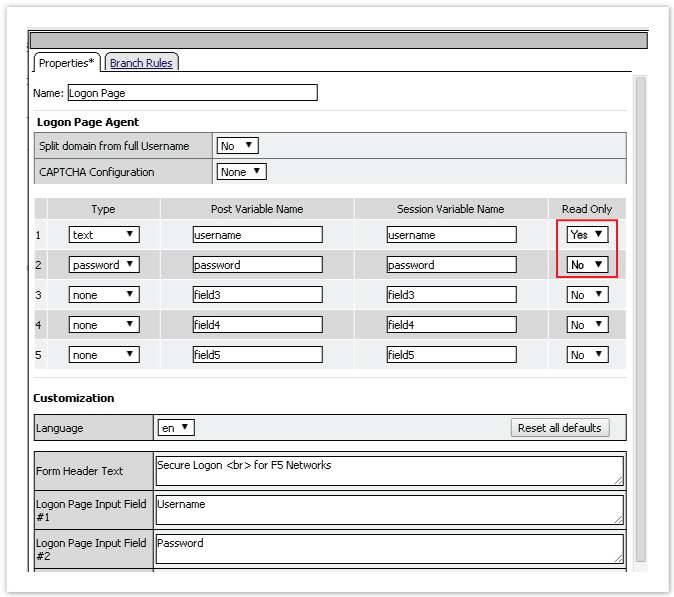 |
31. Configure a Logon Page step
32. Select Yes from the Read Only dropdown for the text Type
33. Select No from the Read Only dropdown for the password Type
34. The configuration should look like the sample provided here
Virtual IP
 |
Create a new Virtual Server and Assign the SAML Policy
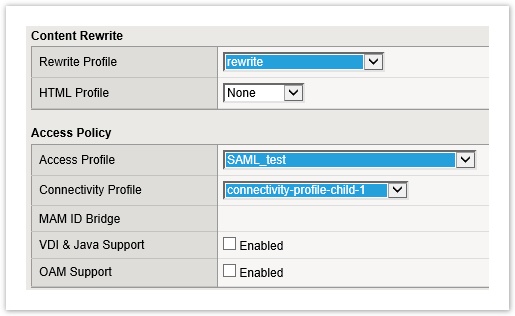
35. Create a new VIP with preferred settings, but assign the SAML External IdP Connector created above
36. Assign a Rewrite Profile, or use the default rewrite selection
37. Select the SAML Profile (Test_IdP) created in steps 5-16 from the Access Profile dropdown
38. Select a Connectivity Profile from the dropdown
