PingFederate (SP-initiated) integration guide
Introduction
Use this guide to enable Multi-Factor Authentication and Single Sign-on (SSO) access via SAML to PingFederate.
Prerequisites
Ping Federate Administrator Account
SecureAuth IdP version 9.1 or later, with a realm ready for the PingFederate integration
SecureAuth IdP Web Admin configuration steps
1. Log on the SecureAuth IdP Web Admin console and find the new realm to be used for the PingIdentity integration.
Data tab
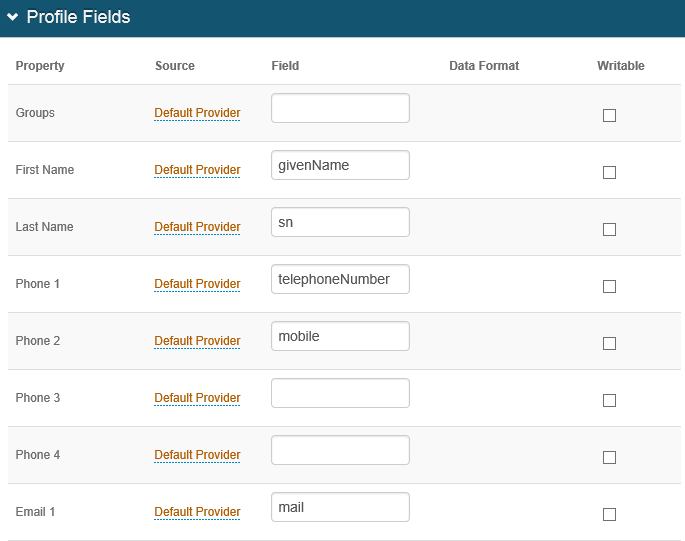
2. In the Profile Fields section, ensure the Membership Connection is set correctly, and map the directory field that contains the user's email address ("Email 1" field, for example) to the correct SecureAuth IdP property.
 |
Post Authentication tab
You can choose to map additional fields as SAML attributes, if necessary.
3. In the Post Authentication section, select the SAML 2.0 (SP Initiated) Assertion option from the Authenticated User Redirect dropdown.
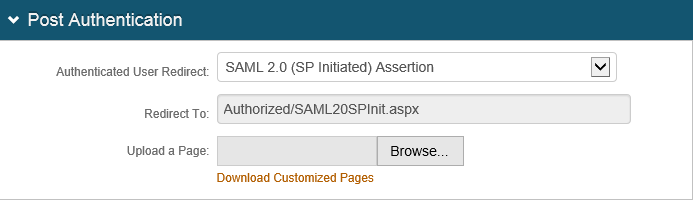 |
4. If required, upload a customized post authentication page using the Upload a Page field.
5. In the User ID Mapping section, make these field selections:
Fields | Description/Recommendations |
User ID Mapping | Select the SecureAuth IdP property that corresponds to the Profile Field value. In this case, it is Email 1 |
Name ID Format | Select urn:oasis:names:tc:SAML:1.1:nameid-format:unspecified |
Encode to Base64 | Select False |
An example of these settings is shown below.
 |
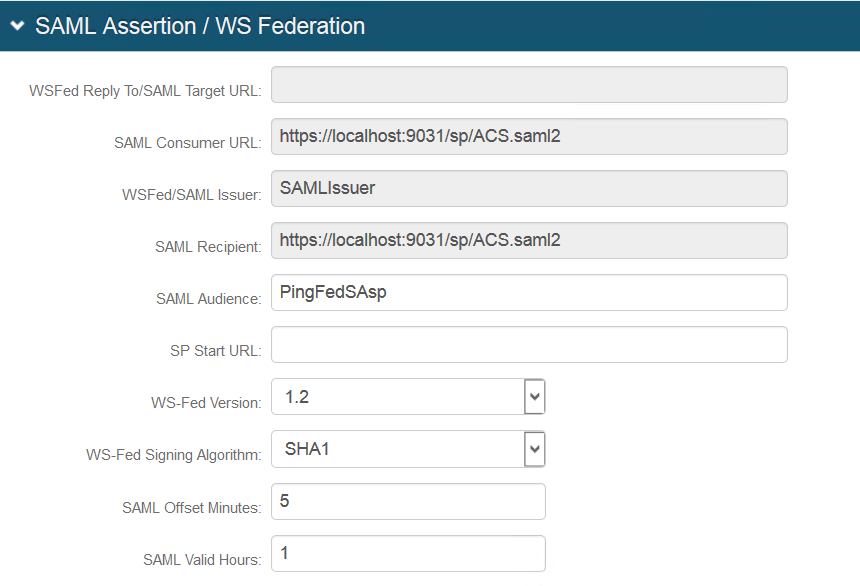
6. In the SAML Assertion / WS Federation section, make these changes in the following fields:
Fields | Description/Recommendations |
WSFed/SAML Issuer | Set to any value, typically in the form https://<IssuerName>.com |
SAML Consumer URL | Set to the appropriate value found in PingFederate. Typically, this value is the application's FQDN with a fixed path extension, such as: https://<FQDN>/sp/ACS/saml2. NOTE: This value is located in the Protocol Endpoints hyperlink, which is in the Federation Info section on the Server Configuration tab. |
SAML Recipient | Set to the same value as designated for the SAML Consumer URL field. |
SAML Audience | Set to the same value as the SAML 2.0 Entity ID on PingFederate. NOTE: This value must differ from the user inputs value for the WSFED/SAML Issuer field and is located in the Federation Info section on the Server Configuration tab. |
7. Provide other settings, as necessary:
Fields | Description/Recommendations |
SP Start URL | This field is not mandatory to enable SSO and to redirect users appropriately to access SecureAuth. In case the user needs to include it, this URL value is the same as the start site for the SP Application. For example: http:<FQDN>:<portNumber>/sp/ startSSO.ping?PartnerSpId=SAMLIssuer |
SAML Offset Minutes | Set to 5 minutes to make up for time differences between devices. |
SAML Valid Hours | Set the to 1 hour to limit for how long the SAML assertion is valid. |
WS-Fed Signing Algorithm / SAML Signing Algorithm | Set both to SHA1 |
An example of the SAML Assertion / WS Federation section is shown below.
 |
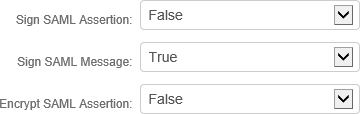
8. Scroll down to the end of this section and provide these field values.
Fields | Description/Recommendations |
Sign SAML Assertion | Set to False |
Sign SAML Message | Set to True |
Encrypt SAML Assertion | Set to False |
An example of these SAML fields is shown below.
 |
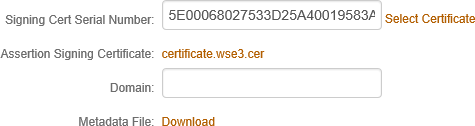
9. Leave the Signing Cert Serial Number field as the default value, unless there is a third-party certificate being used for the SAML assertion.
NOTE: If using a third-party certificate, click Select Certificate and choose the appropriate certificate.
 |
10. If required, scroll down to the Forms Auth/SSO Token section, then click the View and Configure FormsAuth keys / SSO token link to configure the token/cookie settings and to configure this realm for SSO, as shown in the image below.
 |
11. Click Save once the configuration is complete and before leaving the Post Authentication page.
PingFederate configuration steps
Follow these steps to configure PingFederate for use with SecureAuth IdP.
1. From the left pane of the PingFederate main menu, click the SP Configuration tab. A screen as the image below appears.
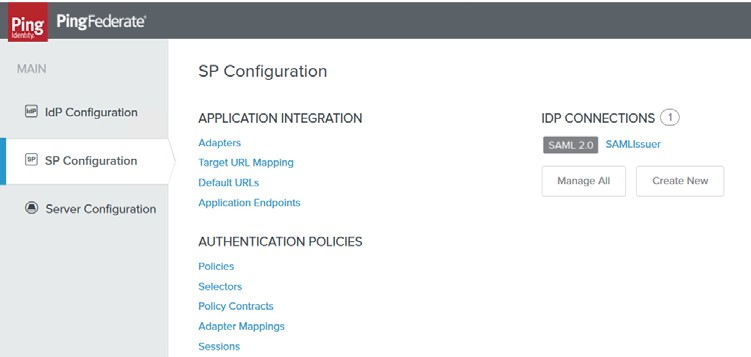 |
2. Under the IDP CONNECTIONS section, click the Create New link to start the IdP Connector wizard and create a new IdP connection.
3. Check the Browser SSO Profiles box and the Protocol of SAML 2.0 is auto-selected as shown in the image below.
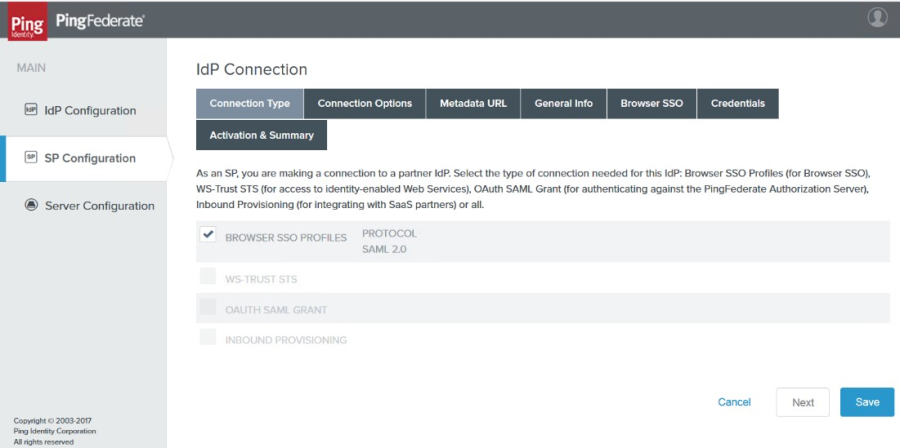 |
4. Click Next. The Connection Options page appears.
5. Check the Browser SSO box, then click Next.
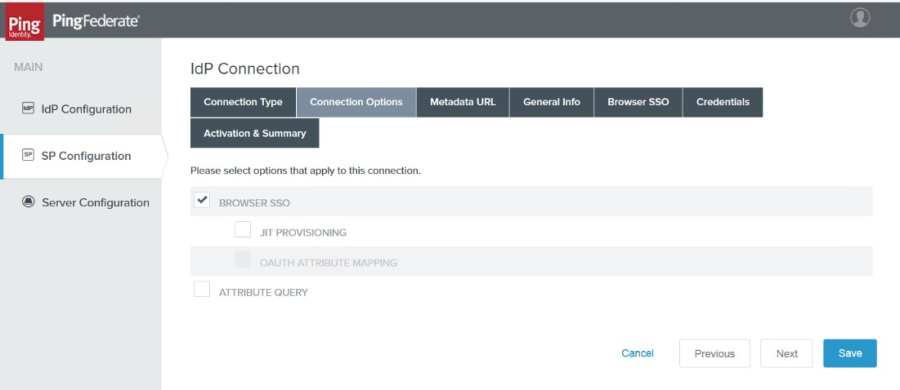 |
The Metadata URL page appears.
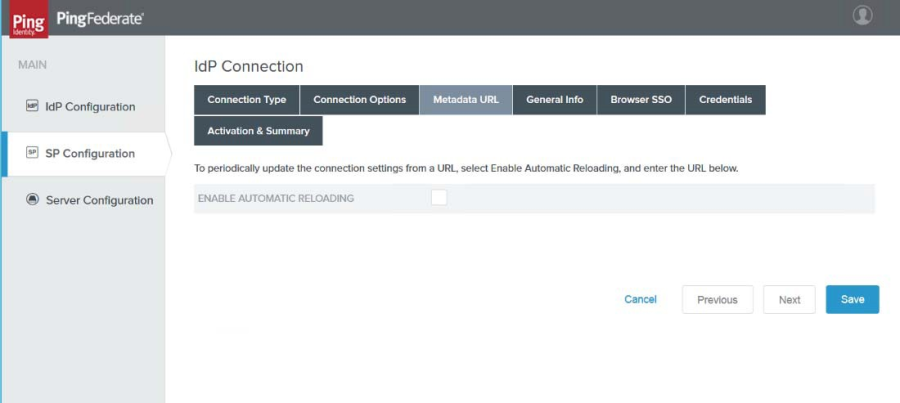 |
6. Click Next to skip the Metadata URL section. The General Info page appears.
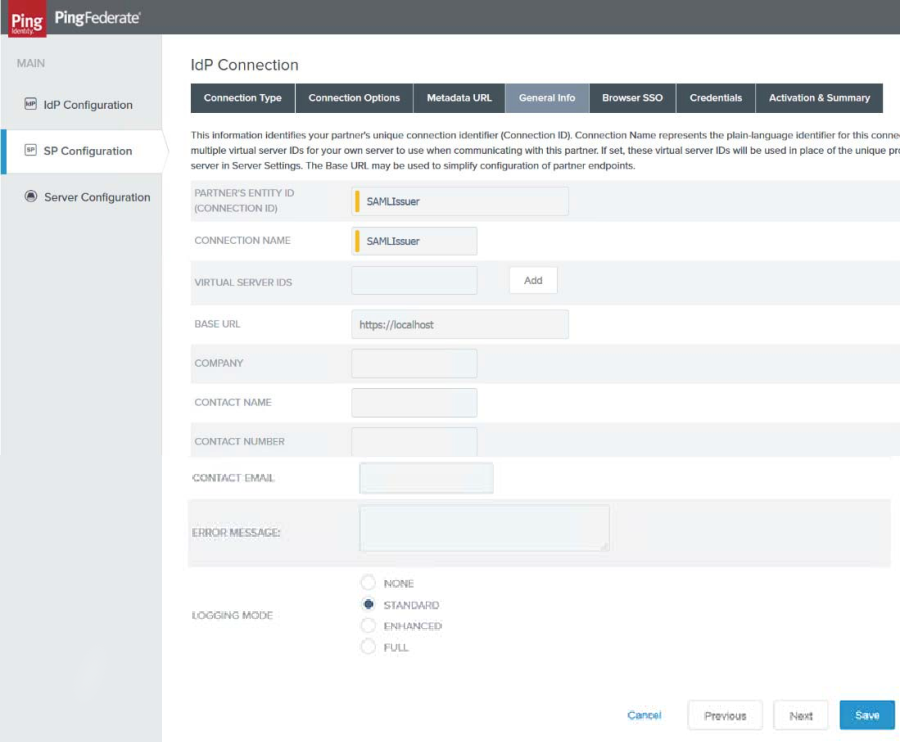 |
7. In the Partners Entity ID text box, enter the correct value.
This value must be the same as the value entered in the WS-Fed / SAML Issuer field on the Post Authentation tab in SecureAuth IdP. In the image above, this value is SAMLIssuer, the same value specified in step 6 of the SecureAuth IdP Configuration Steps.
8. In the Connection Name text box, enter any name required.
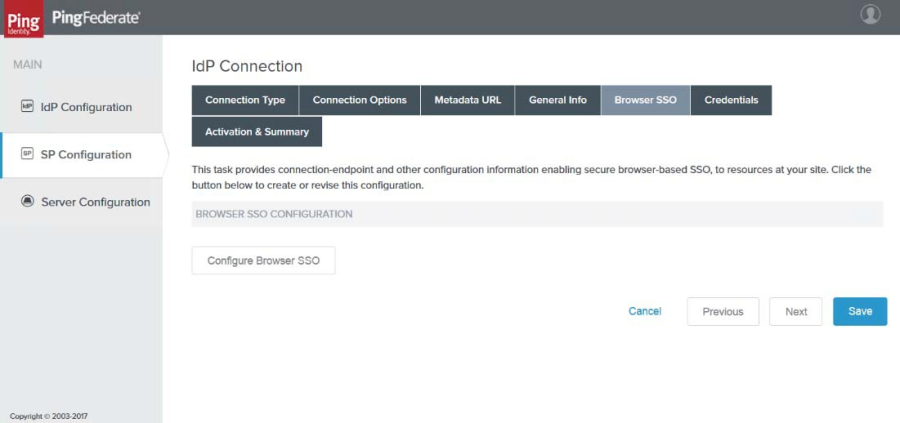
9. Click Next. The Browser SSO page appears.
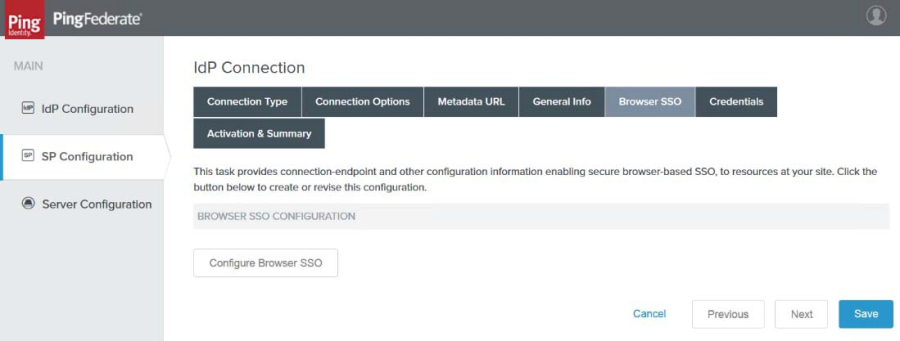 |
10. Click Configure Browser SSO.
11. Under the SAML Profiles tab, check both IDP Initiated SSO and SP Initiated SSO as shown in the image below, then click Next.
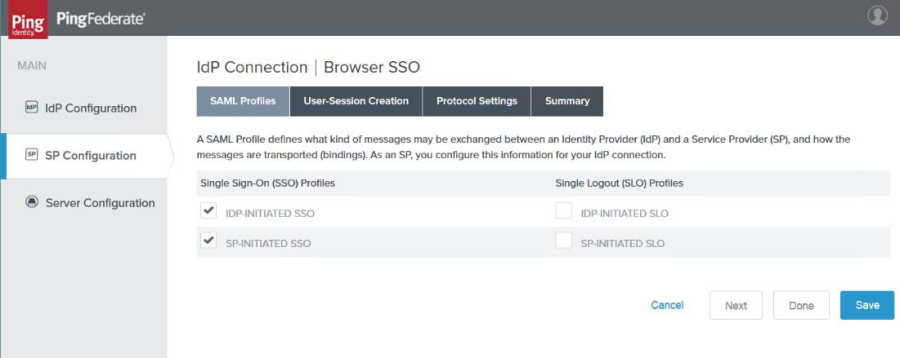 |
The User-Session Creation page appears.
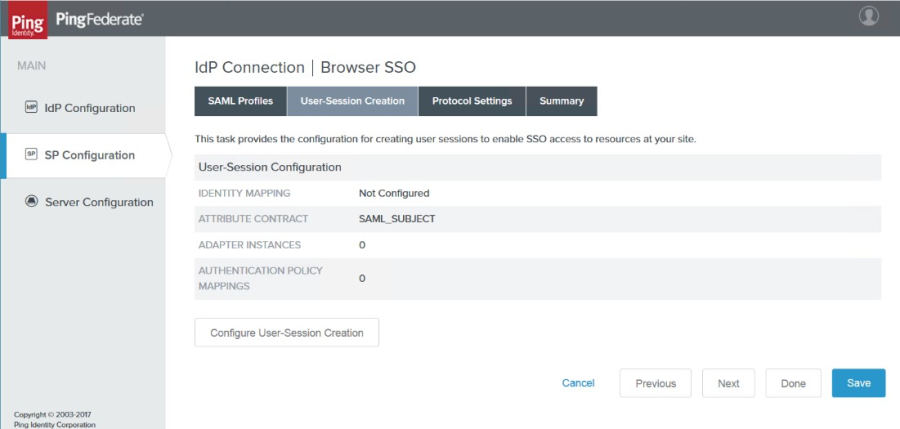 |
12. Click Next. The Protocol Settings page appears.
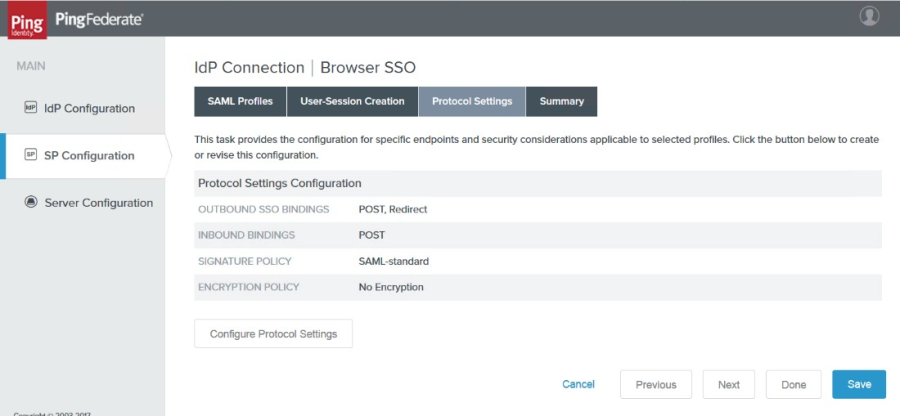 |
13. Click Configure Protocol Settings. The SSO Service URLs tab of the Protocol Settings page appears.
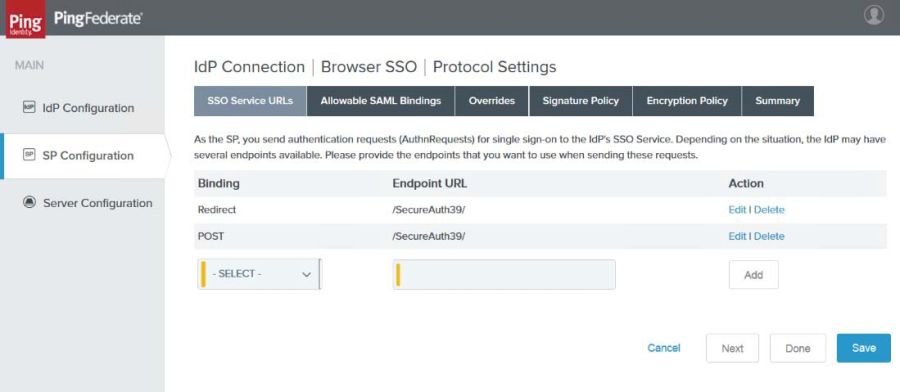 |
14. On the SSO Service URLs tab, ensure that the only two bindings are: Redirect and SOAP and that the Endpoint URL maps to the correct SecureAuth IdP realm. (In the sample image above, it is realm SecureAuth39.)
15. Click Next when completed. The Allowable SAML Bindings tab appears.
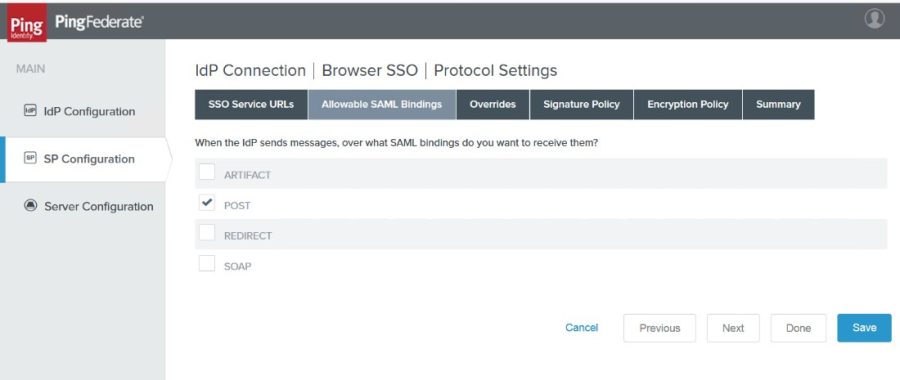 |
16. Check the POST box, then click Next twice. The Signature Policy tab appears.
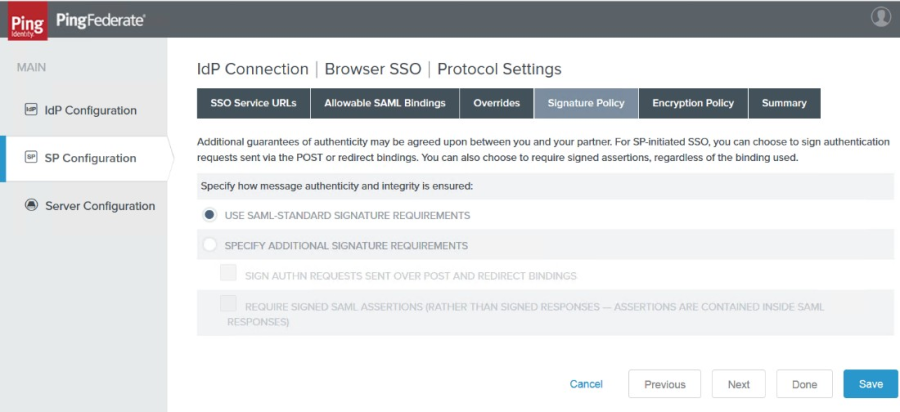 |
17. Click to select the Use SAML Standard Requirements radio button, then click Next. The Encryption Policy tab appears.
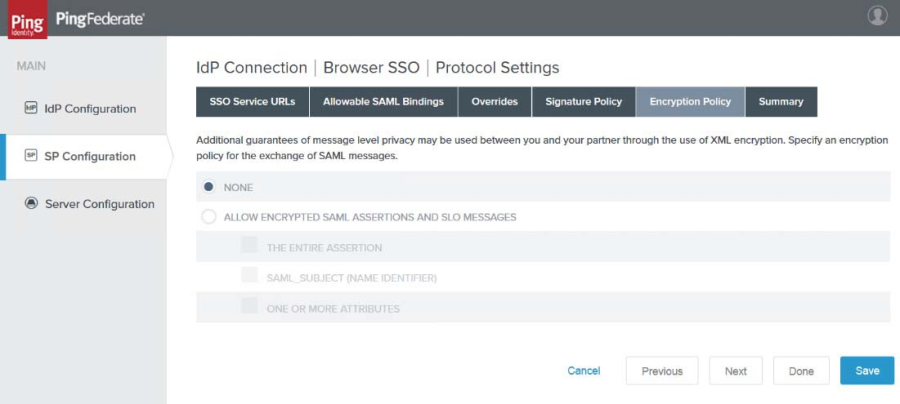 |
18. Click the None radio button, then click Next. The Summary tab appears.
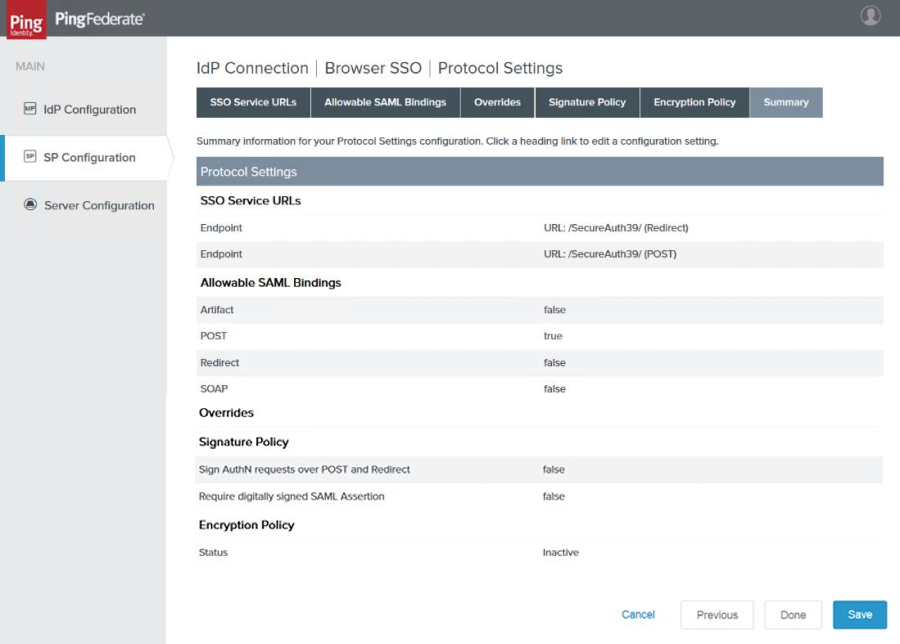 |
19. Verify all the settings on this tab, then click Done. The Protocol Settings page reappears as in the sample image below.
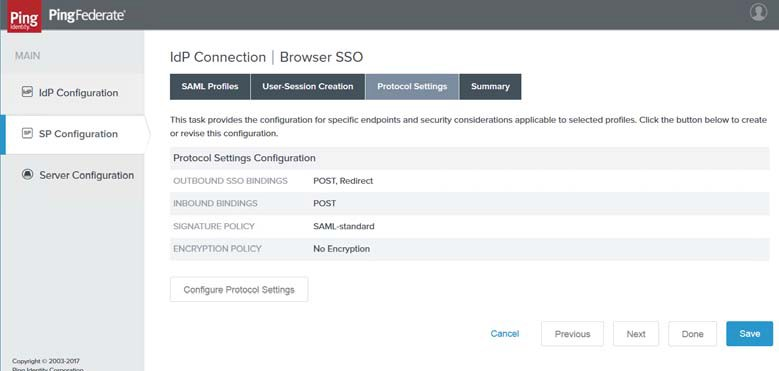 |
20. Click Next. The Browser SSO Summary page appears.
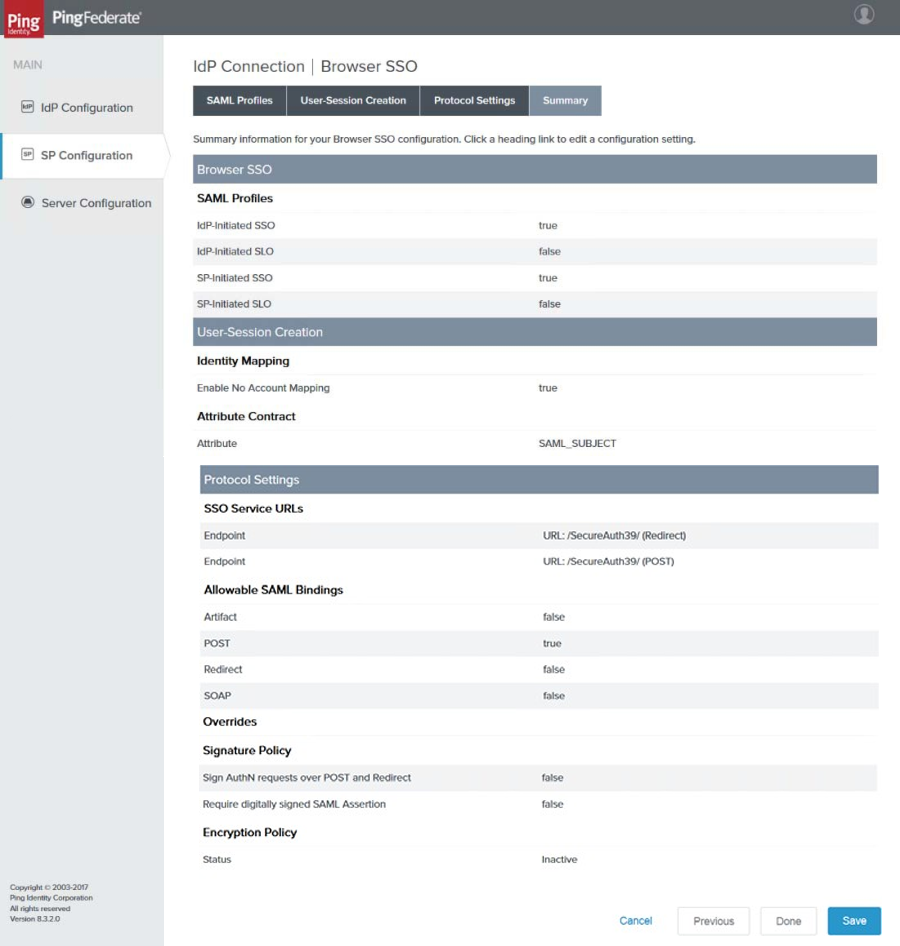 |
21. Ensure all the settings are correct, then click Done. The Browser SSO page reappears.
 |
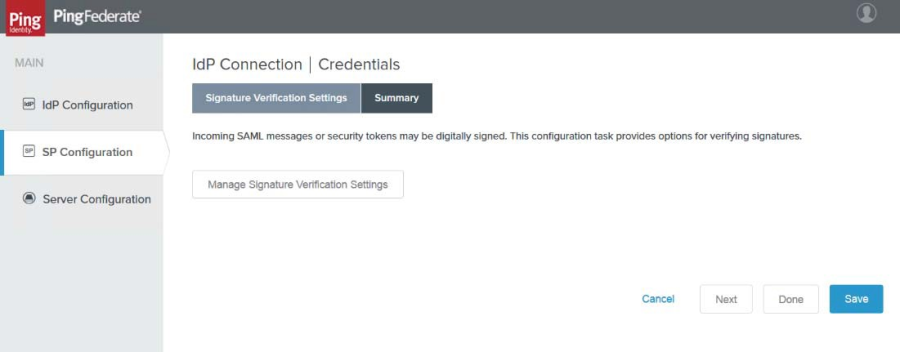
22. Click Next. The Credentials page appears.
 |
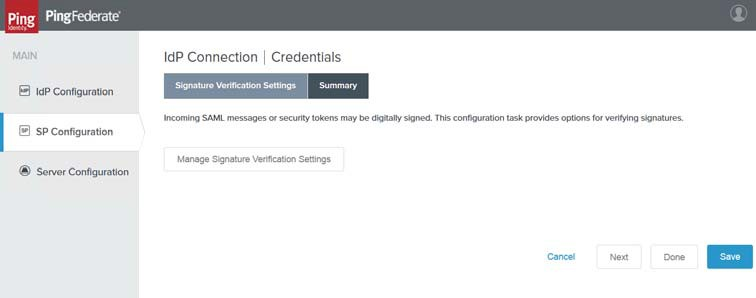
23. Click Configure Credentials. The Signature Verification Settings tab appears.
 |
24. Click Manage Signature Verification Settings. The Trust Model tab page appears.
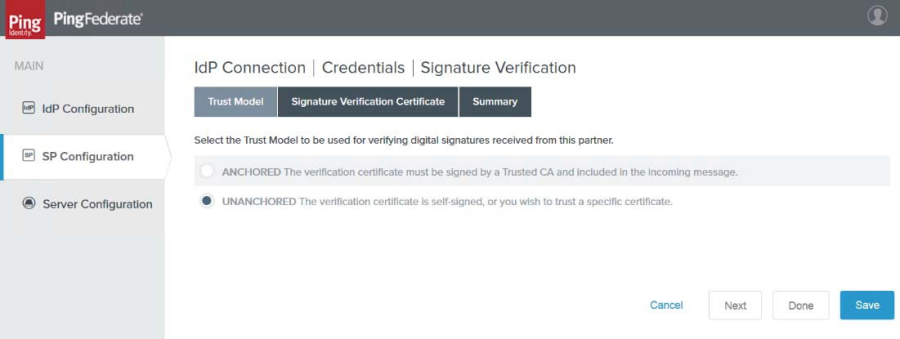 |
25. Click to select the Unanchored radio button, then click Next. The Signature Verification Certificate tab appears.
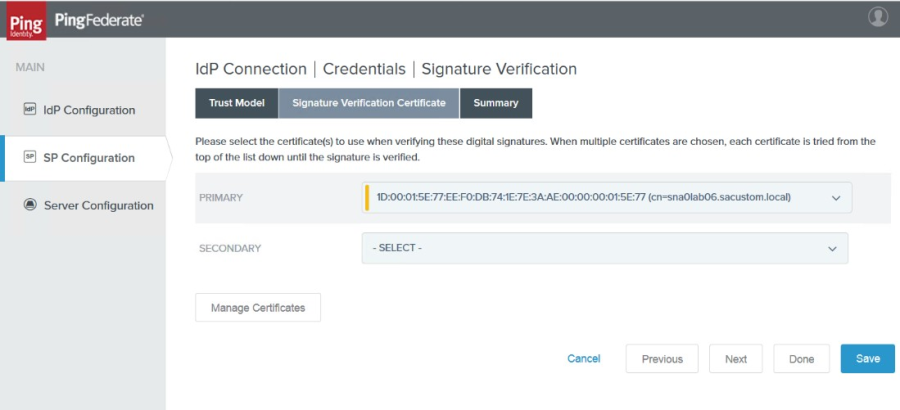 |
26. From the Primary pick list, select the SecureAuth IdP certificate.
NOTE: If no certificate appears in the pick list, click Manage Certificates and import the appropriate SecureAuth IdP certificate.
27. Once the thumb print of the certificate appears, click Next. The Summary tab appears.
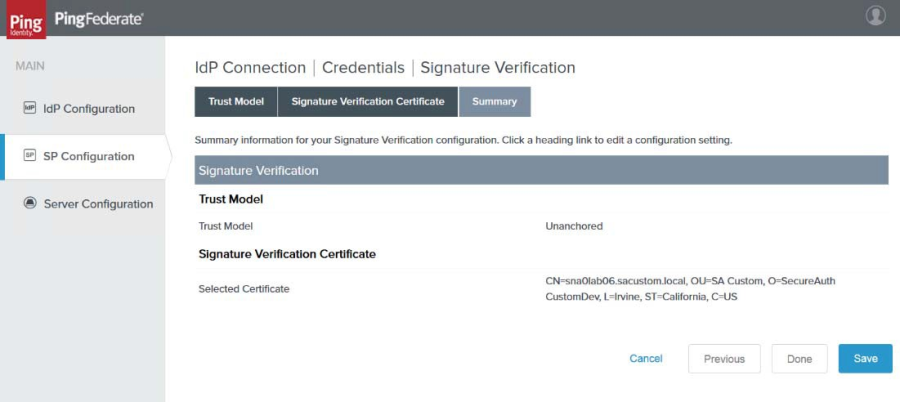 |
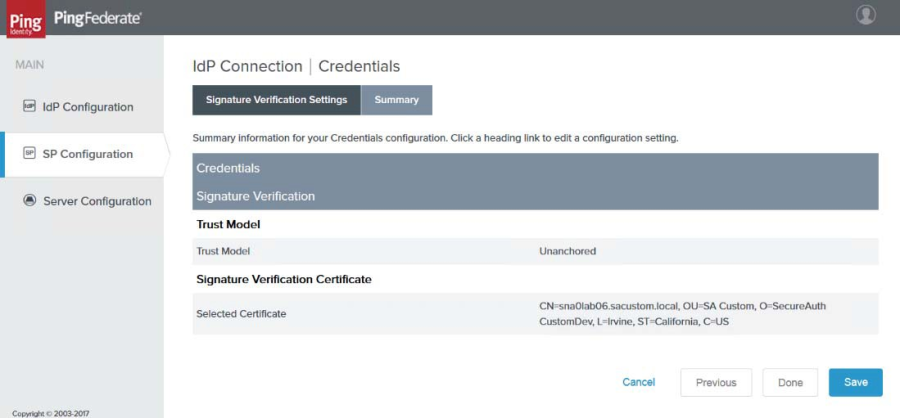
28. When satisfied, click Done. The Signature Verification Settings tab reappears.
 |
29. Click Next. The Credentials Page reappears.
 |
30. Verify all the settings and make appropriate edits if necessary, then click Done.
31. Click Next twice to move to the Activation & Summary page.
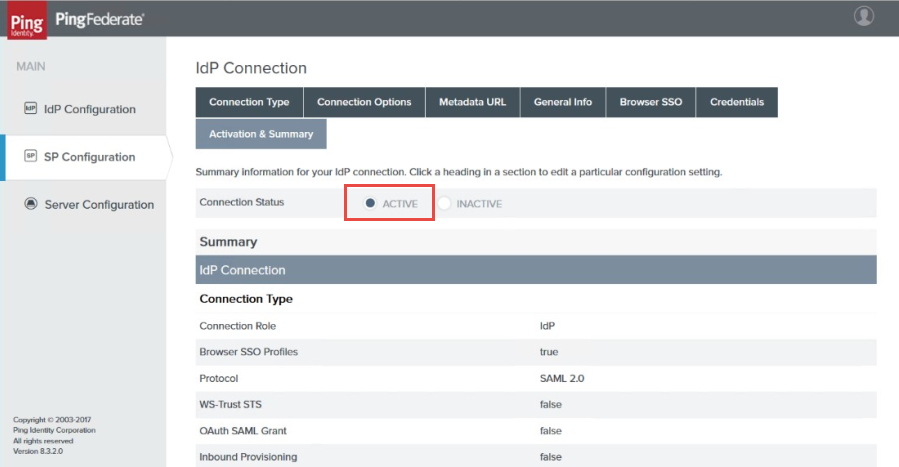 |
32. Ensure Connection Status is set to Active and that all the other configuration values you specified are correctly displayed, then click Save.
Test the configuration
To test this configuration, perform these steps:
Open Firefox browser and download SAML Tracer.
Enter the SP Start URL.
Check to see if the SP Start URL is redirected to SecureAuth IdP.
Enter the credentials (username and password) on the SecureAuth IdP page. The user should be authenticated successfully into the application.