Virtual Appliance Drive Expansion Procedure
Introduction
This article explains how to expand the disk space on a SecureAuth virtual appliance.
Applies to
SecureAuth IdP appliance
Information
Do these instructions apply to my SecureAuth IdP appliance?
To ensure maximum compatibility with VMWare versions select SecureAuth virtual appliances were shipped with only one drive. This drive contains both the C: and D: partitions which are critical to the operation of both SecureAuth and the underlying Windows Server operating system. Over time as Microsoft releases additional security patches the C: partition can run low on disk space. This article explains how to add another disk to the virtual machine and migrate files to allow for the expansion of the C: partition. This process will at the same time increase space on the D: partition creating additional space for the SecureAuth operational files.
Prerequisites
A second disk will need to be added to the SecureAuth VM to facilitate the disk expansion process. For sizing a general rule would be to take the current size of the D: partition and add 5 GB of capacity to account for future growth.
A backup of the server should be taken before the process is started in case there are any complications.
Automated or Manual Process?
SecureAuth offers two ways to proceed with the drive expansion process. The first is our automated Drive Expansion Utility. The second is to perform the process manually following the detailed directions below. If you have questions about which method is best for your environment or encounter issues with either process please contact SecureAuth support at +1 949 777-6959 option 2
Procedures
Prepare the new disk
Now that the disk has been added to the SecureAuth VM you will need to prepare it for use.
Launch the Disk Management tool
1) Start → All Programs → Administration Tools → Server Manager
2) In the console tree, click Storage, and then click Disk Management.
New Disk Wizard
When you first start Disk Management after installing a new disk, a wizard appears that provides a list of the new disks detected by the operating system. The instructions below will guide you through the Wizard steps.
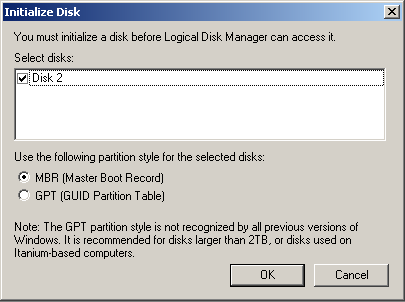
1) In the Initialize Disk window choose the disk which was recently added (it will likely be the only option available).
2) Choose the MBR (Master Boot Record) partition style.
3) Click the OK button.
 |
Create a new volume
To initialize the new disk follow the instructions below:
1)Right-click the new disk you want to initialize, and then click New Simple Volume.
2) You will now be presented with the New Simple Wizard Volume Wizard, click Next >
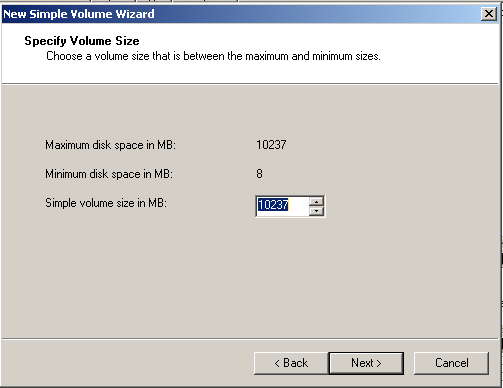
3) For the specify Volume Size step we suggest taking the default setting which uses the entire disk.
 |
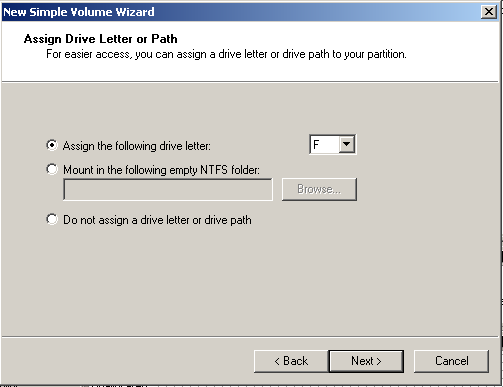
4) For the Assign Drive Letter or Path step you may choose any drive letter you like. We will be changing this volumes drive letter in a later step so this assignment will only be temporary.
 |
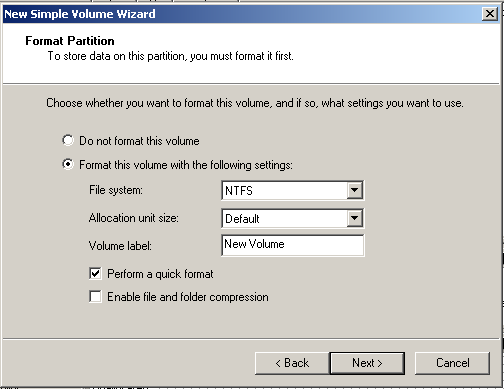
5) For the format Partition step configure the options as follows:
a) Set the radio button to "Format this volume with the following settings:"
b) For the File System option choose NTFS (SecureAuth will only work with NTFS formatted volumes).
c) For the Allocation unit size choose Default.
d) For the Volume Label enter Drive-D.
e) For Perform a quick format we suggest taking the default setting.
f) Set Enable file and Folder compression to Off (unchecked).
 |
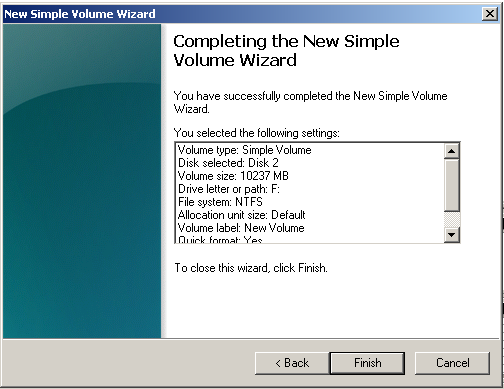
6) For the Completing the New Simple Volume Wizard step, review your settings. If everything is correct click the Finish button. If you find any errors click the < Back button to change the incorrect option(s).
 |
Migrate the Files
Now that the new disk has been created we will need to copy critical files from the D: partition to the new disk. Below please find instructions to safely copy the files from partition D: to the new disk created in the previous steps.
Warning
The following instructions will cause the SecureAuth appliance to become unavailable. We recommend that you execute these steps during a scheduled service outage window to avoid unexpected downtime for users.
Stop Essential Services
1) Click the Start button.
2) In the search box type Cmd
3) Right-click the the Cmd entry in the search results list.
4) Select Run as Administrator from the contextual menu.
(You may be prompted for your credentials at this stage. If so go ahead and enter them as instructed.)
5) In the command prompt window type net stop w3svc and press Enter.
(You should receive the response "The World Wide Web Publishing Service was stopped successfully.")
6) In the command prompt window type net stop mssql$sqlexpress and press Enter.
(You should receive the response "The SQL Server <SQLEXPRESS> service was stopped successfully.")
7) In the command prompt window type net stop sqlwriter and press enter.
(You should receive the response "The SQL Server VSS Writer service was stopped successfully.")
8) Type Exit and press Enter to close the Command window.
Copy SecureAuth Files to the New Disk
1) Click Start → Computer
2) Double-click the D: drive so you can see its contents.
3) Press Ctrl-A to Select All files.
4) Right-click on one of the highlighted files\folders and choose "Copy" from the contextual menu.
5) Click Start → Computer
6) Double-click on the new drive you created so you can see its contents.
7) Right-click in the window you just opened and choose Paste from the contextual menu.
(Windows Explorer will now copy the files from D: to your new disk.)
SQL Express
If you are actively utilizing Microsoft SQL Server Express for reporting then we strongly recommend using the Roboccopy command below to copy the files. In some cases copying the files with File Explorer will not preserve necessary privileges on SQL Express directories. This will prevent the SQL Express service from starting after the expansion process is complete.
D:\ <DESTINATION>\ /XD $RECYCLE.BIN /XD "System Volume Information" /XD "RECYCLER" /MIR /SEC
Verify Essential Directories
There are two directories critical to SecureAuth operation. In the steps below we will verify that these directories were copied over in their entirety.
Verify the SecureAuth Directory
1) Click Start → Computer
2) Double-click the D: drive so you can see its contents.
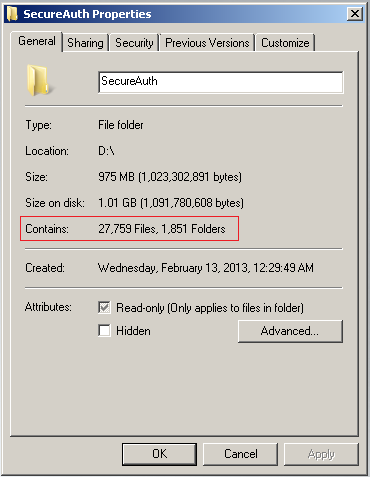
3) Locate the SecureAuth directory, right-click on it, and then choose Properties from the contextual menu.
4) In the Properties window make note of the File\Folder count in the Contains section.
 |
5) Click Start → Computer
6) Double-click on the new drive you created so you can see its contents.
7) Locate the SecureAuth directory, right-click on it, and then choose Properties from the contextual menu.
8) Compare the file\folder count with the SecureAuth directory from D:. They should both have the same number of files and folders listed. If they don't have the same number of files and folders then an error in the copy process has occurred. You should repeat the copy to correct this issue.
Verify the MFCApp_Bin Directory
1) Click Start → Computer
2) Double-click the D: drive so you can see its contents.
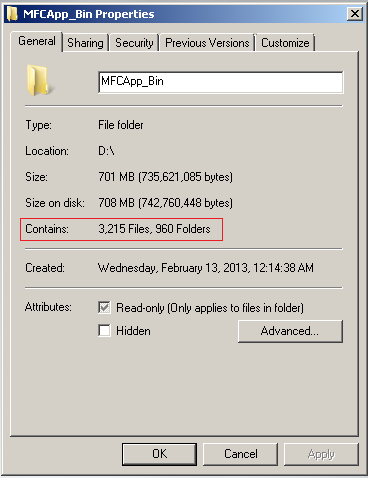
3) Locate the MFCApp_Bin directory, right-click on it, and then choose Properties from the contextual menu.
4) In the Properties window make note of the File\Folder count in the Contains section.
 |
5) Click Start → Computer
6) Double-click on the new drive you created so you can see its contents.
7) Locate the MFCApp_Bin directory, right-click on it, and then choose Properties from the contextual menu.
8) Compare the file\folder count with the MFCApp_Bin directory from D:. They should both have the same number of files and folders listed. If they don't have the same number of files and folders then an error in the copy process has occurred. You should repeat the copy to correct this issue.
Delete the D: Partition
Warning
This operation will delete the D: partition which contains the SecureAuth operational files. This process is irreversible and can not be undone! You should not proceed with these instructions until you have copied AND verified the files from D: as directed in the previous instructions.
If the Windows Page File (virtual memory) resides on this partition you will be unable to delete it. The page file must be moved to another volume and the appliance rebooted before you will be able to successfully delete. Please see the section Troubleshooting - Windows Page File Issue to learn how to workaround this problem.
1) Start → All Programs → Administration Tools → Server Manager
2) In the console tree, click Storage, and then click Disk Management.
3) Right-click the D: partition and then select Delete Volume from the contextual menu.
4) Click Yes to delete the partition.
Expand the C: Partition
Now that we have deleted the existing D: partition on Disk 0 we will want to expand the C: partition to occupy this now free space. Please follow the instructions below to increase the C: partition size.
1) Start → All Programs → Administration Tools → Server Manager
2) In the console tree, click Storage, and then click Disk Management.
3) Right-click on the C: partition and choose Extend Volume... from the contextual menu.
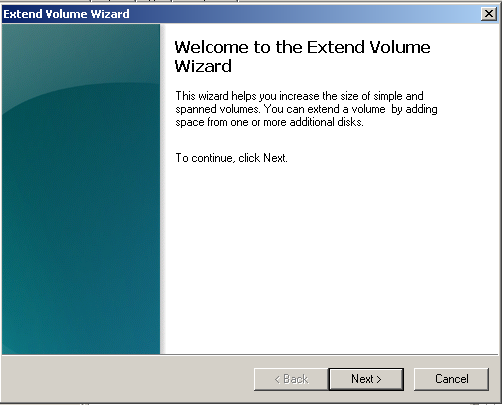
4) You will now be presented with the Extend Volume Wizard introduction screen, click Next > to continue.
 |
5) On the Select Disks step leave the default options in place and click the Next > button to continue.
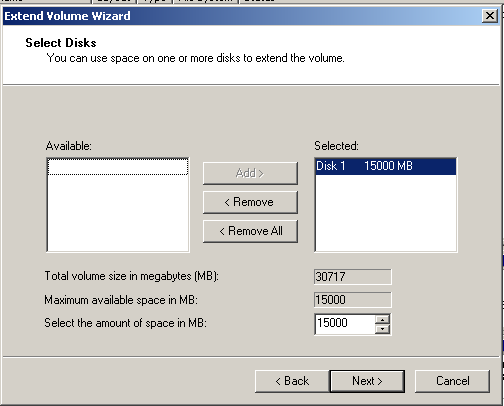 |
6) You will now be presented with the Completing the Extend Volume Wizard screen. Verify the options you have selected and if everything is correct click the Finish button to continue. If you notice an error click the < Back button to go back and change the incorrect setting(s).
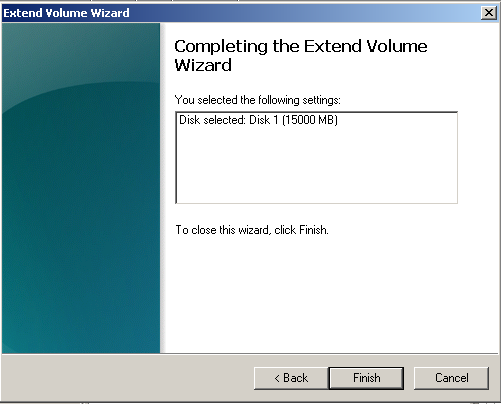 |
7) The C: partition will now be expanded to use all of Disk 0.
Change the Drive Letter
We must now assign your new disk the drive letter D: so that SecureAuth and other services will know to use it.
1) Start → All Programs → Administration Tools → Server Manager
2) In the console tree, click Storage, and then click Disk Management.
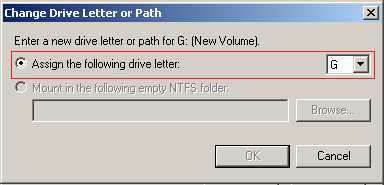
3)Right-click on your new drive, and then click Change Drive Letter and Paths.
4) Click the Change... button.
 |
5) Select D: from the drop down and then click the OK button.
 |
Reset File Permissions and Shares Utility
The Reset File Permissions and Shares utility will verify that all necessary privileges are assigned to the D:\SecureAuth directory and its subfolders. We want to run the script at this stage in case a necessary security privilege did not copy over properly from the D: partition.
1) Click Start → Computer
2) Navigate to D:\MFCApp_Bin\Extras
3) Right-click on Reset-File-Perms and choose Run as administrator from the contextual menu.
4) Below we will cover the prompts presented by the script. Depending on which version you are running some of them might not be shown.
a) Do you want to run this script on all realms or a specific realm (All or SecureAuth#)
Type "All" and press Enter
b) Has the Default Local "Administrator", "SecureAuth0" or "SVC-IISREPL01" accounts been renamed or replaced (Y/N):
If the accounts have not been renamed then choose "N" and press Enter. If one or more of your accounts have been changed then enter Y and press enter.
If you answered Y in the previous step then follow these directions c-e otherwise skip to step 5
c) What is your local Administrator account name?
If your local administrator account is still named "Administrator" then you can press Enter and continue. If the name has changed then you must enter it here in the format <machine name>\Account. Once you have entered the name press Enter to continue.
d) What account will be used for the Administration Application pool "SecureAuth0Pool"?
If your SecureAuth0Pool account is still named "SecureAuth0Pool" then you can press Enter and continue. If the name has changed then you must enter it here in the format <machine name>\Account. Once you have entered the name press Enter to continue.
e) What account will be used for the Appliance Synchronization Script?
If your SVC-IISREPL01 account is still named "SVC-IISREPL01" then you can press Enter and continue. If the name has changed then you must enter it here in the format <machine name>\Account. Once you have entered the name press Enter to continue.
5) The Reset File Permissions and Shares utility will now run. The command window will close when the process is complete.
Start Essential Services
Now that we have established the new D: drive we need to start SecureAuth (IIS) and supporting services.
1) Click the Start button.
2) In the search box type Cmd
3) Right-click the the Cmd entry in the search results list.
4) Select Run as Administrator from the contextual menu.
(You may be prompted for your credentials at this stage. If so go ahead and enter them as instructed.)
5) In the command prompt window type net start w3svc and press Enter.
(You should receive the response "The World Wide Web Publishing Service was started successfully.")
6) In the command prompt window type net start mssql$sqlexpress and press Enter.
(You should receive the response "The SQL Server <SQLEXPRESS> service was started successfully.")
7) In the command prompt window type net start sqlwriter and press enter.
(You should receive the response "The SQL Server VSS Writer service was started successfully.")
8) Type Exit and press Enter to close the Command window.
Verify SecureAuth Operation
The drive expansion process is complete. You should now access the SecureAuth administrative interface and verify everything is working properly. A realm should also be tested for proper operation before allowing users back onto the system.
Troubleshooting - Windows Page File Issue
Some customers have migrated their page file (virtual memory) from the C: to the D: partition to mitigate low disk space issues. This poses a problem for the disk expansion process as you can't delete the D: partition while the page file resides on it. Further since the C: partition is likely low on disk space moving it there is not an option either. The only solution would be to move the page file to the new disk so the partition can be deleted. Unfortunately the drive letter can't be changed on that volume due to the page files residing on it which is another critical step in the expansion process.
The instructions below will provide a workaround for this problem.
Move the Page File from D: to The New Volume
We will first move the Windows Page file from the D: partition to the recently added volume.
1) Open System by clicking the Start button right-clicking Computer, and then clicking Properties.
2)In the left pane, click Advanced system settings. If you're prompted for an administrator password or confirmation, type the password or provide confirmation.
3)On the Advanced tab, under Performance, click Settings.
4)Click the Advanced tab, and then, under Virtual memory, click Change.
5) Clear the Automatically manage paging file size for all drives check box.
6)Under Drive [Volume Label], click the new drive that you created.
7) Select the System managed size radio button and click the Set button.
8) Under Drive [Volume Label], select D:.
9) Select the No paging size radio button and click the Set button.
10) Click the OK button to confirm changes.
11) Click OK in the Performance Options and System Properties windows.
You will be asked to reboot the server to implement the changes, confirm the reboot so the changes can be finalized.
Delete the D: Partition
Now that the page file has been moved we can delete the D: partition.
Note
This operation will delete the D: partition which contains the SecureAuth operational files. This process is irreversible and can not be undone! Please make sure you have followed the directions in the section Migrate the Files before continuing with this operation.
1) Start → All Programs → Administration Tools → Server Manager
2) In the console tree, click Storage, and then click Disk Management.
3) Right-click the D: partition and then select Delete Volume from the contextual menu.
4) Click Yes to delete the partition.
Expand the C: Partition
Now that we have deleted the existing D: partition on Disk 0 we will want to expand the C: partition to occupy this now free space. Please follow the instructions below to increase the C: partition size.
1) Start → All Programs → Administration Tools → Server Manager
2) In the console tree, click Storage, and then click Disk Management.
3) Right-click on the C: partition and choose Extend Volume... from the contextual menu.
4) You will now be presented with the Extend Volume Wizard introduction screen, click Next > to continue.
|
5) On the Select Disks step leave the default options in place and click the Next > button to continue.
|
6) You will now be presented with the Completiting the Extend Volume Wizard screen. Verify the options you have selected and if everything is correct click the Finish button to continue. If you notice an error click the < Back button to go back and change the incorrect setting(s).
|
7) The C: partition will now be expanded to use all of Disk 0.
Move the Page File from the New Volume to C:
We now need to move the page file from the new volume to C:. Otherwise we will not be able to change its drive letter to D: so that SecureAuth and other services will recognize it.
1) Open System by clicking the Start button right-clicking Computer, and then clicking Properties.
2) In the left pane, click Advanced system settings. If you're prompted for an administrator password or confirmation, type the password or provide confirmation.
3) On the Advanced tab, under Performance, click Settings.
4) Click the Advanced tab, and then, under Virtual memory, click Change.
6) Under Drive [Volume Label], click the C: drive.
7) Select the System managed size radio button and click the Set button.
8) Under Drive [Volume Label], select the new volume:.
9) Select the No paging size radio button and click the Set button.
10) Click the OK button to confirm changes.
11) Click OK in the Performance Options and System Properties windows.
You will be asked to reboot the server to implement the changes, confirm the reboot so the changes can be finalized.
Change the Drive Letter
We must now assign your new disk the drive letter D: so that SecureAuth and other services will know to use it.
1) Start → All Programs → Administration Tools → Server Manager
2) In the console tree, click Storage, and then click Disk Management.
3)Right-click on your new drive, and then click Change Drive Letter and Paths.
4) Click the Change... button.
|
5) Select D: from the drop down and then click the OK button.
|
Finish the Expansion Process
You have now successfully worked around the page file issue. Locate the section Reset File Permissions and Shares Utility in these directions to continue with the drive expansion process.
Troubleshooting - SQL Express Issues
In certain cases, after copying the files through File Explorer, the SQL Express service will fail to start. In the event viewer you will see an entry containing the message OS Error: 5(Access is denied.) when the service tried to start. This error indicates required privileges were not preserved during the copy and the SQL Service is unable to access critical files. We offer two ways to resolve this issue, an automated tool and a manual process. Both options are documented below for your convenience. Should you have problems with any of the instructions below please contact SecureAuth support at +1 949.777.6959 option 2 or email support@secureauth.com for further assistance.
Automated Process
1) Download the SQLExpress Permission Fix utility to the SecureAuth appliance.
2) Extract the SQLExpress Permission Fix to D:\
3) In the file explorer navigate to the file D:\SQLExpress Permission Fix and launch the script.
4) Please review the legal terms and, if you agree, press any key to continue with the fix.
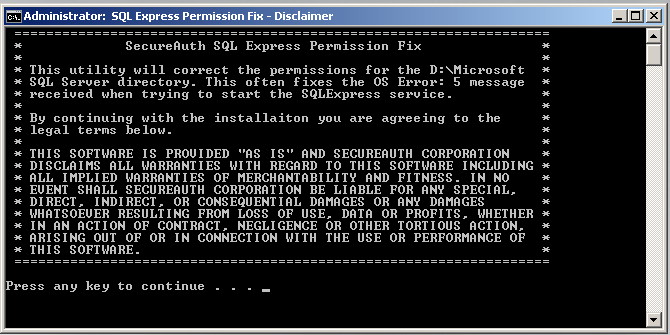 |
5) The script will now set the proper permissions in the D:\Microsoft SQL Express directory.
6) When the script is complete you will see the process complete screen below. Click any key to continue and the script will exit automatically.
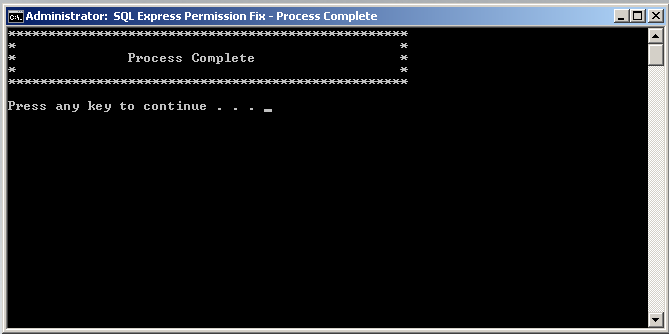 |
7) The SQL Express service should now be running and the issue resolved.
Manual Process
1) Navigate to the directory D:\Microsoft SQL Server\MSSQL11.SQLEXPRESS\MSSQL
a) Right-click on the folder and choose Properties, then click on the Security tab, in the Security tab click the Edit button.
c) Click the Add button and enter the following NT SERVICE\MSSQL$SQLEXPRESS.
d) Click the Check Names button and the name should shrink to MSSQL$SQLEXPRESS.
e) Click the OK button to dismiss the dialog.
f) In the Permissions for MSSQL window ALLOW the following and click the OK button.
Read and Execute
List folder contents
Read
g) Click the OK button to confirm your changes.
2) Navigate to the directory D:\Microsoft SQL Server\MSSQL11.SQLEXPRESS\MSSQL\Backup
a) Right-click on the folder and choose Properties, then click on the Security tab, in the Security tab click the Edit button.
c) Click the Add button and enter the following NT SERVICE\MSSQL$SQLEXPRESS.
d) Click the Check Names button and the name should shrink to MSSQL$SQLEXPRESS.
e) Click the OK button to dismiss the dialog.
f) In the Permissions for Backup window ALLOW the following and click the OK button.
Full Control
g) Click the OK button to confirm your changes.
3) Navigate to the directory D:\Microsoft SQL Server\MSSQL11.SQLEXPRESS\MSSQL\Binn
a) Right-click on the folder and choose Properties, then click on the Security tab, in the Security tab click the Edit button.
c) Click the Add button and enter the following NT SERVICE\MSSQL$SQLEXPRESS.
d) Click the Check Names button and the name should shrink to MSSQL$SQLEXPRESS.
e) Click the OK button to dismiss the dialog.
f) In the Permissions for Binn window ALLOW the following and click the OK button.
Read and Execute
List folder contents
Read
g) Click the OK button to confirm your changes.
4) Navigate to the directory D:\Microsoft SQL Server\MSSQL11.SQLEXPRESS\MSSQL\DATA
a) Right-click on the folder and choose Properties, then click on the Security tab, in the Security tab click the Edit button.
c) Click the Add button and enter the following NT SERVICE\MSSQL$SQLEXPRESS.
d) Click the Check Names button and the name should shrink to MSSQL$SQLEXPRESS.
e) Click the OK button to dismiss the dialog.
f) In the Permissions for DATA window ALLOW the following and click the OK button.
Full Control
g) Click the OK button to confirm your changes.
5) Navigate to the directory D:\Microsoft SQL Server\MSSQL11.SQLEXPRESS\MSSQL\Install
a) Right-click on the folder and choose Properties, then click on the Security tab, in the Security tab click the Edit button.
c) Click the Add button and enter the following NT SERVICE\MSSQL$SQLEXPRESS.
d) Click the Check Names button and the name should shrink to MSSQL$SQLEXPRESS.
e) Click the OK button to dismiss the dialog.
f) In the Permissions for Install window ALLOW the following and click the OK button.
Read and Execute
List folder contents
Read
g) Click the OK button to confirm your changes.
6) Navigate to the directory D:\Microsoft SQL Server\MSSQL11.SQLEXPRESS\MSSQL\JOBS
a) Right-click on the folder and choose Properties, then click on the Security tab, in the Security tab click the Edit button.
c) Click the Add button and enter the following NT SERVICE\MSSQL$SQLEXPRESS.
d) Click the Check Names button and the name should shrink to MSSQL$SQLEXPRESS.
e) Click the OK button to dismiss the dialog.
f) In the Permissions for JOBS window ALLOW the following and click the OK button.
Full Control
g) Click the OK button to confirm your changes.
7) Navigate to the directory D:\Microsoft SQL Server\MSSQL11.SQLEXPRESS\MSSQL\Log
a) Right-click on the folder and choose Properties, then click on the Security tab, in the Security tab click the Edit button.
c) Click the Add button and enter the following NT SERVICE\MSSQL$SQLEXPRESS.
d) Click the Check Names button and the name should shrink to MSSQL$SQLEXPRESS.
e) Click the OK button to dismiss the dialog.
f) In the Permissions for Log window ALLOW the following and click the OK button.
Full Control
g) Click the OK button to confirm your changes.
8) Navigate to the directory D:\Microsoft SQL Server\MSSQL11.SQLEXPRESS\MSSQL\Template Data
a) Right-click on the folder and choose Properties, then click on the Security tab, in the Security tab click the Edit button.
c) Click the Add button and enter the following NT SERVICE\MSSQL$SQLEXPRESS.
d) Click the Check Names button and the name should shrink to MSSQL$SQLEXPRESS.
e) Click the OK button to dismiss the dialog.
f) In the Permissions for Template Data window ALLOW the following and click the OK button.
Full Control
g) Click the OK button to confirm your changes.