iOS Exchange Provision Configuration Guide
Introduction
Use this guide to enable the provisioning of end-users' iOS devices to access Microsoft Exchange without requiring the Exchange password or manual setup.
Prerequisites
1. Ensure the device is running iOS v5.0+
2. Procure a Microsoft Exchange account
3. Set up a directory Service Account with read access for SecureAuth IdP
4. Create a New Realm for the iOS Exchange Provision in the SecureAuth IdP Web Admin
5. Configure the following tabs in the Web Admin before configuring the Post Authentication tab:
Overview – the description of the realm and SMTP connections must be defined
Data – an enterprise directory must be integrated with SecureAuth IdP
Workflow – the way in which users will access this application must be defined
Multi-Factor Methods – the Multi-Factor Authentication methods that will be used to access this page (if any) must be defined
iOS Configuration Steps
1. Download the Apple Configurator from Apple
Apple Configurator
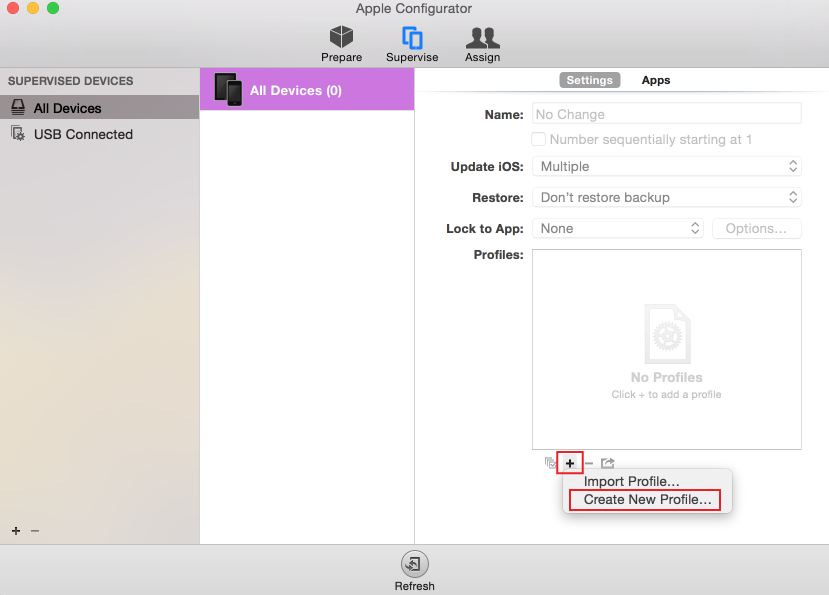 |
2. In the Supervise section under Settings, click the + button, and select Create New Profile...
General
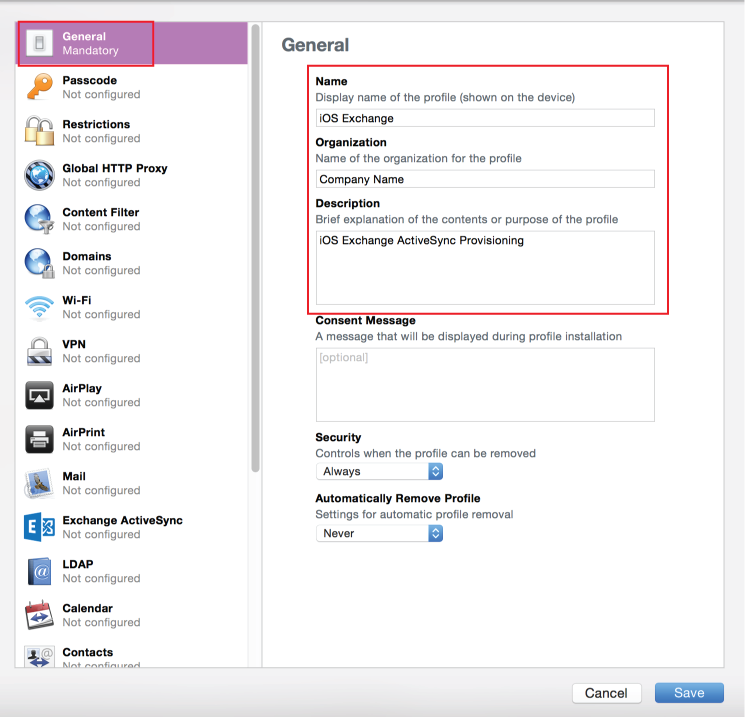 |
3. In the General section, provide a Name for the profile, e.g. iOS Exchange
4. Set the Organization, Description, and Consent Message fields to preferred values
Exchange ActiveSync
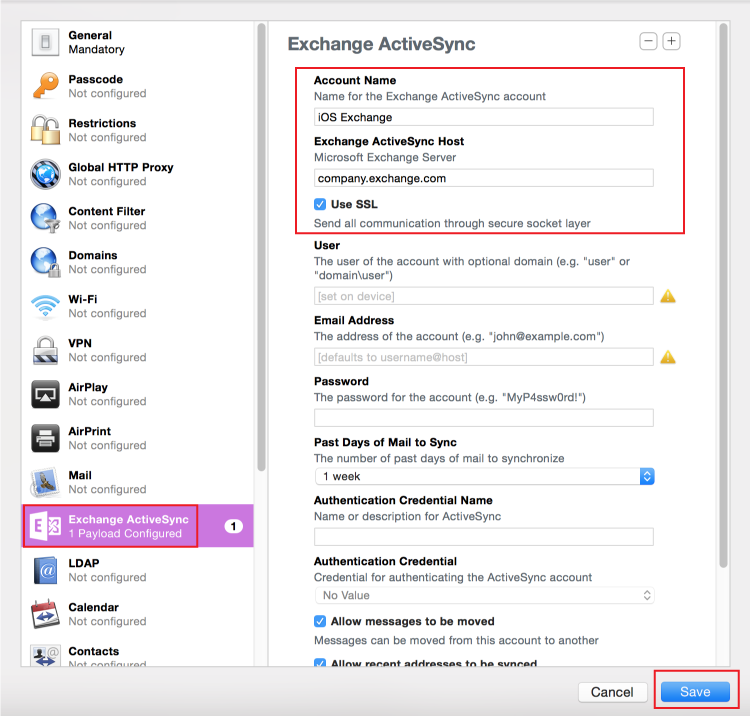 |
5. In the Exchange ActiveSync section, provide an Account Name for the Exchange ActiveSync account, e.g. iOS Exchange
6. Set the Exchange ActiveSync Host to the Exchange Fully Qualified Domain Name (FQDN), e.g. company.exchange.com
7. Check the Use SSL box
Note
Leave the remaining fields blank as they will be automatically populated during the provisioning process
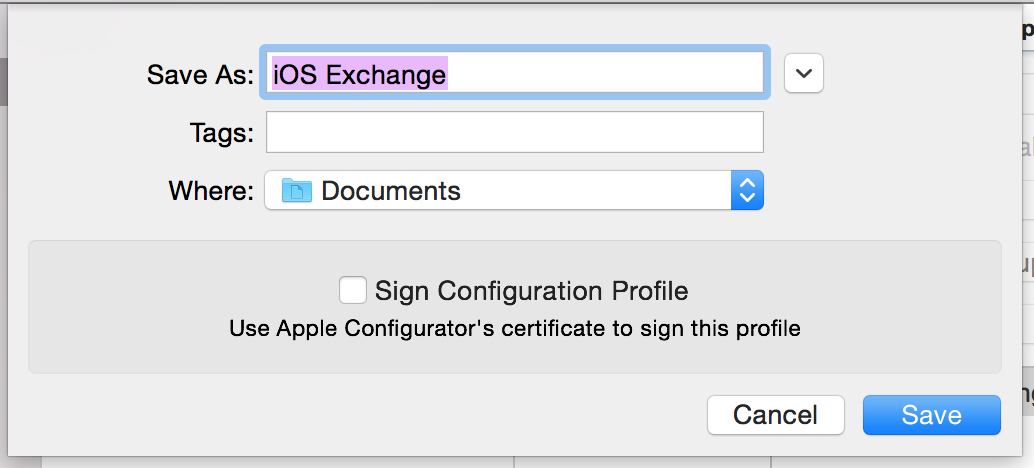
8. Click Save
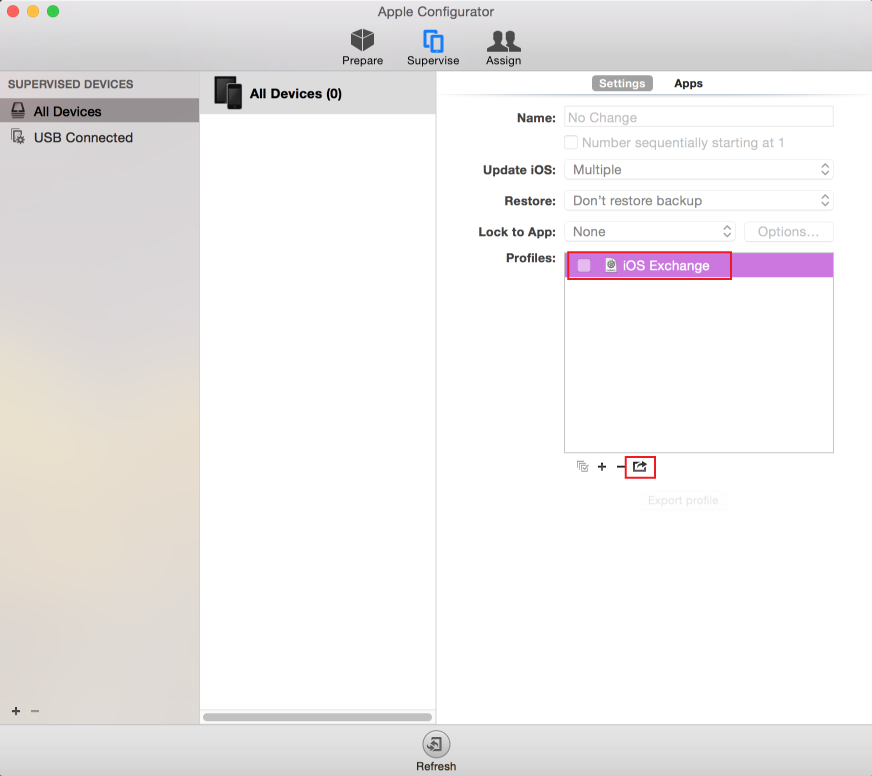 |
9. Select the new profile (iOS Exchange) from the Profiles field, and Export the profile
10. Uncheck the Sign Configuration Profile option
11. Save the iOS Exchange Profile as a .mobileconfig template file
SecureAuth IdP Configuration Steps
Data
 |
Note
This step is for Active Directory data stores only; if using different directory, the values will need to be mapped appropriately in the data store
1. In the Profile Fields section, map the userPrincipalName (UPN) to the SecureAuth IdP Property, e.g. Aux ID 1
2. Map the distinguishedName (DN) to the SecureAuth IdP Property, e.g Aux ID 12
Warning
Click Save once the configurations have been completed and before leaving the Data page to avoid losing changes
Post Authentication
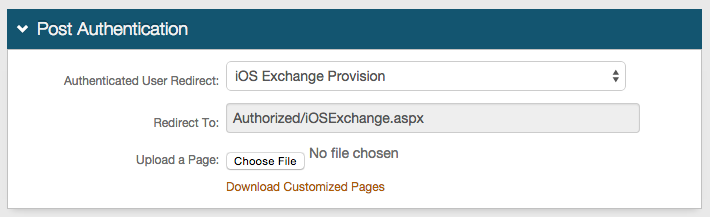 |
3. Select iOS Exchange Provision from the Authenticated User Redirect dropdown in the Post Authentication tab in the Web Admin
4. An unalterable URL will be auto-populated in the Redirect To field, which will append to the domain name and realm number in the address bar (Authorized/iOSExchange.aspx)
User ID Mapping
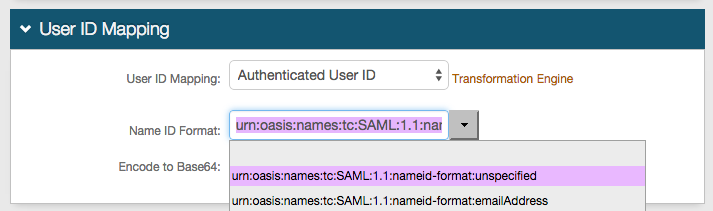 |
5. Select Authenticated User ID from the User ID Mapping dropdown
iPhone / Android
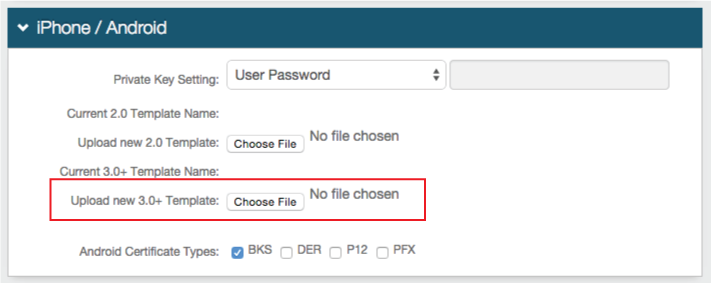 |
6. Click Choose File to upload the 3.0 Template, and select the iOS Exchange Profile file from the iOS Configuration Steps
iOS Profile Provision for Microsoft Exchange
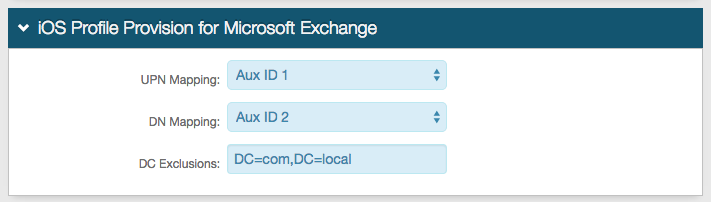 |
7. Select Aux ID 1 (or the Property to which the userPrincipalName is mapped) from the UPN Mapping dropdown
8. Select Aux ID 2 (or the Property to which the distinguishedName is mapped) from the DN Mapping dropdown
9. Provide any DC Exclusions to simplify the user ID, e.g. DC=com,DC=local, making the user ID domain/username
Warning
Click Save once the configurations have been completed and before leaving the Post Authentication page to avoid losing changes
Forms Auth / SSO Token
 |
10. Click View and Configure FormsAuth keys / SSO token to configure the token/cookie settings and to configure this realm for Single Sign-on (SSO)
These are optional configurations
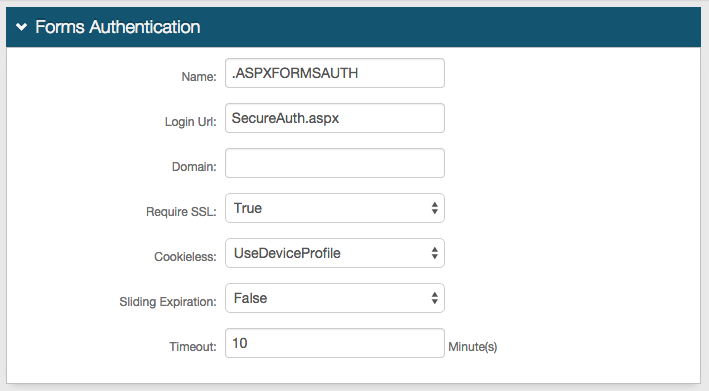 |
1. If SSL is required to view the token, select True from the Require SSL dropdown
2. Choose whether SecureAuth IdP will deliver the token in a cookie to the user's browser or device:
UseCookies enables SecureAuth IdP to always deliver a cookie
UseUri disables SecureAuth IdP to deliver a cookie, and instead deliver the token in a query string
AutoDetect enables SecureAuth IdP to deliver a cookie if the user's settings allow it
UseDeviceProfile enables SecureAuth IdP to deliver a cookie if the browser's settings allow it, no matter the user's settings
3. Set the Sliding Expiration to True if the cookie remains valid as long as the user is interacting with the page
4. Set the Timeout length to determine for how many minutes a cookie is valid
Note
No configuration is required for the Name, Login URL, or Domain fields
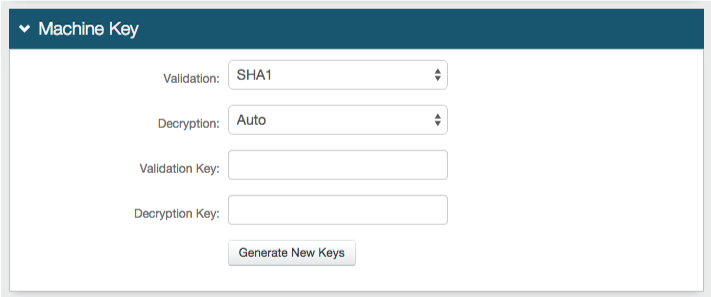 |
5. No changes are required in the Validation field, unless the default value does not match the company's requirement
If a different value is required, select it from the dropdown
6. No changes are required in the Decryption field, unless the default value does not match the company's requirement
If a different value is required, select it from the dropdown
Note
No configuration is required for the Validation Key or Decryption Key fields
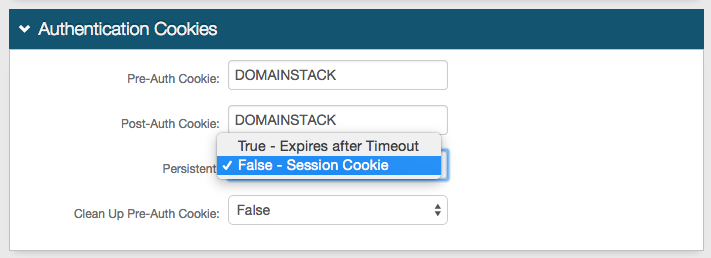 |
7. Enable the cookie to be Persistent by selecting True - Expires after Timeout from the dropdown
Selecting False - Session Cookie enables the cookie to be valid as long as the session is open, and will expire once the browser is closed or the session expires
Note
No configuration is required for the Pre-Auth Cookie, Post-Auth Cookie, or the Clean Up Pre-Auth Cookie fields
Warning
Click Save once the configurations have been completed and before leaving the Forms Auth / SSO Token page to avoid losing changes