G Suite (SP-initiated) Integration Guide
Introduction
Use this guide to enable Service Provider (SP)-initiated Multi-Factor Authentication and Single Sign-on (SSO) access via SAML to G Suite (formerly Google Apps).
For SecureAuth IdP-initiated access, refer to G Suite (IdP-initiated) Integration Guide
Prerequisites
Disclaimer: Enabling Single Sign On (SSO) for G Suite will redirect all users to SecureAuth for authentication. Users who are G Suite Super Administrators can bypass SSO by going directly to https://admin.google.com. Assigning Super Administrators role for select users is recommended in the event of any failures.
1. Have a G Suite account
2. Create a New Realm for the G Suite integration
3. Configure the following tabs in the Web Admin before configuring the Post Authentication tab:
Overview – the description of the realm and SMTP connections must be defined
Data – an enterprise directory must be integrated with SecureAuth IdP
Workflow – the way in which users will access this application must be defined
Multi-Factor Methods – the Multi-Factor Authentication methods that will be used to access this page (if any) must be defined
SecureAuth IdP Configuration Steps
Data
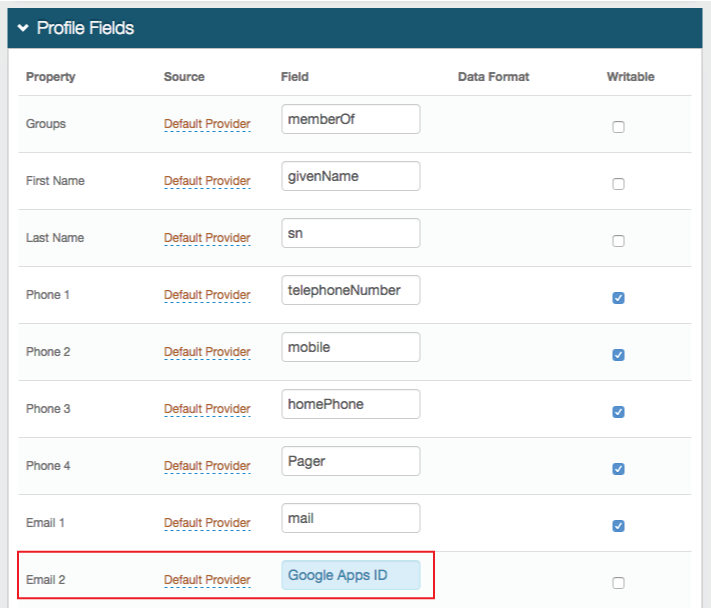 |
1. In the Profile Fields section, map the directory field that contains the user's G Suite ID to the SecureAuth IdP Property
For example, add the G Suite ID Field to the Email 2 Property if it is not already contained somewhere else
Tip
Be sure that the G Suite ID includes the domain name, e.g. user@company.com
Warning
Click Save once the configurations have been completed and before leaving the Data page to avoid losing changes
Post Authentication
 |
2. Select SAML 2.0 (SP Initiated) Assertion Page from the Authenticated User Redirect dropdown in the Post Authentication tab in the Web Admin
3. An unalterable URL is auto-populated in the Redirect To field, which appends to the domain name and realm number in the address bar (Authorized/SAML20SPInit.aspx)
User ID Mapping
 |
4. Select the SecureAuth IdP Property that corresponds to the directory field that contains the G Suite ID (Email 2)
5. Select urn:oasis:names:tc:SAML:1.1:nameid-format:unspecified from the Name ID Format dropdown (default)
Select a different option if G Suite requires it, which the SP provides
6. Select False from the Encode to Base64 dropdown
SAML Assertion / WS Federation
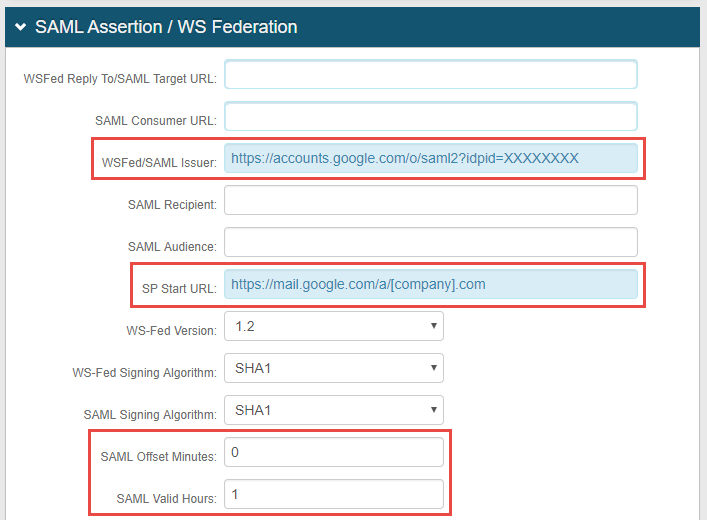 |
7. Set the WSFed/SAML Issuer to the Entity ID value from the Google Admin Console (G Suite Configuration Steps, step 3), e.g. https://accounts.google.com/o/saml2?idpid=12345678
8. Provide the SP Start URL to enable SSO and to redirect users appropriately to access G Suite
For example, the SP Start URL would be https://mail.google.com/a/[company].com
9. Set the SAML Offset Minutes to make up for time differences between devices
10. Set the SAML Valid Hours to limit for how long the SAML assertion is valid
Notice
No configuration is required for the WSFed Reply To/SAML Target URL, SAML Consumer URL, SAML Recipient, or SAML Audience fields
 |
11. Leave the Signing Cert Serial Number as the default value, unless there is a third-party certificate being used for the SAML assertion
If using a third-party certificate, then click Select Certificate and choose the appropriate certificate
12. Download the Assertion Signing Certificate, which is used in the G Suite Configuration Steps
13. Provide the Domain in order to Download the Metadata File to send to G Suite (if required)
Google Apps Functions
Note
These are optional configurations to enable certain, built-in Google Apps functions
To use these features, G Suite must be configured appropriately
Refer to G Suite Provisioning Configuration Guide for more information
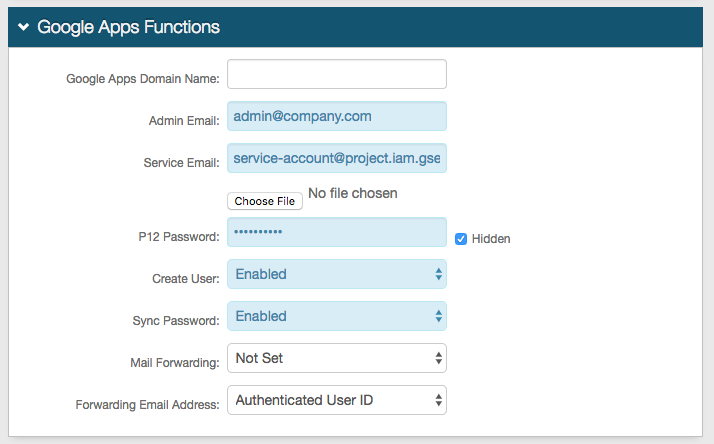 |
14. Leave the Google Apps Domain Name field blank
15. Set the Admin Email to the G Suite Administrative email account
16. Set the Service Email to the Service Account email address obtained from the G Suite Provisioning Guide (step 18)
17. Click Choose File and select the p12 File obtained in the G Suite Provisioning Guide (step 12)
18. Set the P12 Password to the Private Key Password obtained in the G Suite Provisioning Guide (step 12)
19. Select Enabled from the Create User dropdown if SecureAuth IdP is to automatically create the G Suite user account (if it does not already exist)
20. Select Enabled from the Sync Password dropdown if SecureAuth IdP is to conduct a one-way synchronization of the user's directory password to G Suite
To synchronize on specific dates versus every time the password changes, map a directory field to the Ext. Sync Pwd Date property in the Data tab
If no field is mapped, then the password synchronizes every time
Tip
G Suite requires passwords with a minimum of 8 characters
21. Select Enabled from the Mail Forwarding dropdown if another email address is to receive messages; select Disabled to disable the feature; or select Not Set if SecureAuth IdP is to not be included in this feature
22. Select the Profile Field that contains the user's Forwarding Email Address
Warning
Click Save once the configurations have been completed and before leaving the Post Authentication page to avoid losing changes
Forms Auth / SSO Token
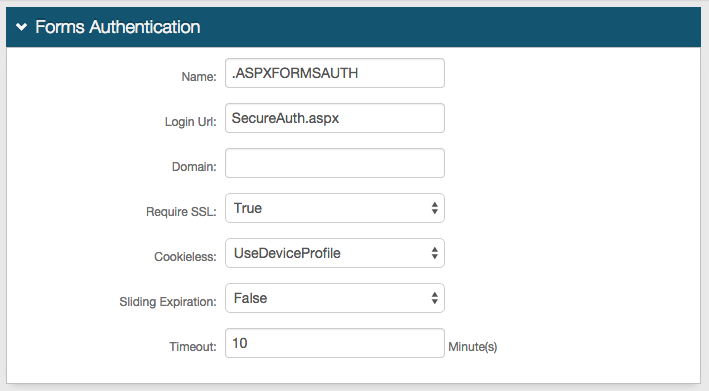
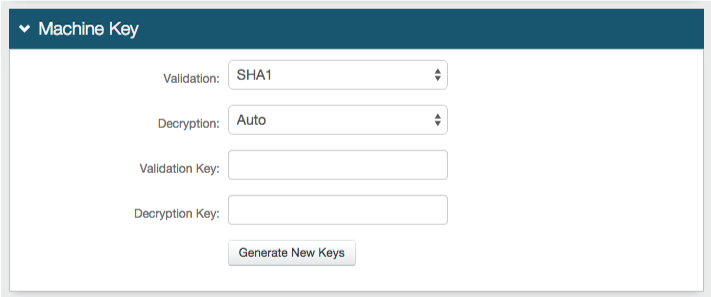
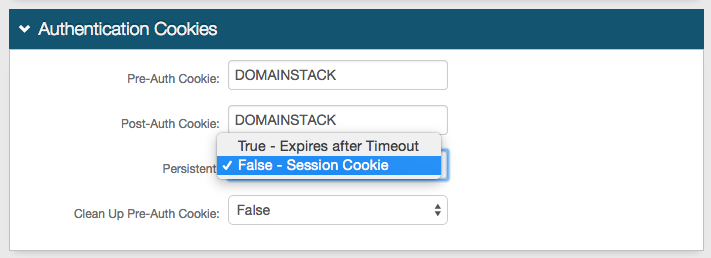
Optionally, in the Forms Auth / SSO Token section, click the View and Configure FormsAuth keys/SSO token link to configure the token/cookie settings and configure this realm for SSO.
 |
Google Apps Configuration Steps
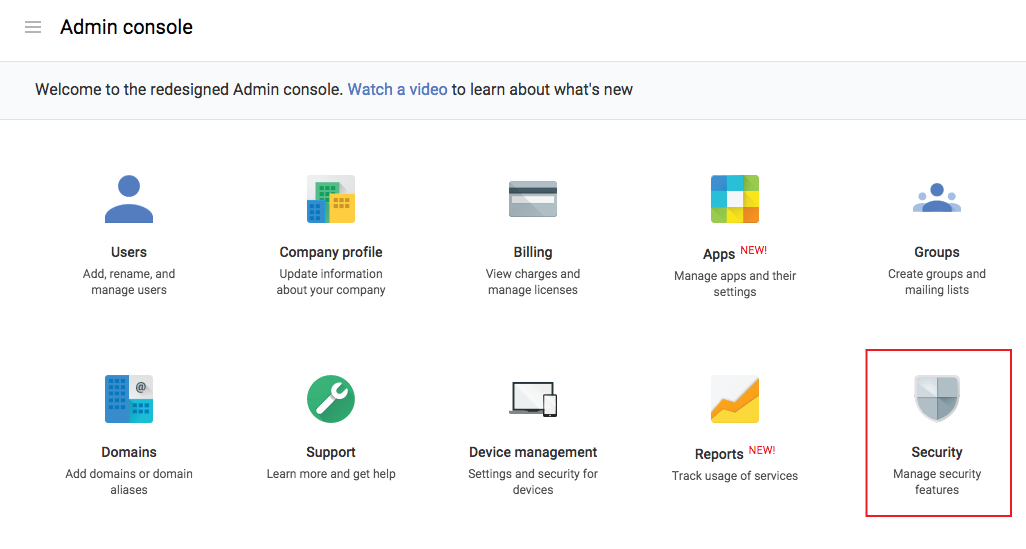 |
1. Log into the G Suite Admin Console
2. Select Security, then click Set up single sign-on (SSO)
Security
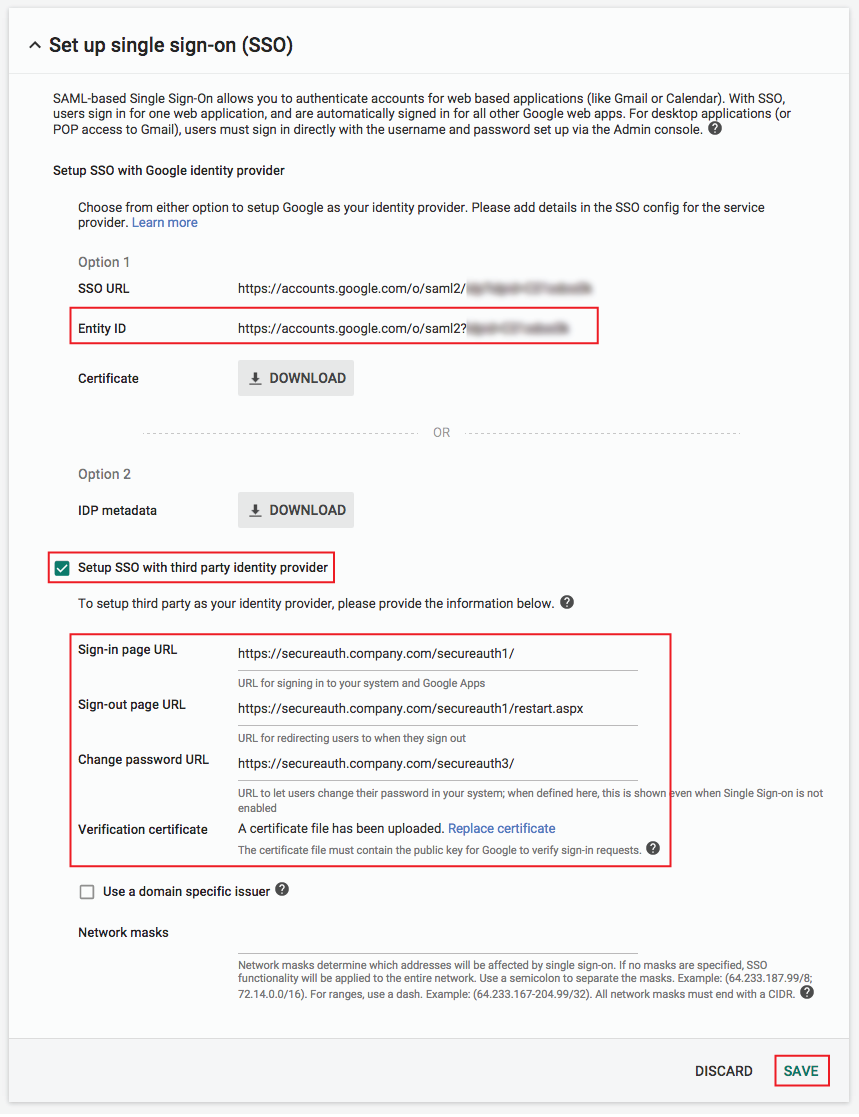 |
3. Note the Entity ID value at the top, as it is required in the SecureAuth IdP Configuration Steps (step 7)
4. Check Setup SSO with third party identity provider
5. Set the Sign-in page URL to the Fully Qualified Domain Name (FQDN) of the SecureAuth IdP appliance, followed by the Google integration realm number, e.g. https://secureauth.company.com/secureauth1/
6. Set the Sign-out page URL to the FQDN of the SecureAuth IdP appliance, followed by the Google integration realm number, and /logout.aspx, e.g. https://secureauth.company.com/secureauth1/logout.aspx
7. Set the Change password URL to the FQDN of the SecureAuth IdP appliance, followed by the Self-service Password Reset realm number (if created), e.g. https://secureauth.company.com/secureauth3/
Follow the Reset Password Configuration Guide to create this realm
7. Upload the Assertion Signing Certificate from the SecureAuth IdP Web Admin (step 12)
8. Click Save Changes
Troubleshooting
Message from Google
G Suite - This service cannot be accessed because your login credentials are not yet valid. Please log in and try again.
This service cannot be accessed because your login credentials are not yet valid. Please log in and try again. We are unable to process your request at this time, please try again later.
Possible Cause
The time between the SecureAuth IdP Appliance and G Suite exceeds the allowable validity period for the credentials
SecureAuth IdP Solution
Post Authentication
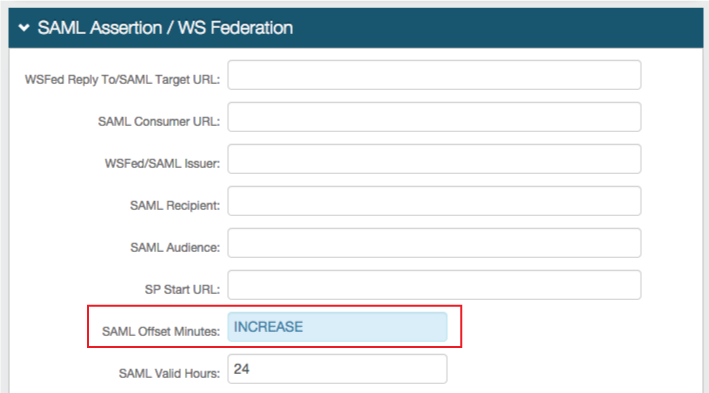 |
In the SAML Assertion / WS Federation section, increase the SAML Offset Minutes to make up for any time difference
Warning
Click Save once the configurations have been completed and before leaving the Post Authentication page to avoid losing changes
