Citrix StoreFront 3.9 (SP-initiated) Integration Guide
Introduction
Use this guide to enable Multi-Factor Authentication and Single Sign-on (SSO) access via SAML to Citrix StoreFront 3.9.
Prerequisites
1. Have Citrix StoreFront 3.9
2. Create a New Realm for the Citrix StoreFront integration in the SecureAuth IdP Web Admin v9.1+
3. Configure the following tabs in the Web Admin before configuring the Post Authentication tab:
Overview– the description of the realm and SMTP connections must be defined
Data– an enterprise directory must be integrated with SecureAuth IdP
Workflow– the way in which users will access this application must be defined
Multi-Factor Methods– the Multi-Factor Authentication methods that will be used to access this page (if any) must be defined
Web Admin Configuration Steps
Data
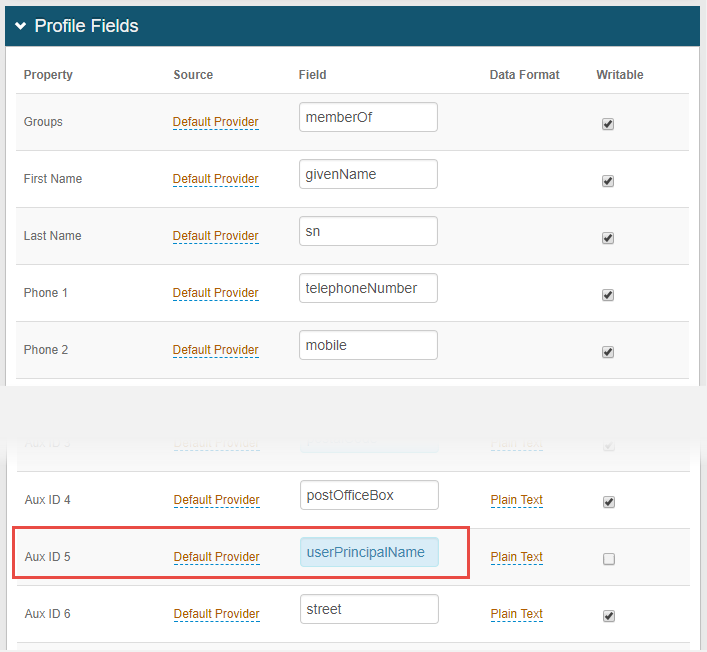 |
1. In the Profile Fields section on the Data tab, map the UPN attribute (userPrincipalName) to an available Property – e.g. Aux ID 5 is selected in this example
Warning
Click Save once the configuration has been completed and before leaving the Data page to avoid losing changes
Post Authentication
Post Authentication
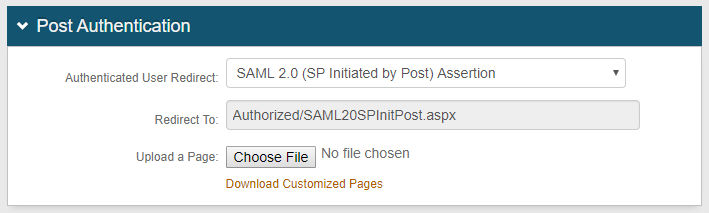 |
2. Select SAML 2.0 (SP Initiated by Post) Assertion from the Authenticated User Redirect dropdown
The unalterable Authorized/SAML20SPInitPost.aspx URL appears in the Redirect To field – this URL will append to the domain name and realm number in the address bar
User ID Mapping
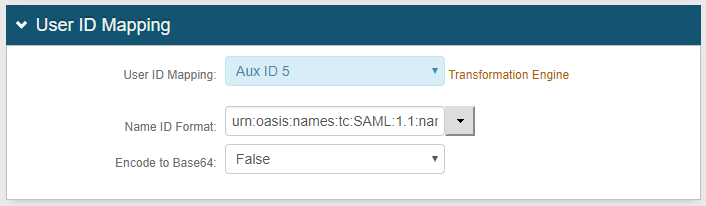 |
3. Select the Property from the User ID Mapping dropdown – this is the Property to which the Profile Field containing the UPN attribute was mapped in step 1 (in this example, Aux ID 5)
4. Select urn:oasis:names:tc:SAML:1.1:nameid-format:unspecified from the Name ID Format dropdown (default)
Or select a different option – if Citrix requires it – provided by the Service Provider (SP)
5. Select False from the Encode to Base64 dropdown
SAML Assertion / WS Federation
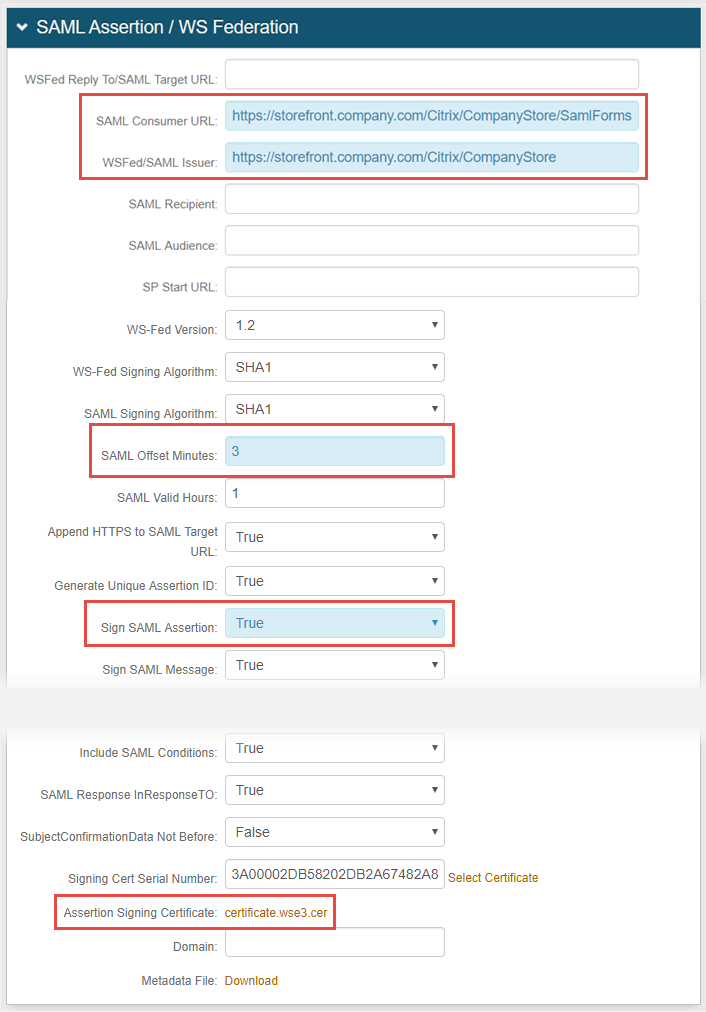 |
6. Set SAML Consumer URL to the same value configured on the Citrix Metadata file for the AssertionConsumerService Binding – e.g. https://storefront.company.com/Citrix/CompanyStore/SamlForms/AssertionConsumerService
See directions for downloading the StoreFront metadata file in the Citrix StoreFront Configuration Steps below
7. Set WSFed / SAML Issuer URL to the EntityID configured on the Citriux StoreFront Metadata file – e.g. https://storefront.company.com/Citrix/CompanyStore
8. Set the SAML Offset Minutes to compensate for differences in the time set on the devices
9. Set the SAML Valid Hours to limit the length of time for which the SAML assertion is valid
10. Set Sign SAML Assertion to True
11. Download the Assertion Signing Certificate, export it as Base64, and store it on a local PC to be used by Citrix StoreFront
Warning
Click Save once the configuration has been completed and before leaving the Post Authentication page to avoid losing changes
Citrix StoreFront Configuration Steps
 |
1. Start Citrix StoreFront
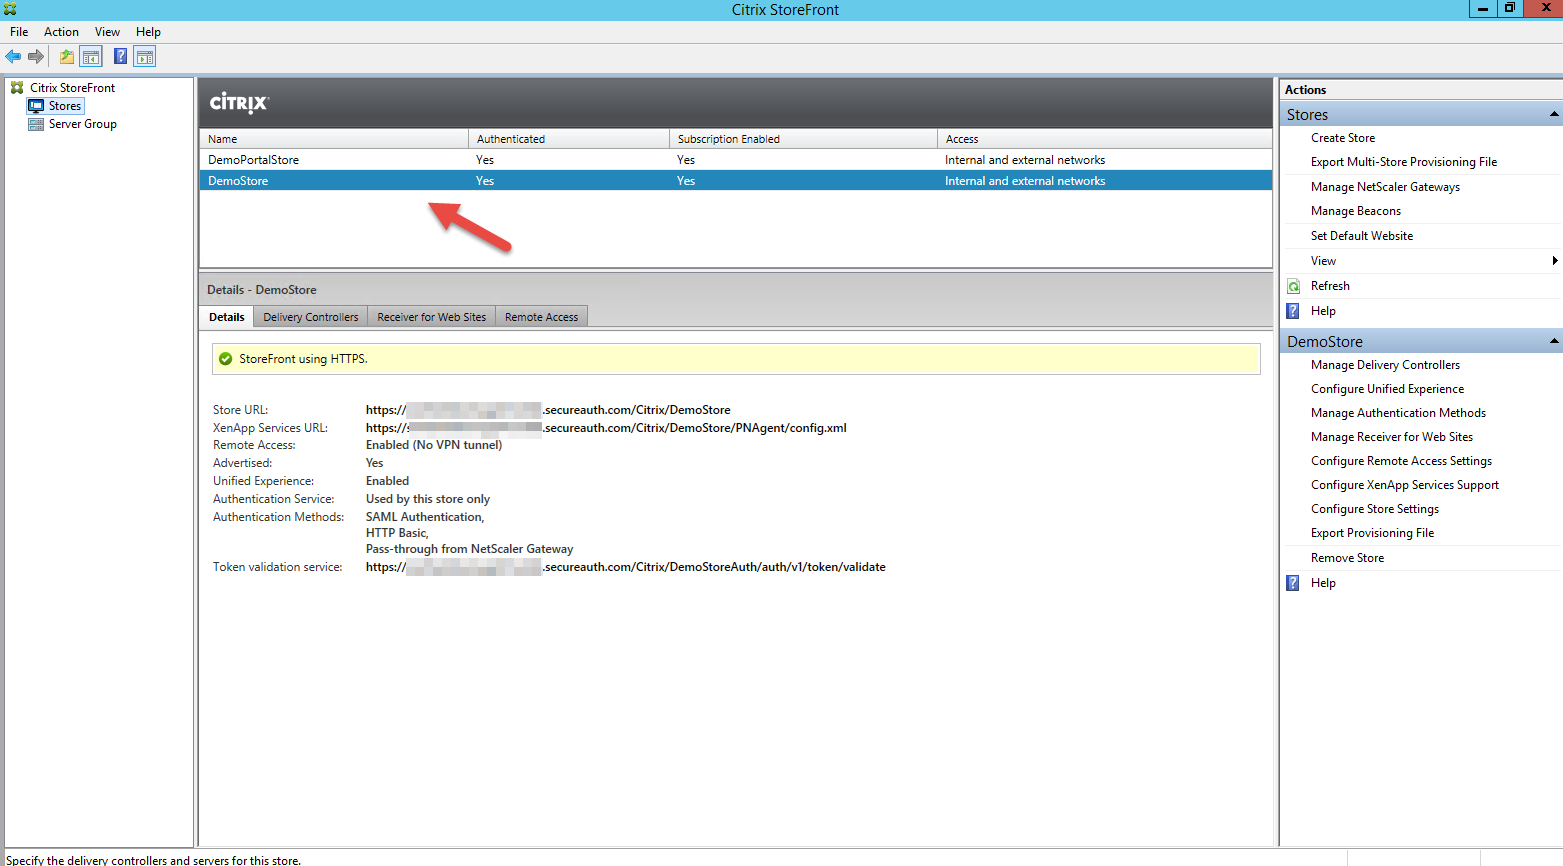
2. Select Stores from the Citrix StoreFront tree menu on the left pane
3. On the middle pane, select the store to be configured
Details appear on the pane below
 |
4. Select Manage Authentication Methods on the Actions pane to the right
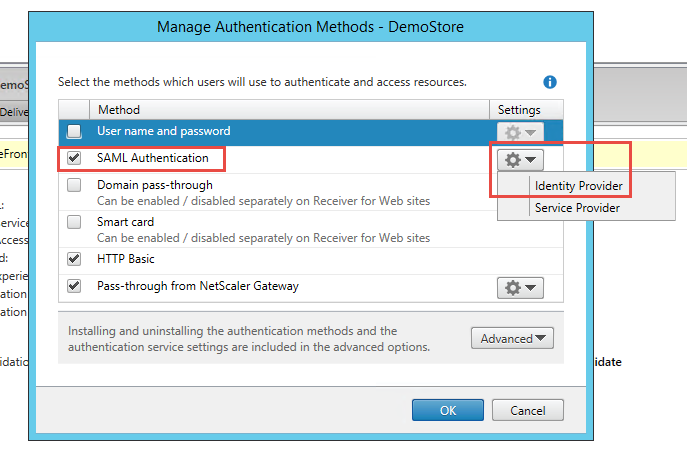 |
5. In the Manage Authentication Method s window, enable the SAML Authentication Method
6. Click the gear icon – located under Settings for SAML Authentication – and select Identity Provider
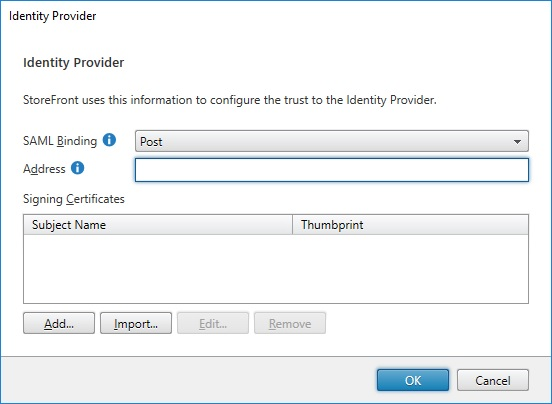 |
7. Select Post from the SAML Binding dropdown to specify how StoreFront initiates the SAML flow with SecureAuth IdP
8. In the Address field, enter the redirect URL – the SecureAuth IdP appliance's Fully Qualified Domain Name (FQDN) – which will be used to send the initial request, and append the Citrix-integrated realm followed by /secureauth.aspx
-- e.g. https://secureauth.company.com/secureauth2/secureauth.aspx
9. Click Import to import the assertion signing certificate downloaded from the SecureAuth IdP realm in step 11 of the SecureAuth IdP Configuration Steps
10. Click OK
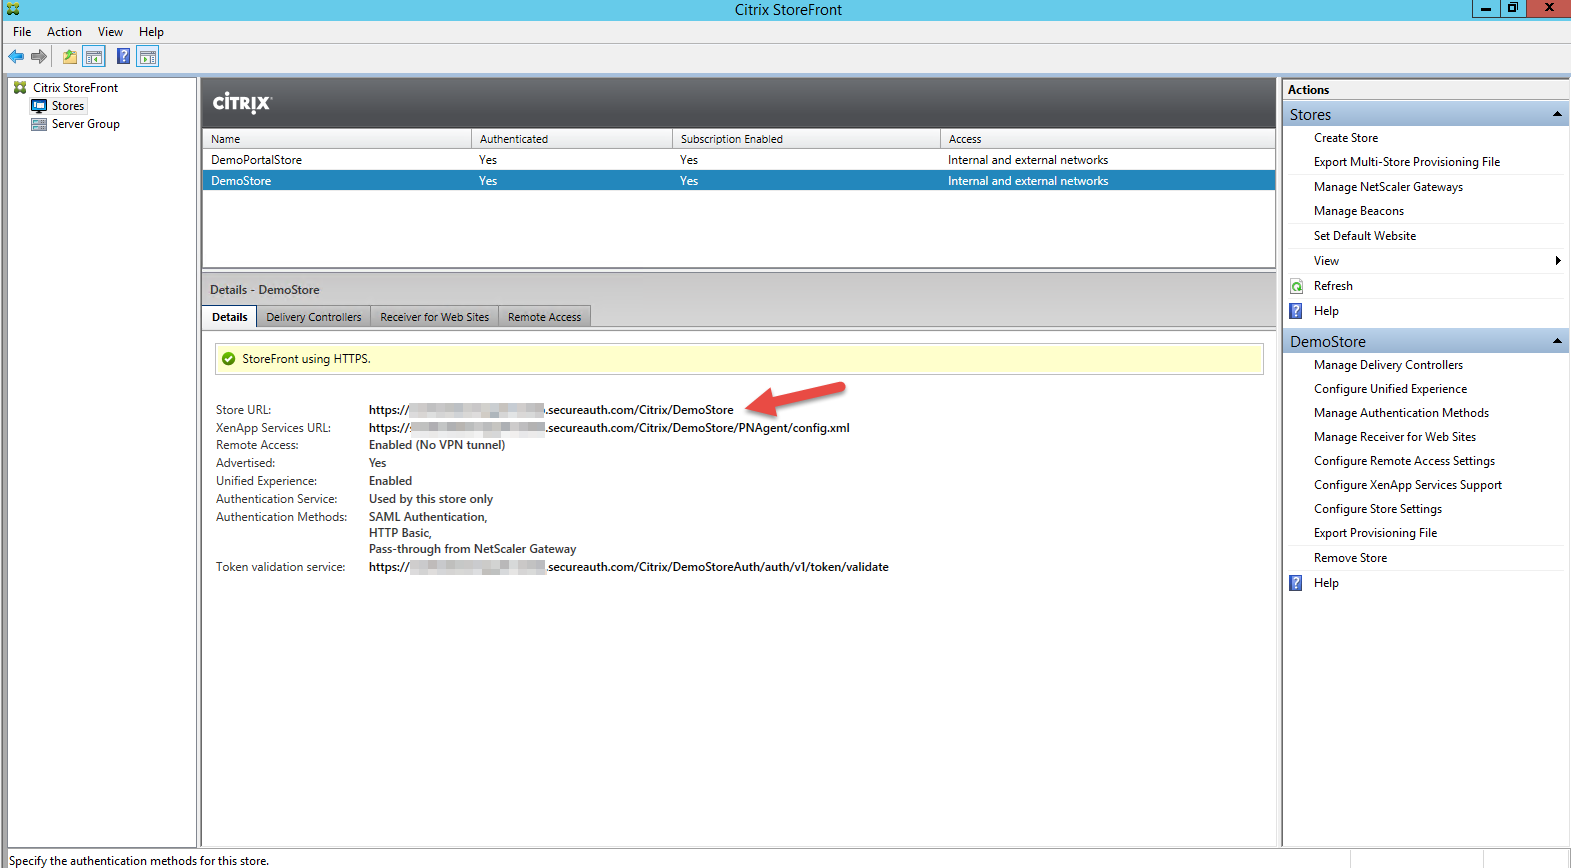 |
11. Locate the Store URL on the Details pane
12. Copy this URL and paste it in a browser address bar with Citrix/NAMEofStoreFrontAuth/SamlForms/serviceprovider/Metadata appended after the URL
-- e.g. https://storefront.company.com/Citrix/CompanyStoreAuth/SamlForms/serviceprovider/Metadata
13. Download the metadata file
Note the values for EntityID and AssertionConsumerService Binding appear in this file – these can be used in the SecureAuth IdP configuration