Juniper IVE Single Sign-on Configuration Guide (SAML)
Introduction
Use this guide to enable Single Sign-on (SSO) access via SAML to Juniper IVE VPN.
Note
These SSO configurations are only necessary when SecureAuth IdP handles the username and second factor, and Juniper IVE handles the user's password before assertion
Prerequisites
1. Have Juniper IVE 6.3 or higher
2. Create a New Realm or access the current realm for the Juniper IVE integration in the SecureAuth IdP Web Admin
3. The realm's configurations on the Overview, Data, and Multi-Factor Methods tabs should be completed before configuring the Workflow tab
See the specific Juniper IVE Integration Guide to configure the Post Authentication tab and the Juniper IVE server
SecureAuth IdP Configuration Steps
Workflow
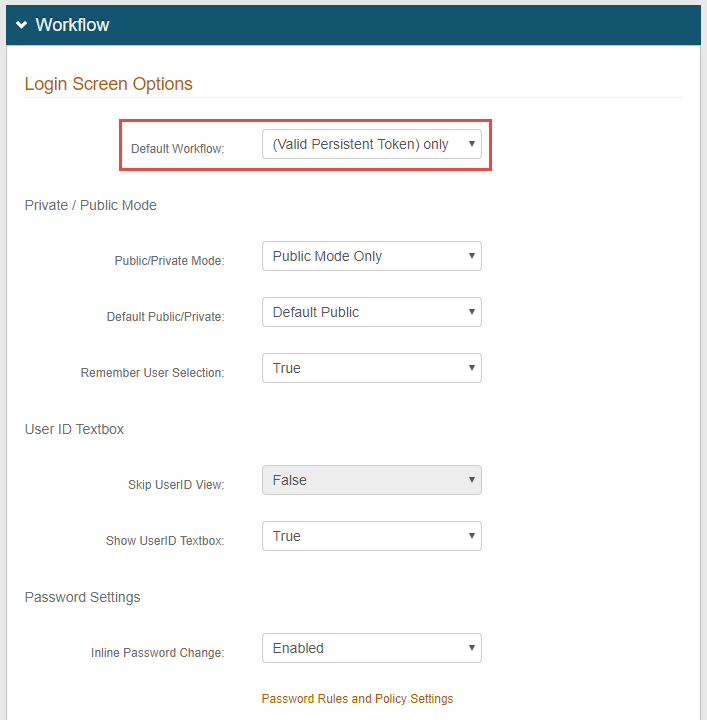 |
1. In the Workflow section, select (Valid Persistent Token) only from the Default Workflow dropdown
Warning
Click Save once the configurations have been completed and before leaving the Workflow page to avoid losing changes
Juniper IVE SSO Configuration Steps
Note
Juniper IVE has numerous SSO options available to provide a more convenient portal environment. For this configuration, the NTLM option will be exemplified.
 |
1. Log into the Juniper IVE admin console, select User Realms under Users, and click New User Realm...
An established realm can also be selected if one has already been set up for the SecureAuth IdP integration
2. Set a Name for the new authentication realm
3. Select the Server created for the SecureAuth IdP integration (see Integration Guides)
4. Select the Directory from which the authorization will occur from the User Directory / Attribute dropdown
5. Check Additional authentication server to expand the menu
6. Select the Directory from the Authentication #2 dropdown
7. Select predefined as from the Username is options, and set the field as <USER>
8. Click Save Changes
Resource Policies
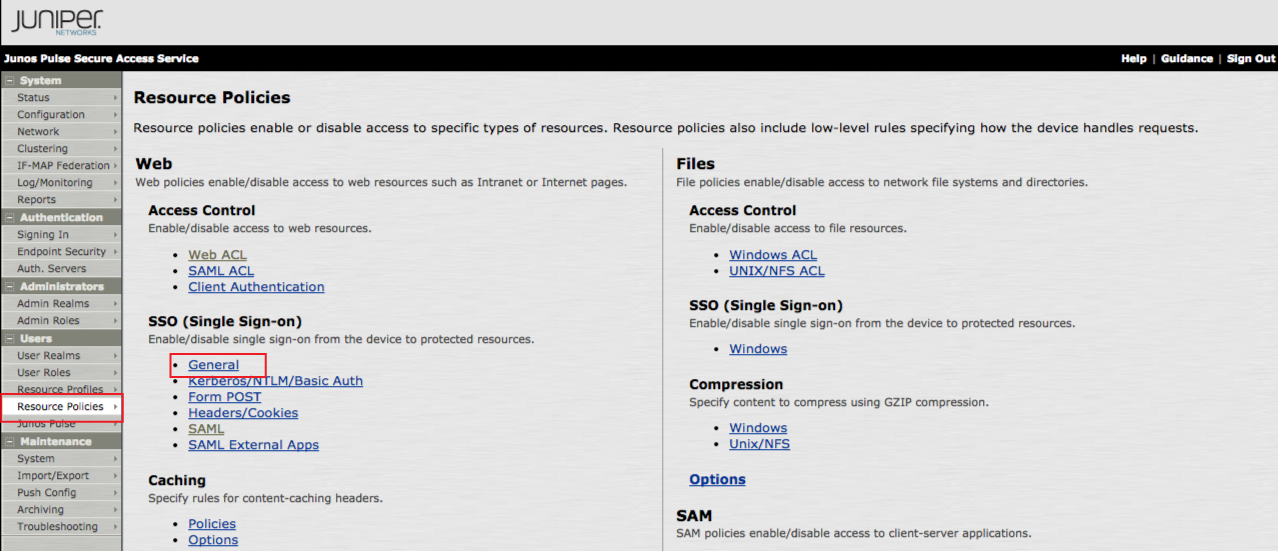 |
9. In the admin console, click Resource Policies under Users
10. Select General under SSO (Single Sign-on)
NTLM SSO Settings
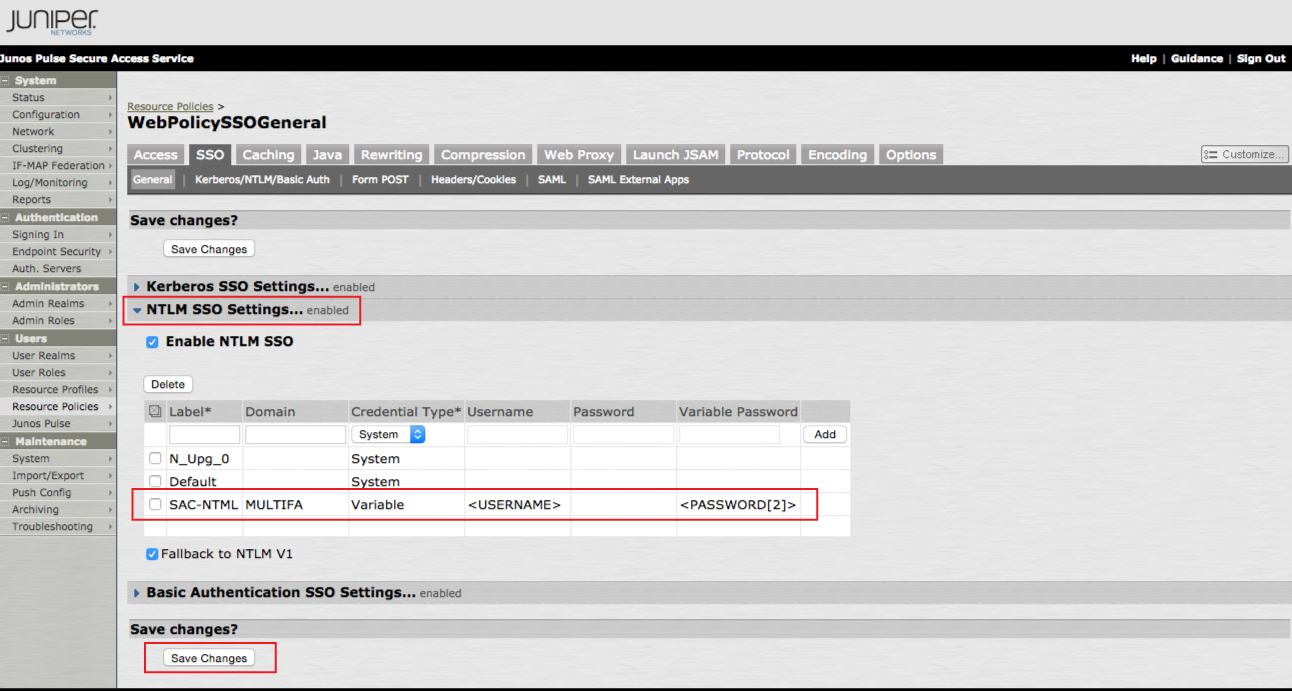 |
11. Click NTLM SSO Settings... to expand the menu
12. Check Enable NTLM SSO
13. Create a Label and provide the Domain for the new setting
14. Select Variable from the Credential Type dropdown
15. Set the Username variable to <USERNAME> and the Variable Password to <PASSWORD[2]>
16. Click Save Changes
Autopolicy: Single Sign-on
 |
17. To apply the SSO settings configured above to a resource profile, enter the profile, and check Autopolicy: Single Sign-on
18. Select NTLM
19. Select the Label name from the Credential dropdown