Microsoft Azure AD Configuration Guide
Use this guide along with the Data Tab Configuration guide to configure a Microsoft Azure AD-integrated SecureAuth® Identity Platform (formerly SecureAuth IdP) realm.
Important
See this Critical product update for: Customers who use Azure AD in the Classic Experience.
Prerequisites
Identity Platform version 19.07 and earlier
Have Azure AD and access to the admin console
Create or designate an existing administrator service account with read and optional write access for the Identity Platform
Create a Native Client Application on Azure AD (see Azure AD configuration below)
OPTIONAL: Have Azure Powershell installed to use Powershell commands to get user properties
Azure AD configuration
Log in to your Azure Account through the Azure portal.
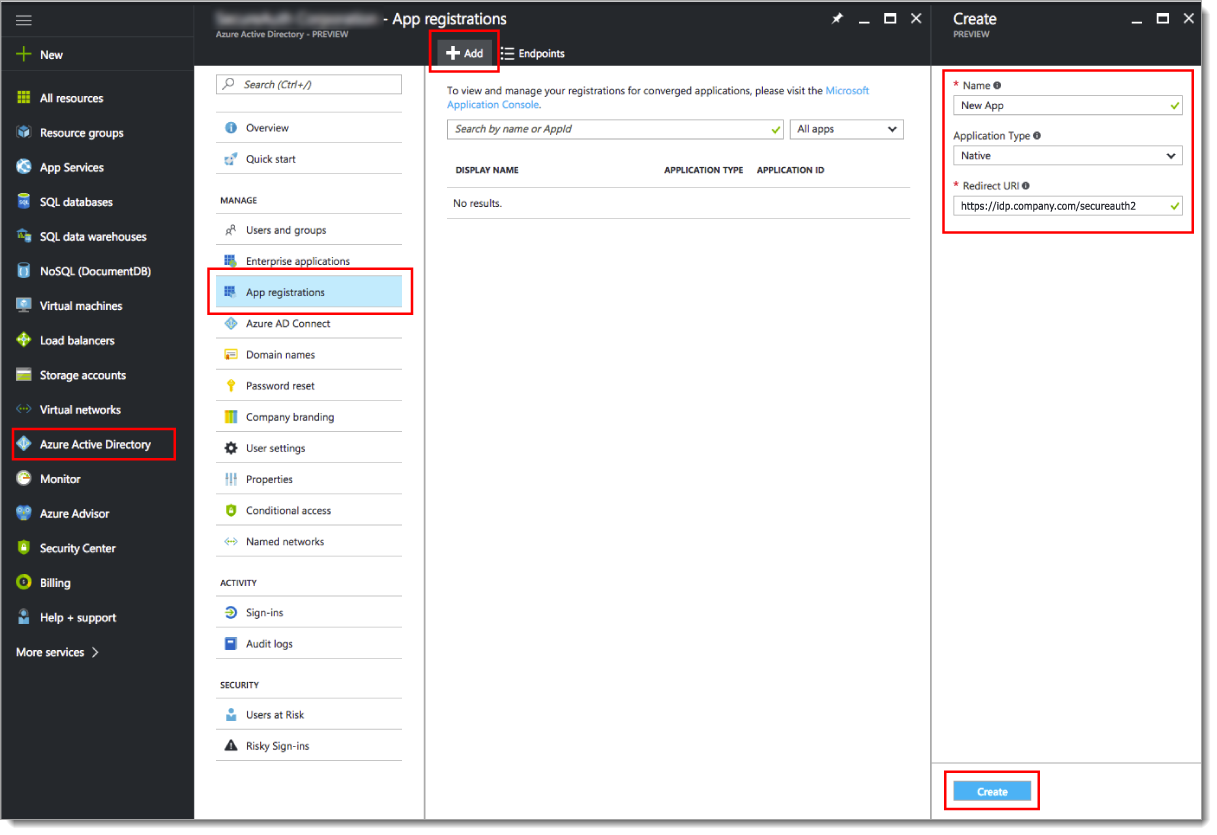
Select Azure Active Directory.
Select App registrations.
Click Add.
In the Create section, set the following:
Name
Set a name for the new application.
Application Type
Set to Native.
Redirect URI
Set to the Fully Qualified Domain Name (FQDN) of the Identity Platform appliance, followed by the realm to which Azure AD is integrated.
For example, https://idp.company.com/secureauth2
Click Create.
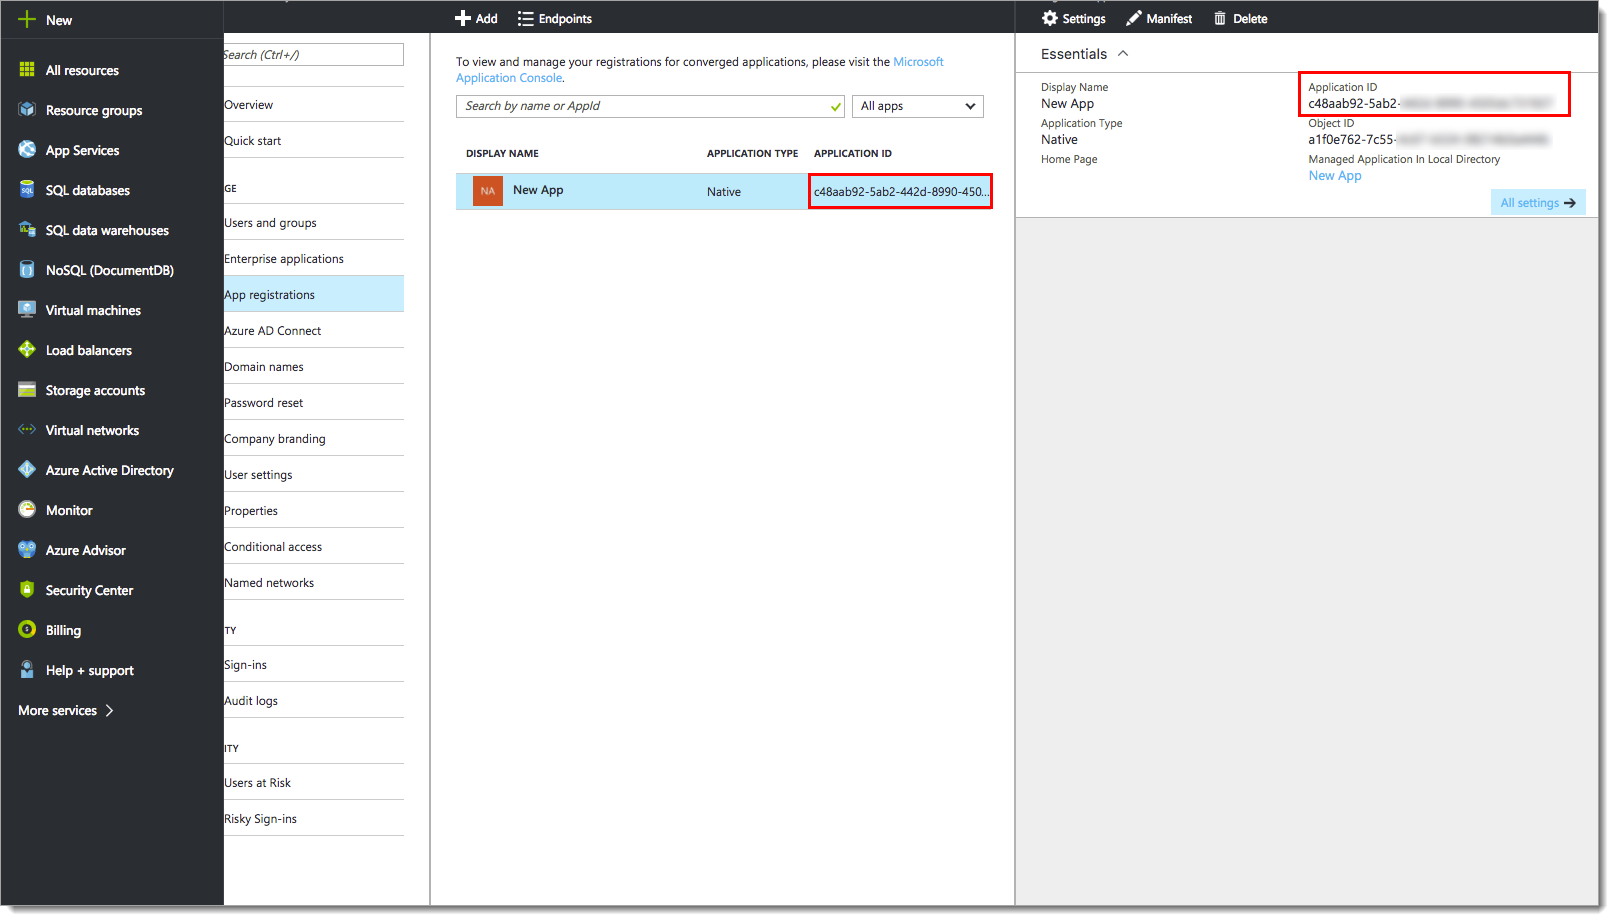
From the App registrations panel, select the new application you just created.
Copy the Application ID.
Click Settings > Required Permissions.
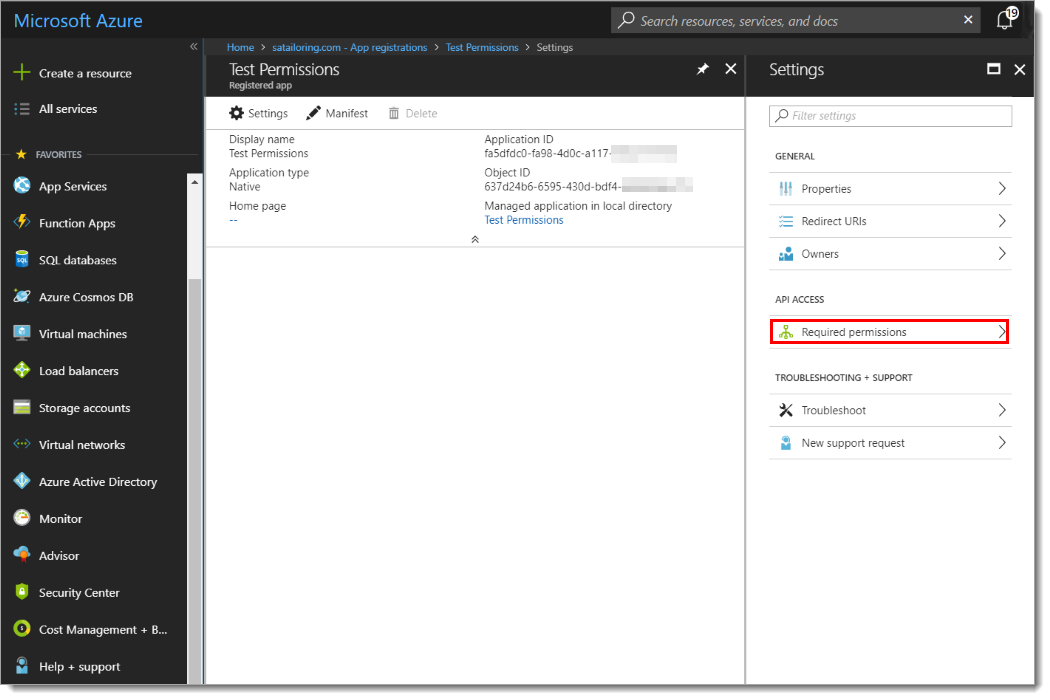
In the Required Permissions section, click Windows Azure Active Directory.
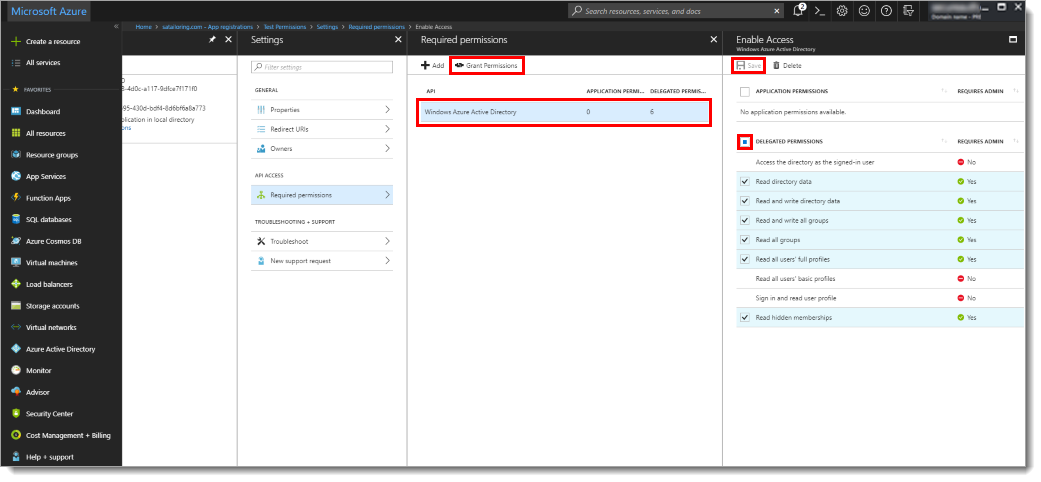
In the Enable Access section, delegate the permissions to be granted.
Click Save.
In the Required permissions section, click Grant Permissions.
From the Azure Active Directory menu, click Domain names.
Copy the .onmicrosoft.com domain name.
You will need this domain name in the Identity Platform configuration.

Identity Platform configuration
Select the Data tab.
In the Membership Connection Settings section, set the following:
Datastore Type
Set to Microsoft Azure AD.
Data Credentials
Provide the username and password of the administrator service account.
Azure Settings
Tenant Domain: Set to the .onmicrosoft tenant domain that was copied from the Azure portal.
Client ID: Set to the Application ID that was copied from the Azure portal.
Group Permissions
To restrict access to the realm (if you have such restrictions), provide a list of Allowed Groups and Denied Groups in a comma delimited format.

Click Test Connection.
Save your changes.
To complete the remaining configurations, see the Data Tab Configuration guide.
OPTIONAL: PowerShell commands to get user properties
You can use PowerShell commands to get user properties.
Install Azure PowerShell: https://docs.microsoft.com/en-us/powershell/azure/install-az-ps?view=azps-3.6.1
To ensure that the PowerShell commands function properly, be sure the SetExecutionPolicy is Unrestricted.
Run the following commands.
Command List
1. $Cred = Get-Credential [The value for this credential must be the onmicrosoft account associated with the Azure tenant].
2. Connect-AzureAD -Credential $Cred
3. Get-AzureADUser
4. Get-AzureADUser –ObjectID "<Value of the Object ID"> | fl
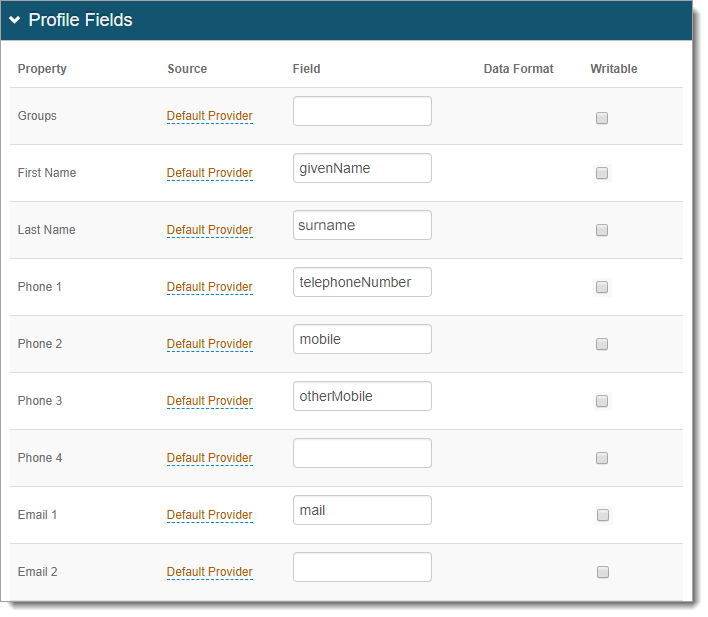
After the fourth command is executed, the AzureAD profile should resemble what is shown in the following screenshot.
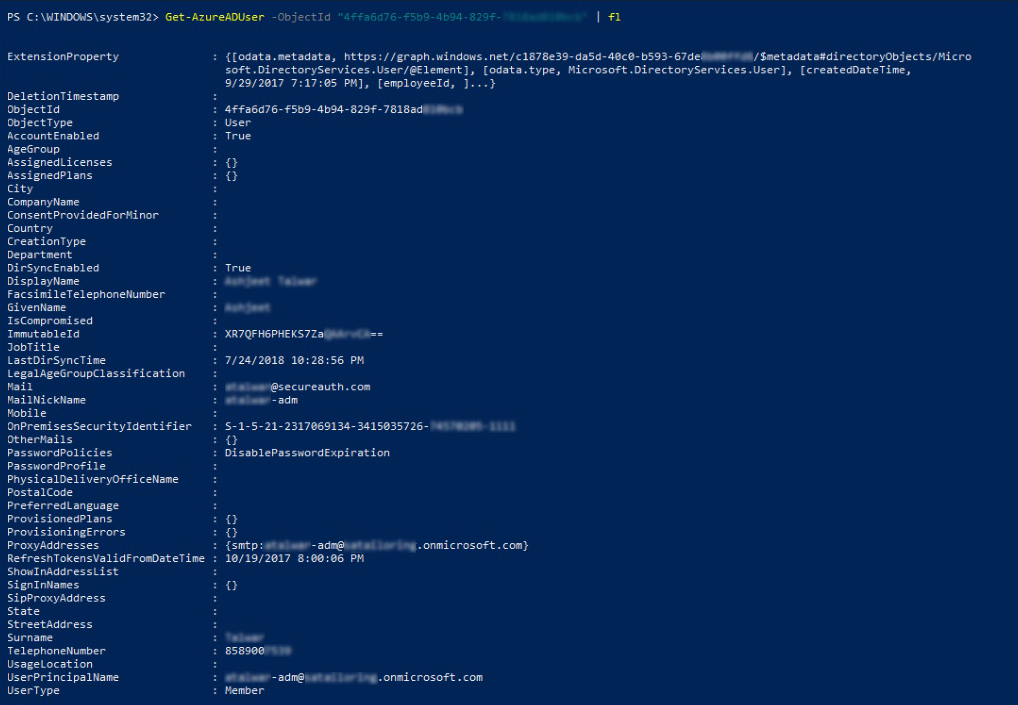
Verify that User Properties on the AzureAD Profile match with the Profile Fields configured on the Data tab in the Identity Platform.