Juniper Pulse iOS Provisioning Integration Guide (Certificate)
Introduction
Use this guide to enable the provisioning of and certificate delivery to end-users' iOS devices to include Juniper VPN settings applied to the device(s) without manual input and to conduct Multi-Factor Authentication.
Settings that are delivered in a profile are bound together and cannot be removed in part by the end-user, creating front-end protection with a device PIN or passcode and control over the network through the VPN client and associated rules.
Prerequisites
1. Have a Juniper Pulse VPN
2. Download the Apple Configurator to create iOS profiles
3. Download the SecureAuth CA Public Certificates zip bundle
4. Create a New Realm for the iOS Juniper Pulse integration in the SecureAuth IdP Web Admin
5. Configure the following tabs in the Web Admin before configuring the Post Authentication tab:
Overview – the description of the realm and SMTP connections must be defined
Data– an enterprise directory must be integrated with SecureAuth IdP
Workflow – the way in which users will access this application must be defined
Multi-Factor Methods – the Multi-Factor Authentication methods that will be used to access this page (if any) must be defined
Juniper Configuration Steps
Signing In Policy Configuration
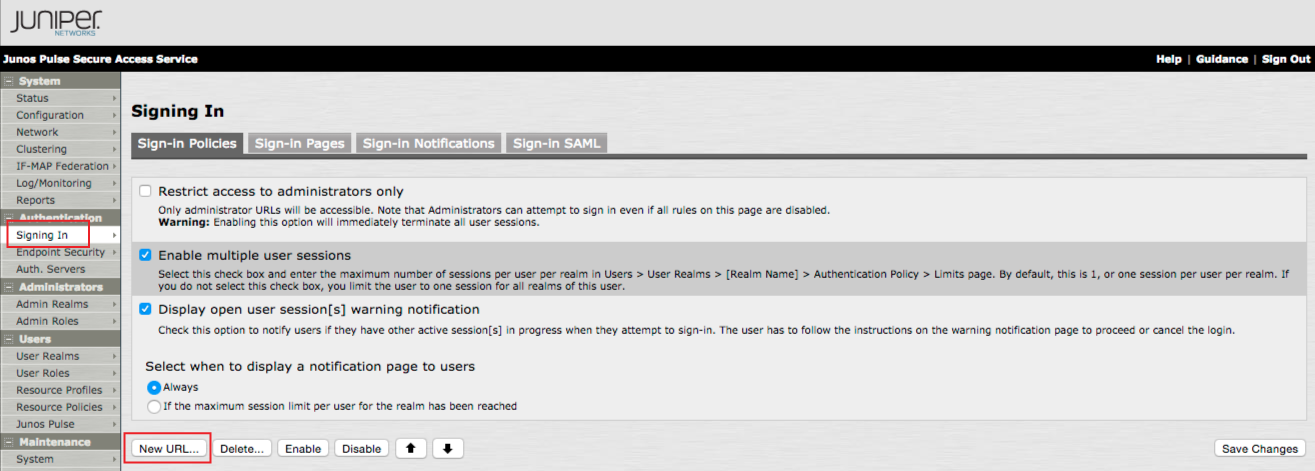 |
1. Log into the Juniper admin console, and Signing In under Authentication, and click Signing-In Policies
2. Click New URL...
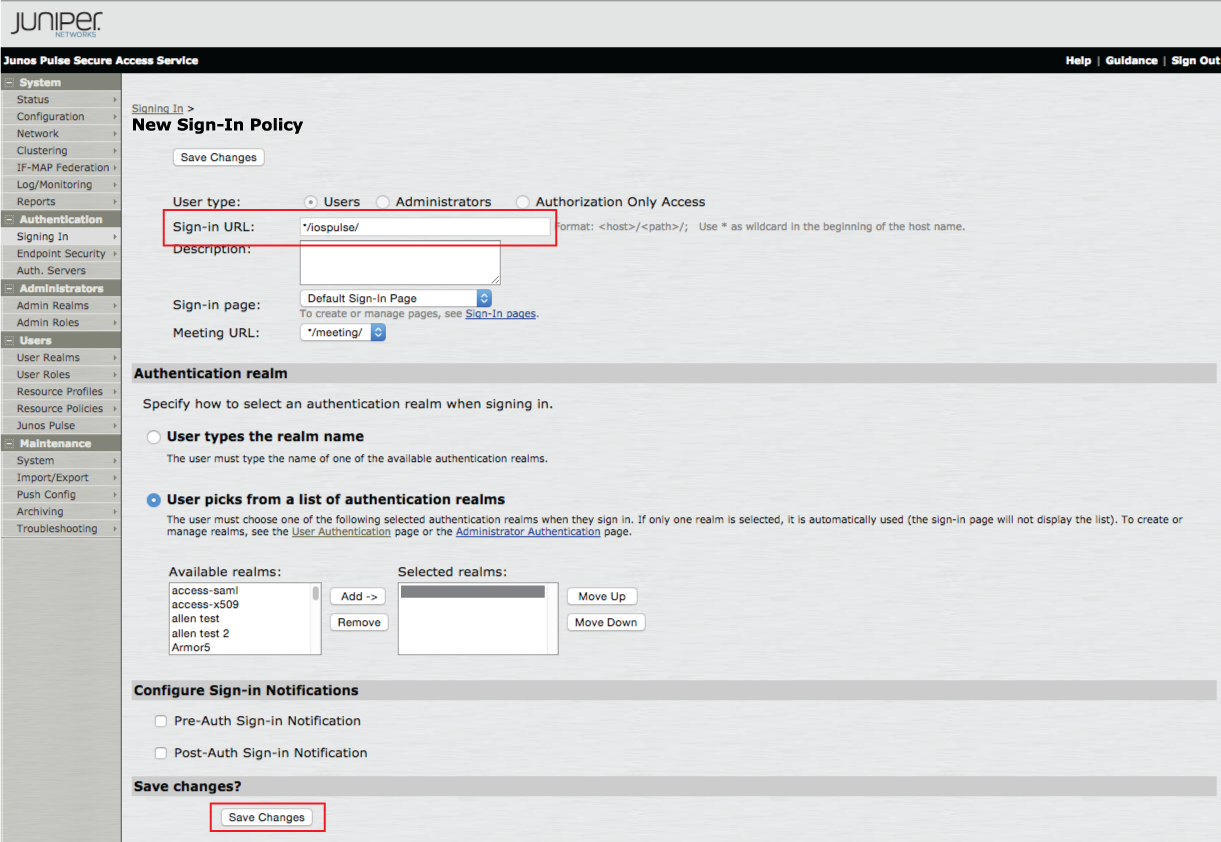 |
3. Set the Sign-in URL to */iospulse/
Note
The Pulse iOS client requires that the Sign-In Policy URL be a wildcard path (*) rather than the FQDN path
4. Make any preferred modifications for the Sign-In Policy, and click Save Changes
Certificate Server Configuration
 |
5. In the admin console, select Auth. Servers under Authentication
6. Select Certificate Server from the New dropdown, and click New Server...
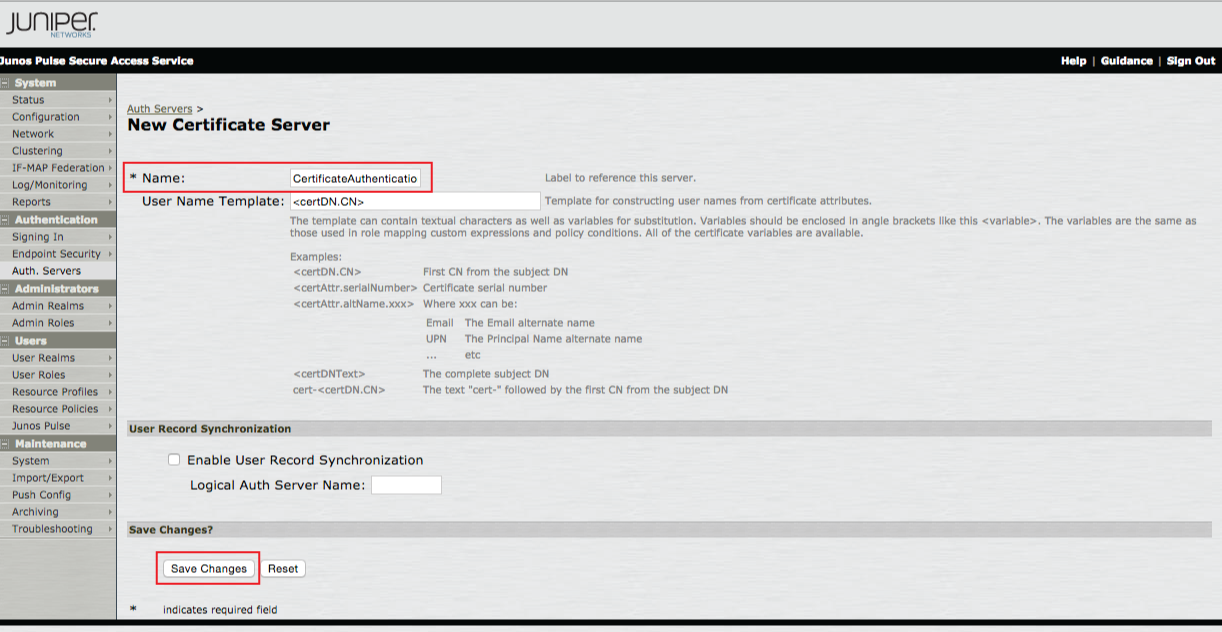 |
7. Set the Name to CertificateAuthentication (or a preferred name), and leave the rest as default
8. Click Save Changes
Certificates Configuration
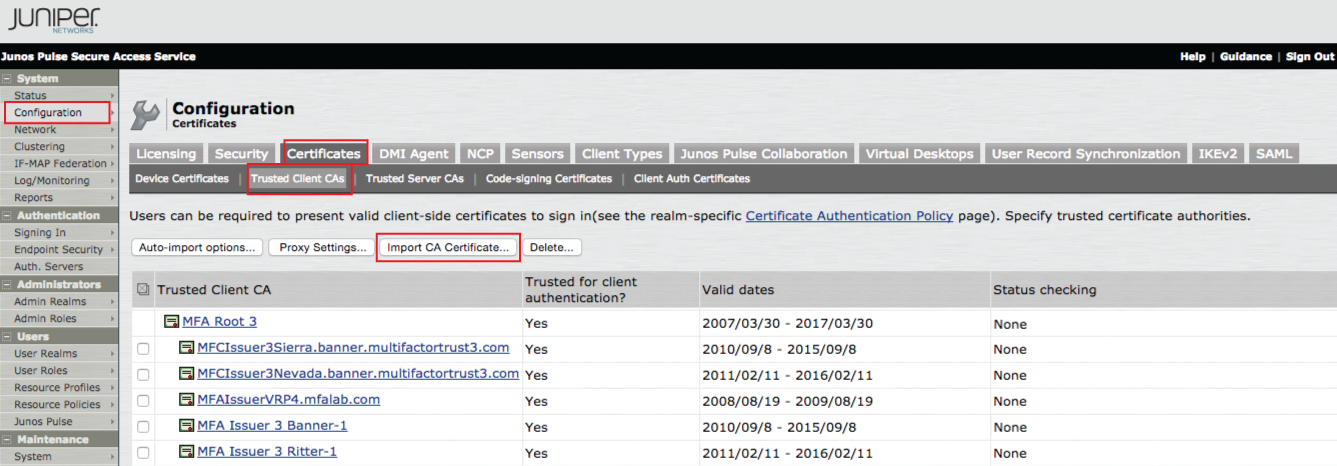 |
8. In the admin console, select Configuration under System, and click Certificates
9. In the Trusted Client CAs section, click Import CA Certificate...
10. Upload the SecureAuth CA Public Certificates zip bundle and view the certificates back in the Trusted Client CAs section
Note
These will be used to validate client certificates
User Realm Configuration
11. In the admin console, select User Realms under Users, and click New User Realm...
There are distinct configuration steps for VPN on Demand and Certificate plus AAA – follow the specific configuration steps for the appropriate type
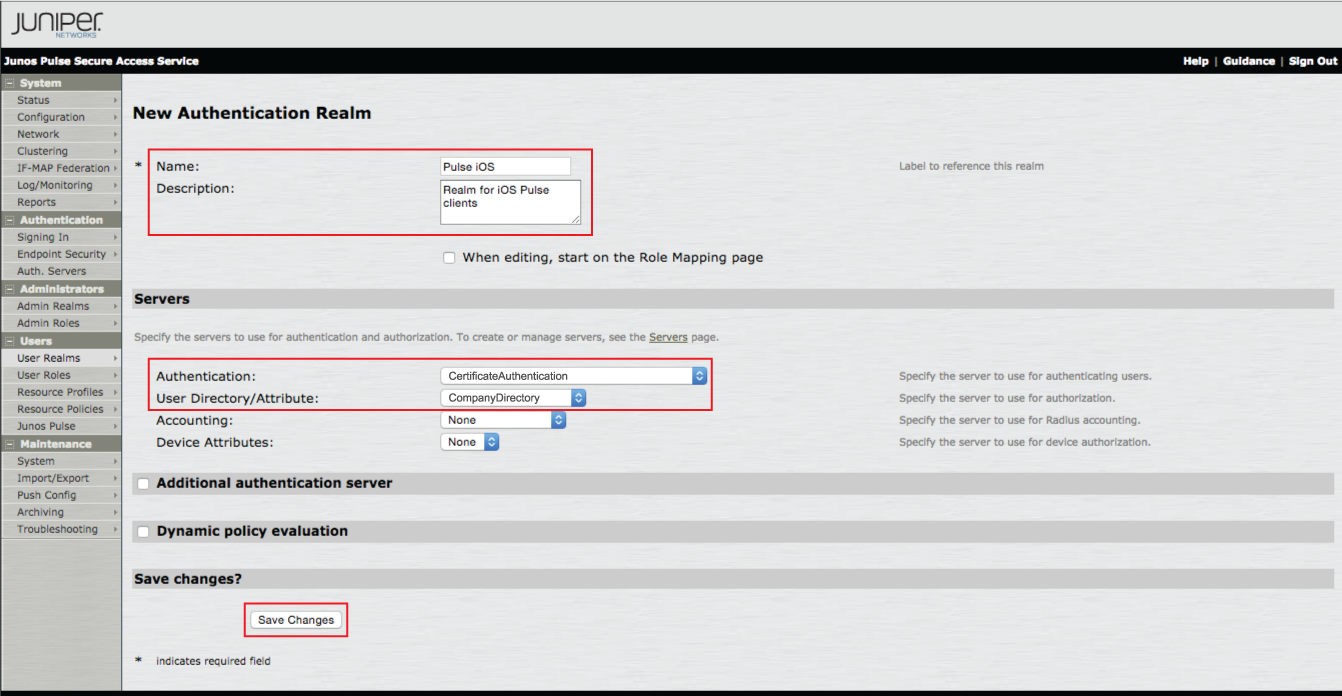 |
12. Provide a Name for the new User Realm, e.g. Pulse iOS, and a Description
13. Select CertificateAuthentication from the Authentication dropdown (the Certificate Server created in steps 7-8)
14. Select the authorizing directory from the User Directory/Attribute dropdown
15. Click Save Changes
Note
There are no steps 16-18
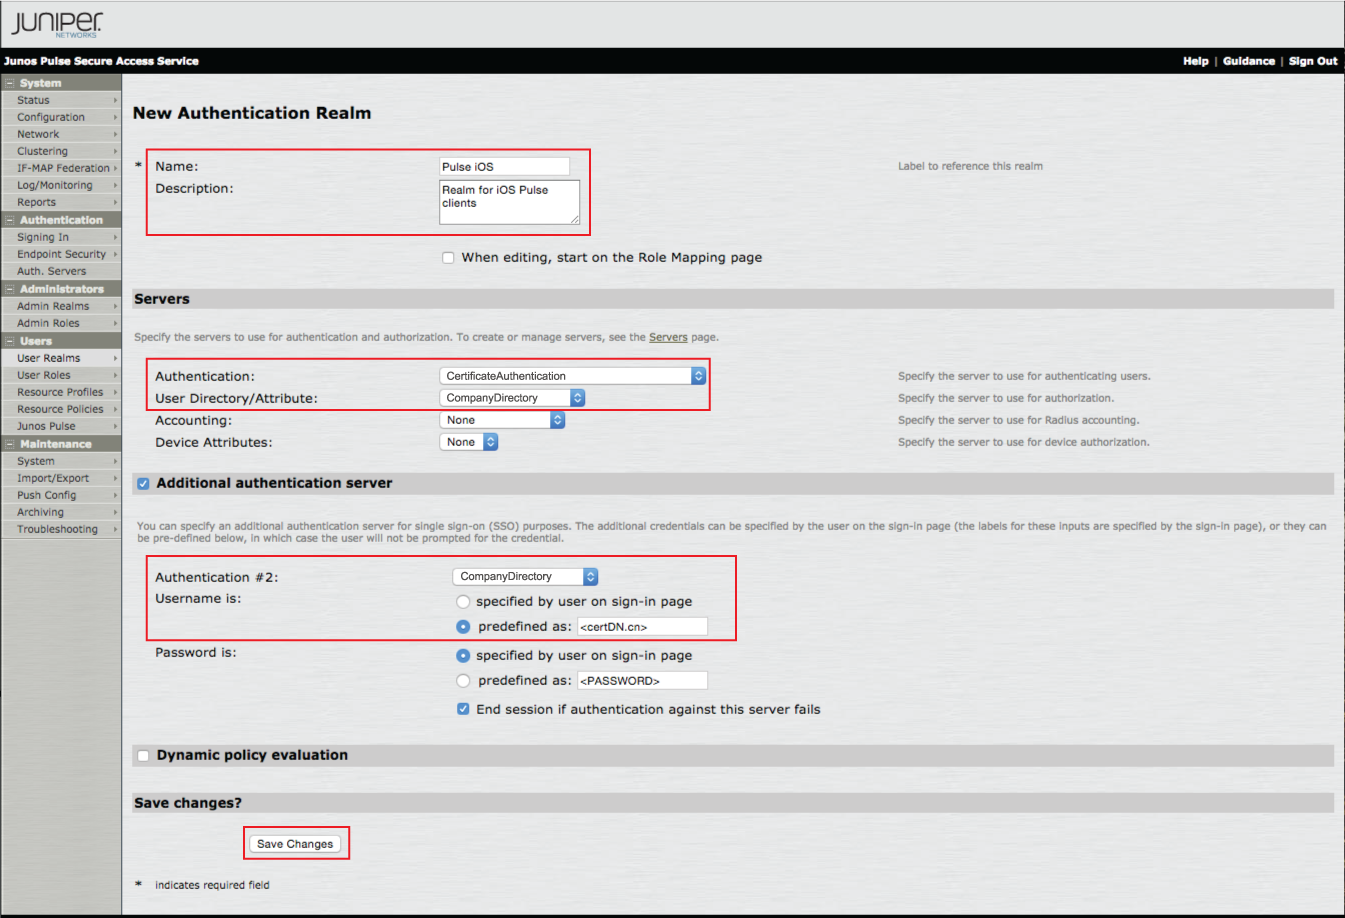 |
12. Provide a Name for the new User Realm, e.g. Pulse iOS, and a Description
13. Select CertificateAuthentication from the Authentication dropdown (the Certificate Server created in steps 7-8)
14. Select the authorizing directory from the User Directory/Attribute dropdown
15. Check Additional authentication server to expand the menu
16. Select the authorizing directory from the Authentication #2 dropdown
17. Check predefined as from the Username is options, and set it to <certDN.cn>
18. Click Save Changes
User Realm Authentication Policy
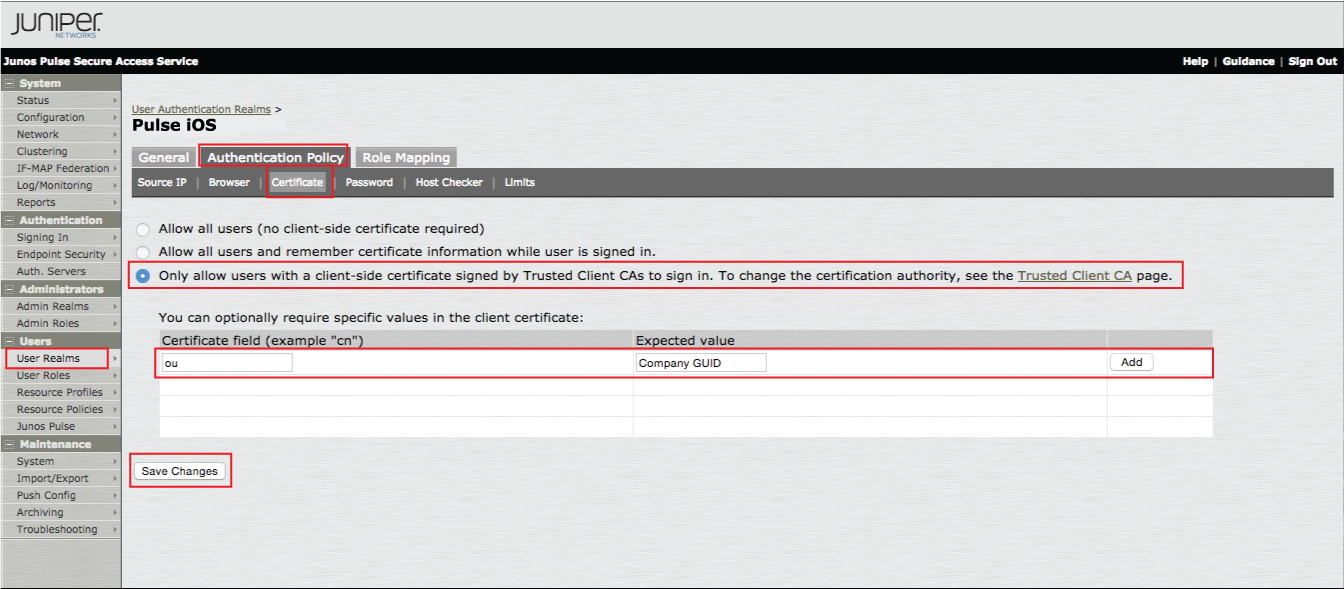 |
19. To add certificate restrictions in the User Realm, select User Realms under Users in the admin console, and select the realm that was just created (Pulse iOS)
20. In the Authentication Policy section, select Certificate
21. Select Only allow users with a client-side certificate signed by Trusted Client CAs to sign in.
22. Set the Certificate field to ou
23. Set the Expected value to the Company GUID value in the Systems Info tab of the SecureAuth IdP Web Admin
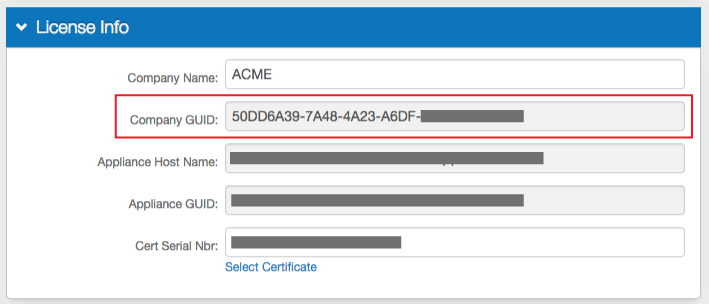
24. Click Save Changes
iOS Configuration Steps
Apple Configurator
 |
1. Download the Apple Configurator from Apple
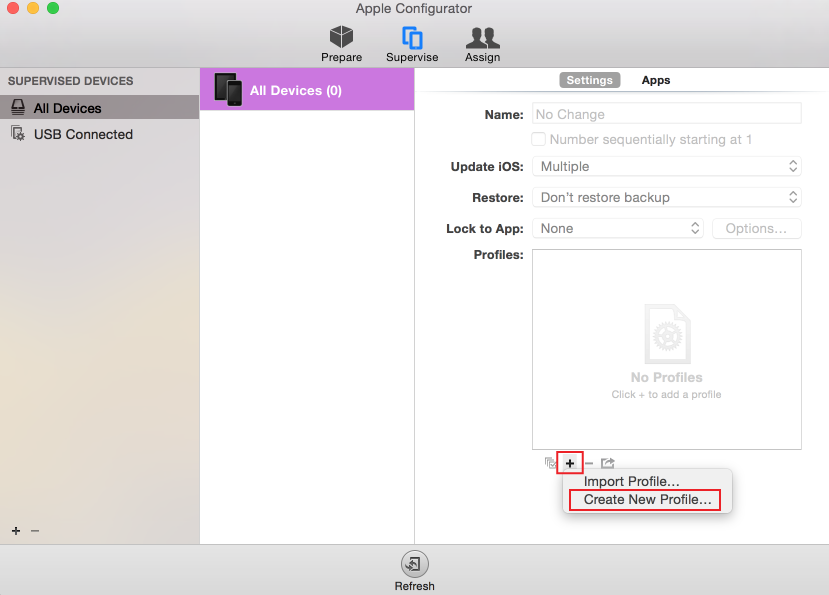
2. In the Supervise section under Settings, click the + button, and select Create New Profile...
3. Fill out the General section
VPN
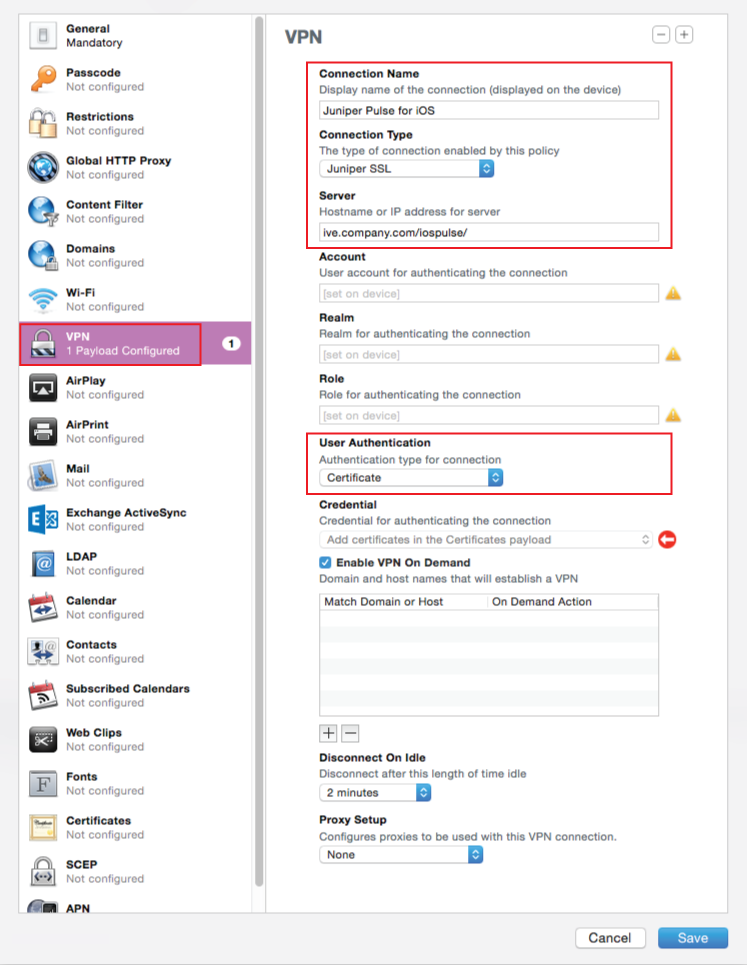 |
3. In the VPN section, provide a Connection Name, e.g. Juniper Pulse for iOS
4. Select Juniper SSL from the Connection Type dropdown
5. Set the Server to the Juniper Pulse signing-in policy URL, including the path, and without https (steps 1-4), e.g. ive.company.com/iospulse/
6. Select Certificate from the User Authentication dropdown
7. Configure the VPN On Demand as preferred to suit the network
Note
The Apple Configurator will warn that an Identity Certificate is required, but it is not for this template
Passcode
Note
It is recommended that the VPN configuration be paired with Passcode requirements to require a PIN after the device has been idle for a while
Below is an example of how the Passcode section can be configured for this integration
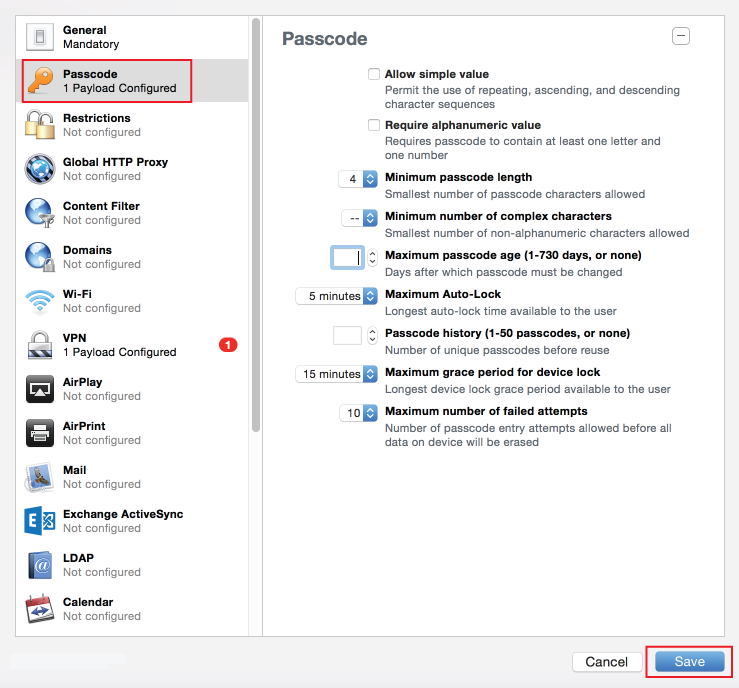 |
8. In the Passcode section, set values to restrict access and to require a PIN to unlock the device
9. Click Save
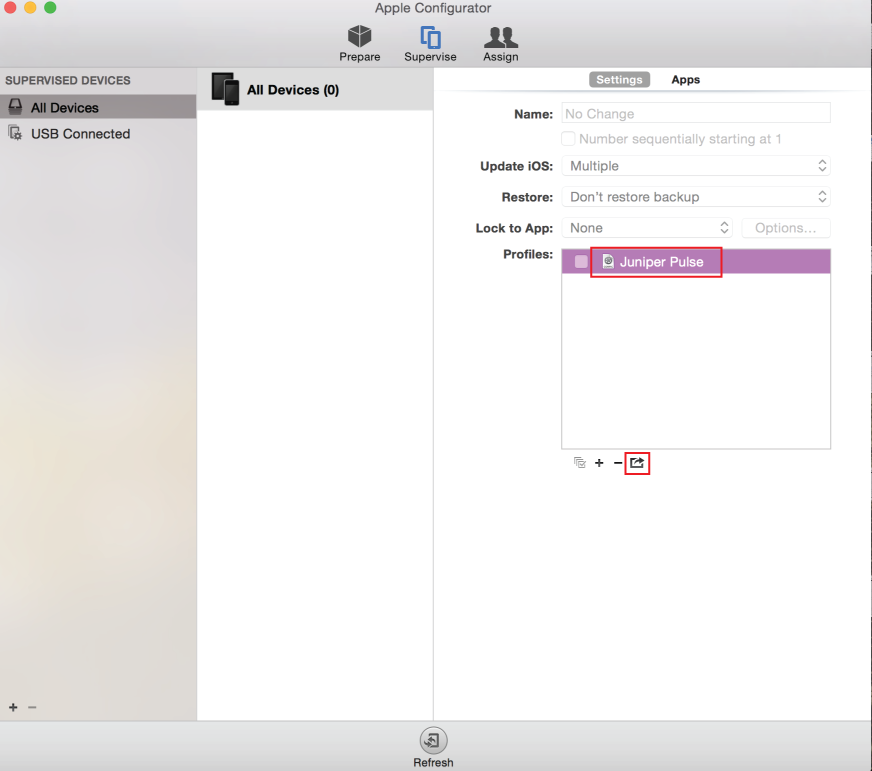 |
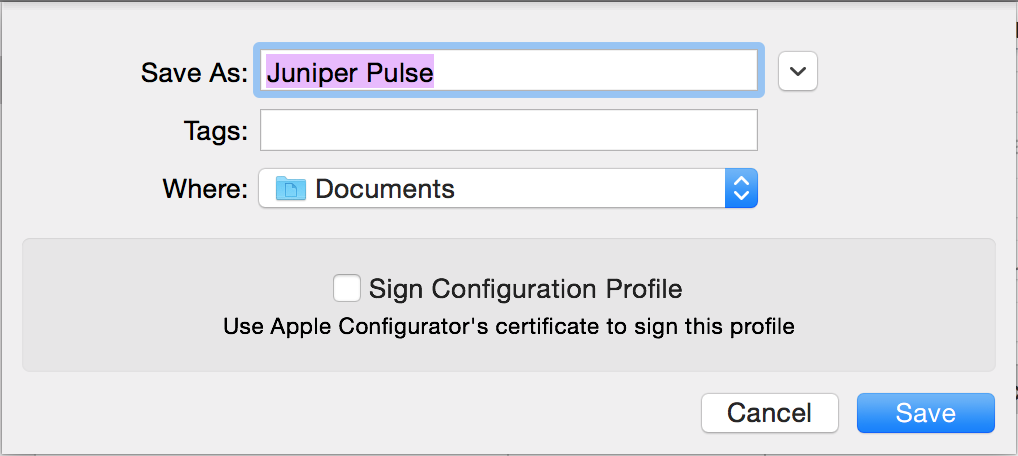
10. Select the new profile (Juniper Pulse) from the Profiles field, and Export the profile
11. Uncheck Sign Configuration Profile
12. Save the Juniper Pulse profile as a .mobileconfig template file
SecureAuth IdP Configuration Steps
Post Authentication
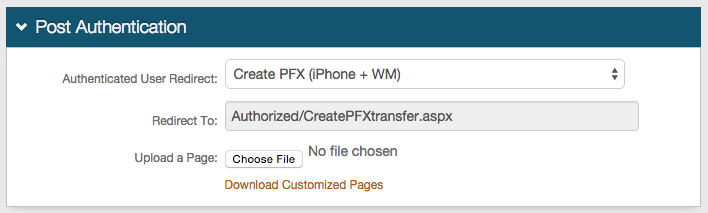 |
1. In the Post Authentication section, select Create PFX (iPhone + VM) from the Authenticated User Redirect dropdown
2. An unalterable URL will be auto-populated in the Redirect To field, which will append to the domain name and realm number in the address bar (Authorized/CreatePFXtransfer.aspx)
3. A customized post authentication page can be uploaded, but it is not required
iPhone / Android
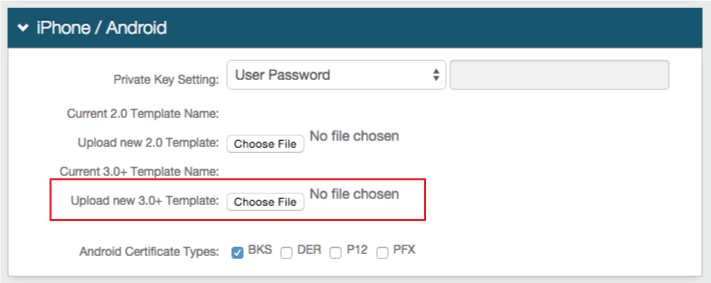 |
4. Select the preferred password method from the Private Key Setting dropdown
5. Click Choose File to Upload new 3.0+ Template, and select the new profile file
Warning
Click Save once the configurations have been completed and before leaving the Post Authentication page to avoid losing changes
Forms Auth / SSO Token
Optionally, in the Forms Auth / SSO Token section, click the View and Configure FormsAuth keys/SSO token link to configure the token/cookie settings and configure this realm for SSO.
 |
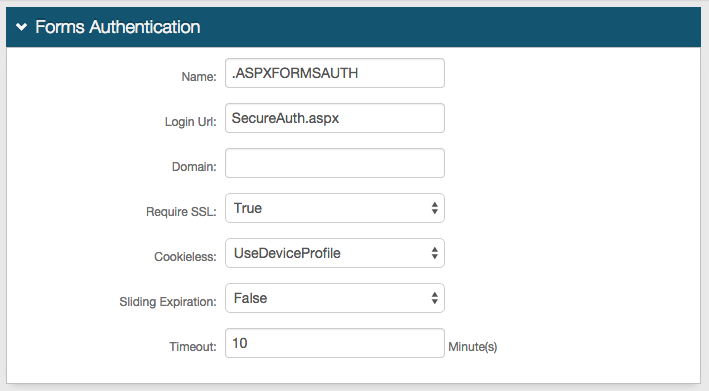
In the Forms Authentication section, set the following:
Require SSL
If the SSL is required to view the token, set to True.
Cookieless
Indicate whether SecureAuth IdP will deliver the token in a cookie to the user's browser or device:
UseCookies – Always deliver a cookie
UseUri – Do not deliver a cookie, deliver the token in a query string
AutoDetect – Deliver a cookie if the user's settings allow it.
UseDeviceProfile – Deliver a cookie if the browser settings allow it, regardless of the user's settings
Sliding Expiration
For the cookie to remain valid as long as the user is interacting with the page, set to True.
Timeout
Set the length of time in minutes the cookie is valid.
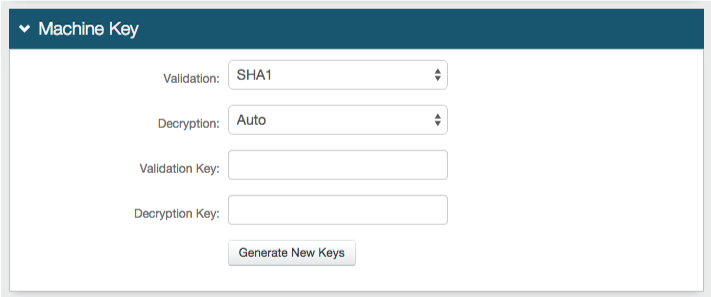
In the Machine Key section, set the following:
Validation
If the default value does not match your organization's requirements, choose another value.
Decryption
If the default value does not match your organization's requirements, choose another value.
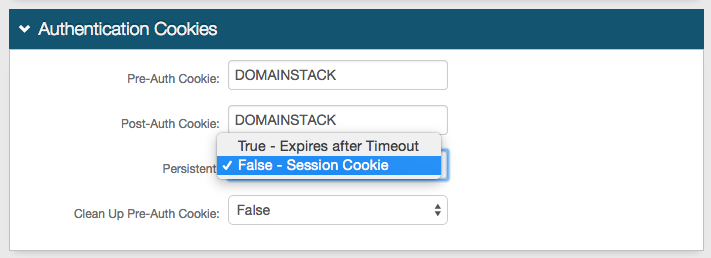
In the Authentication Cookies section, set the following:
Persistent
Set one of the following values:
True - Expires after Timeout – Allow the cookie to be persistent
False - Session Cookie – Allow the cookie to be valid as long as the session is open, and expires when the browser is closed or the session expires
Save your changes.
Note
To configure this realm for SSO, refer to SecureAuth IdP Single Sign-on Configuration
Note
To configure this realm for Windows Desktop SSO, refer to Windows desktop SSO configuration