NetMotion Mobility RADIUS configuration guide
Last updated: July 22, 2019
Introduction
Use this guide to integrate NetMotion Wireless Mobility server with SecureAuth IdP RADIUS Server Version 2.1.0 and later. This integration provides end users with VPN access for mobile devices in a wireless environment. In this setup, trust is established between the end user's mobile device and the SecureAuth IdP RADIUS server, not the VPN.
NetMotion Mobility server only supports the Protected Extensible Authentication Protocol (PEAP) protocol. By default, SecureAuth IdP RADIUS server detects the PEAP request type and handles the request accordingly. The PEAP protocol is implemented in Java with dependencies on the Java Native Interface (JNI) calls to a custom OpenSSL library.
Note
Note: SecureAuth IdP RADIUS Server Version 2.0.X and earlier support the PAP protocol only.
Prerequisites
NetMotion Mobility RADIUS components include:
NetMotion Mobility version 10.71
x64 version of Microsoft Visual C++ runtime (Redistributable for Visual Studio 2012 Update 4), installed on the Windows Server where SecureAuth IdP RADIUS server is installed
NetMotion Mobility server 10.X and later
NetMotion Mobility client installed on each end user mobile device to be used for VPN login access
Certificate, .PFX file, private key, and private key password
SecureAuth IdP configuration steps
Follow the steps in the SecureAuth IdP RADIUS server configuration guide, in the "Step B: IdP Realms configuration" section.
Configure the NetMotion Mobility Server
The NetMotion Mobility Server configuration includes setting up how the SecureAuth IdP RADIUS server will authenticate users. Use the NetMotion Mobility Authentication Settings user interface to make the following changes:
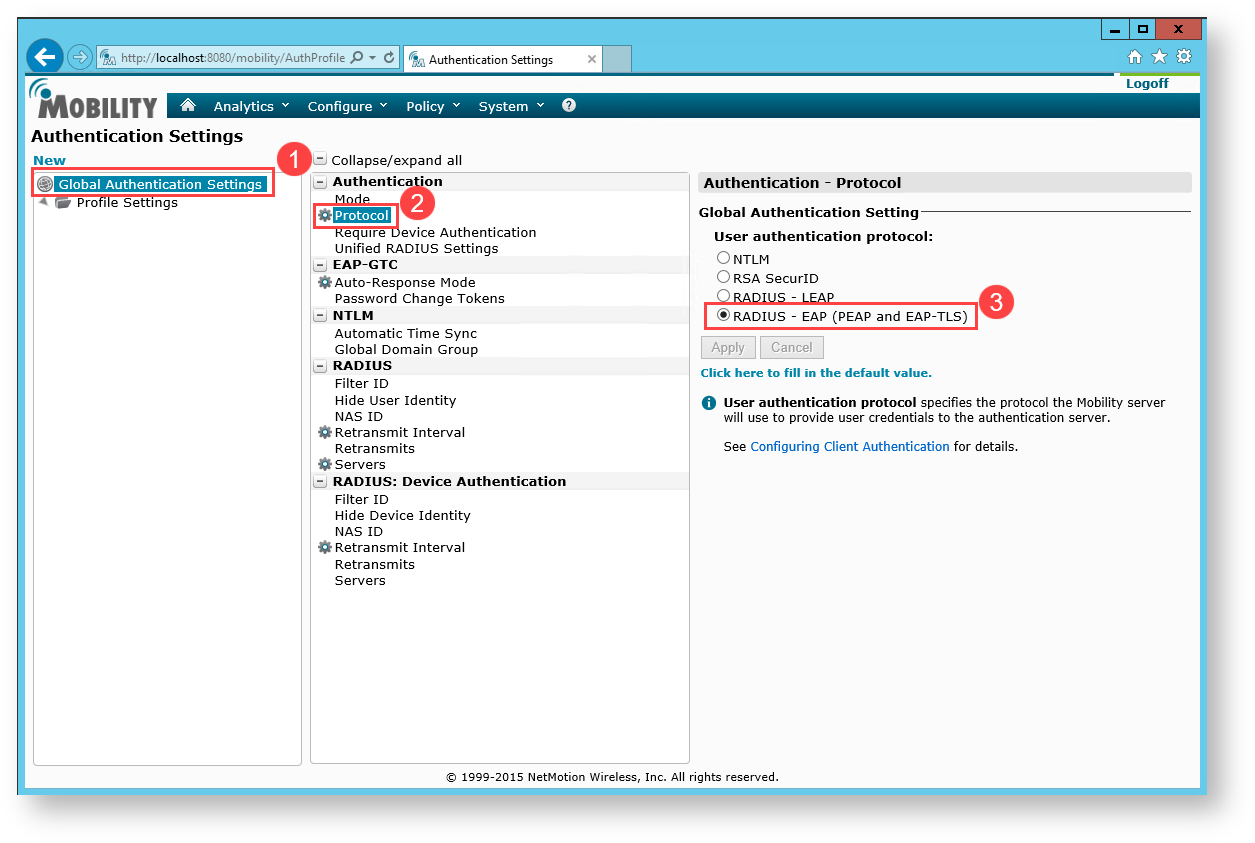
Under Global Authentication Settings, set the User authentication protocol to RADIUS - EAP (PEAP and EAP-TLS).
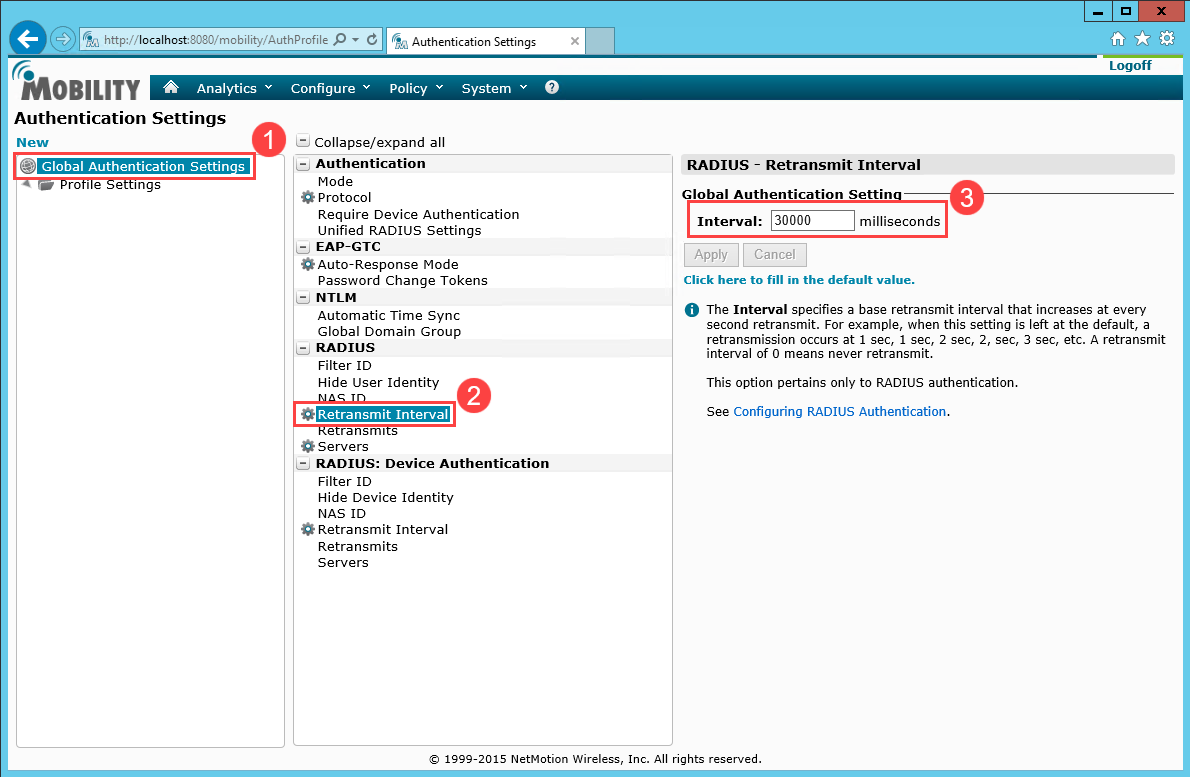
Set RADIUS - Retransmit Interval to 30000 milliseconds.
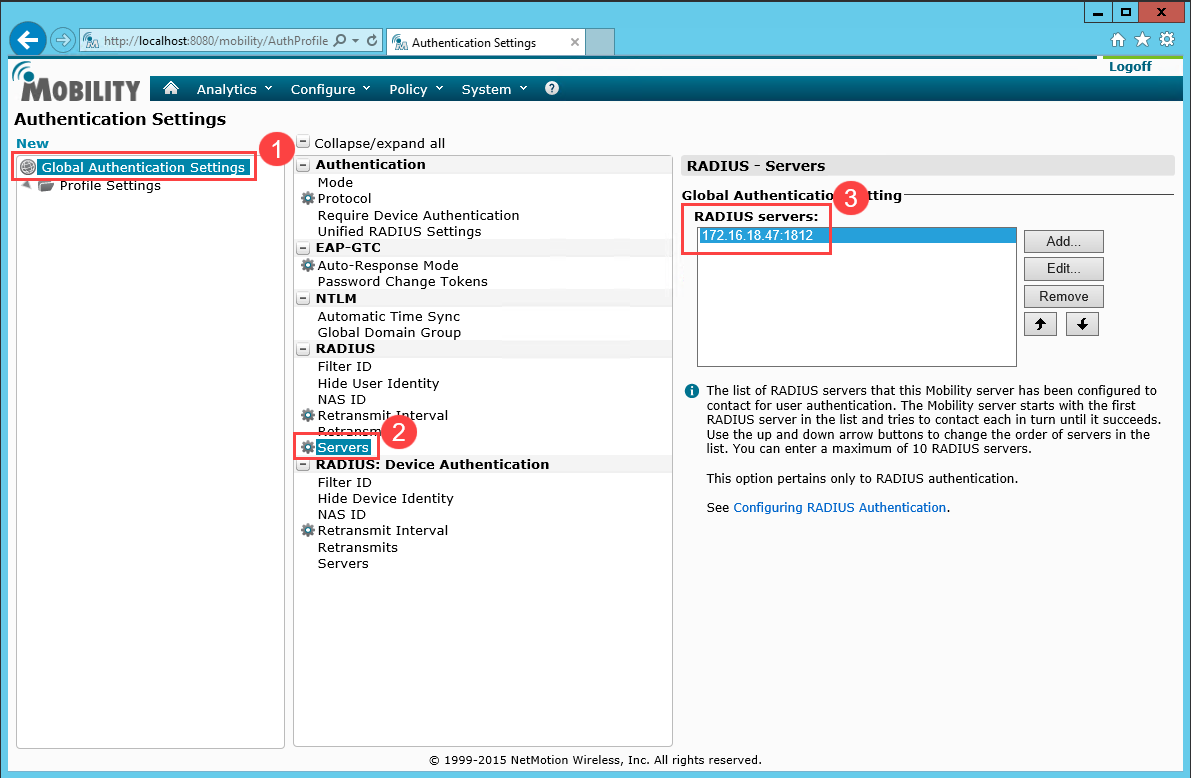
Add the RADIUS server IP address appended by authentication port number 1812.
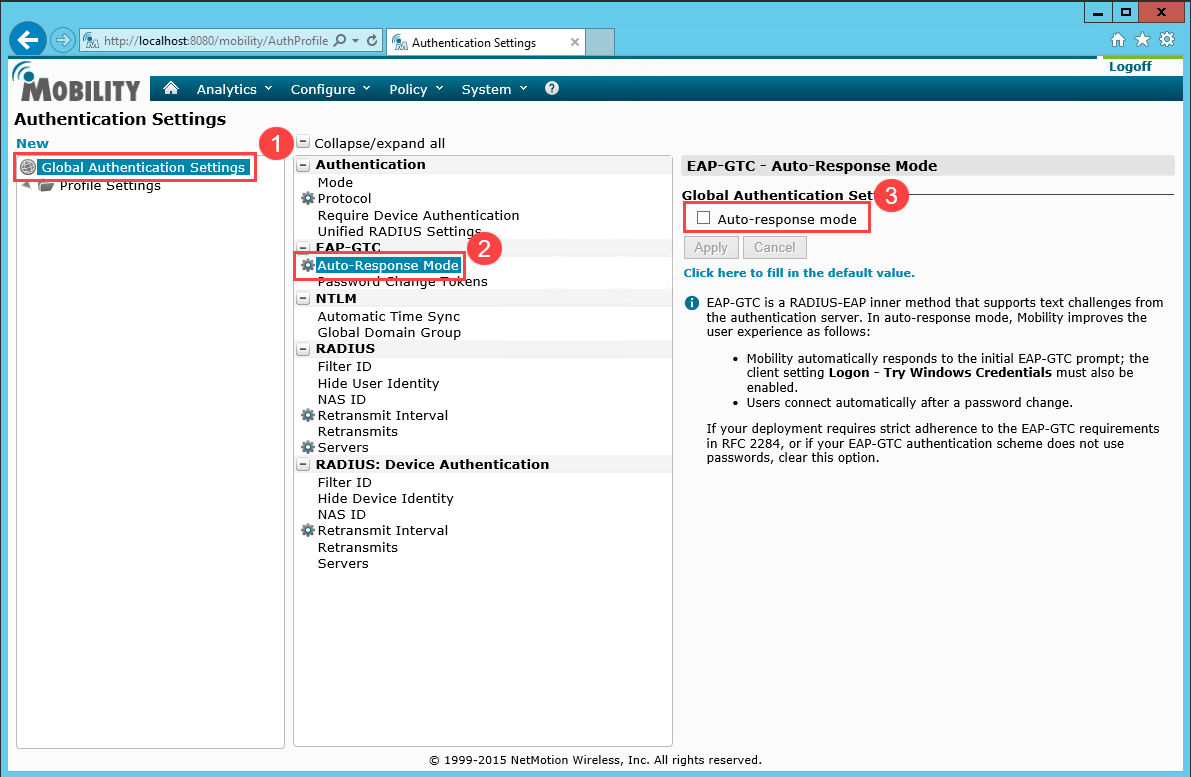
Ensure that the EAP-GTC Auto-Response Mode setting is disabled.
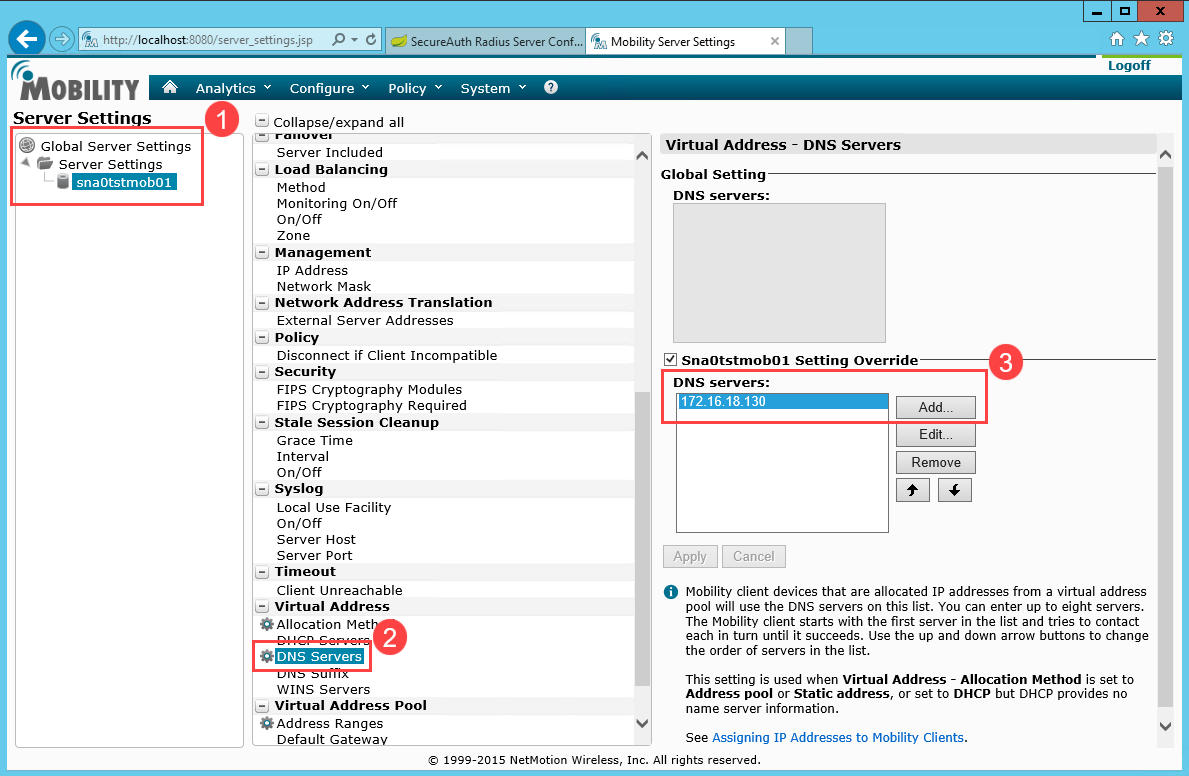
Under Server Settings, select the node on the Global Server Settings tree.
Scroll down to Virtual Address and click Add to enter the IP addresses of the DNS servers for the Mobility clients to use.
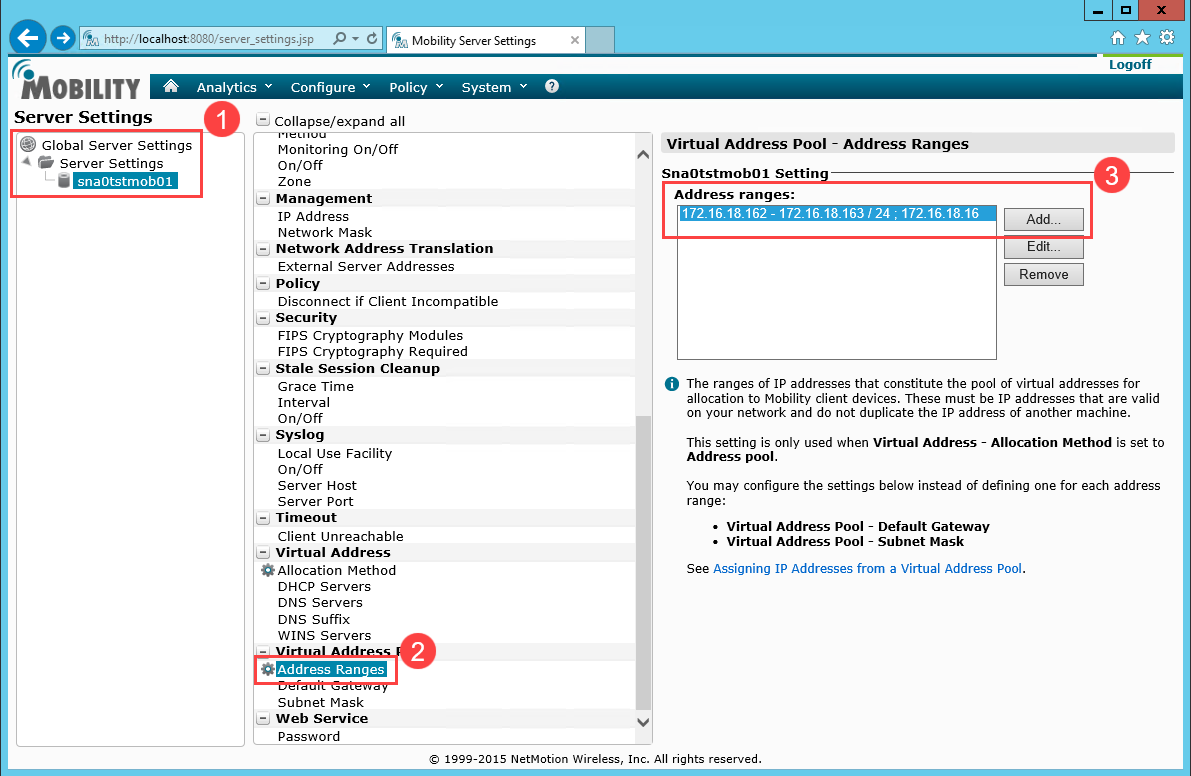
Click Add and enter the Virtual Address Pool Ranges of IPs on the network where end users will authenticate.
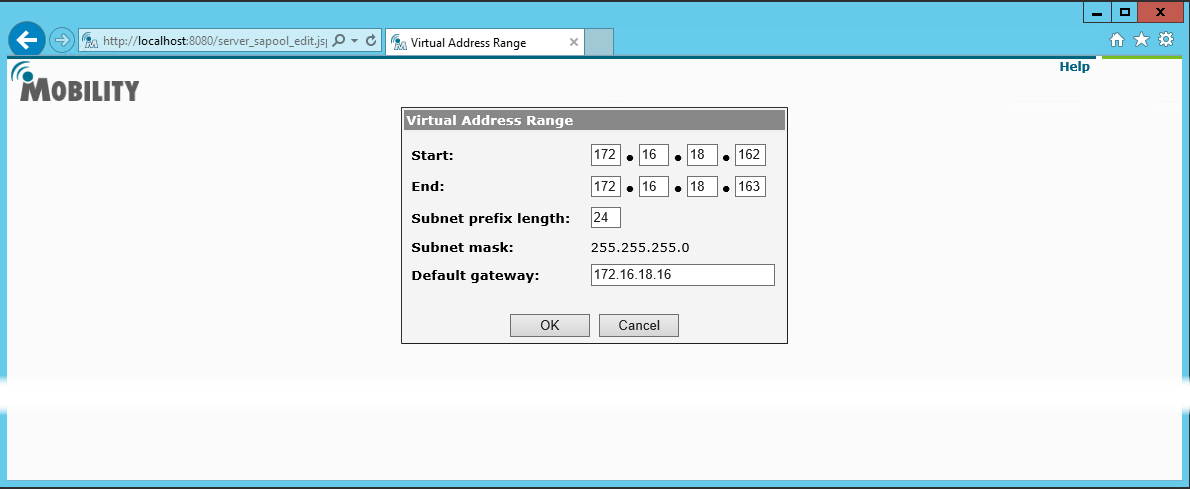
Include the default gateway used on the network for dynamic IP address assigned to end users.
The following image is a sample of Virtual Address Range entries.
Configure Windows Server
Configure Windows Server 2012 R2 or Windows Server 2016 with Active Directory in the same location where users will perform authentication.
Note
Note: Be sure to install Microsoft Visual C++ runtime (Redistributable for Visual Studio 2012 Update 4) on the Windows Server where SecureAuth IdP RADIUS server is installed.
End-user experience
All end users added to SecureAuth RADIUS through Active Directory can authenticate into the corporate VPN by using SecureAuth IdP's Push to Accept second-factor MFA method.
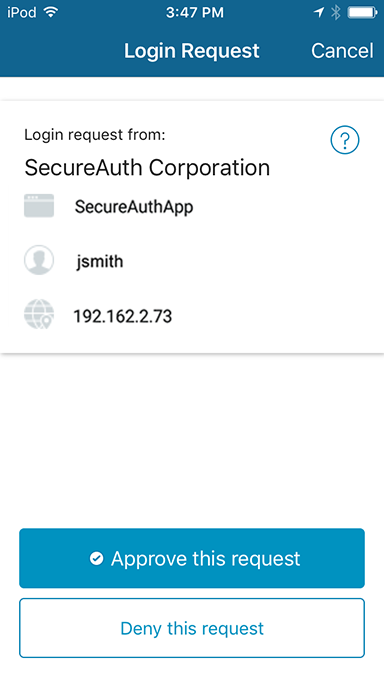
When the end user selects the Push-to-Accept option, the VPN waits for RADIUS to respond. When the Login Request screen appears on the mobile app, tap Approve or Deny on the screen. The following images show Push-to-Accept examples that end users will see in the Authenticate App:
App is closed
Open the app by swiping down on the login request notification.
 |
2. Tap Accept to securely authenticate into the corporate VPN.
 |
App is open
Tap Approve this request to securely log into the corporate VPN.
 |