SecureAuth Backup Tool: Assigning Certificate Privileges
Introduction
During a restore operation, the SecureAuth Backup Tool restores the x.509 v3 certificates associated with the installation. If restoration is done on a different SecureAuth IdP Appliance, then you need to assign the proper privileges to the certificate(s) private key. Use the instructions below to set the proper privileges.
Applies to
SecureAuth IdP
Discussion
Run the Certificate Manager
Use the Certificate Manager to view the private key of the certificate.
Windows Server 2008
Click Start and enter certmgr.msc into the Search box, then press Enter.
Windows Server 2012/2012 R2
From the Desktop, click the Windows Explorer icon
 on the Taskbar.
In the address bar, type certmgr.msc and press Enter.
Windows Server 2019/2022
Select Run from the Start menu, or from the keyboard press Windows + R.
Type certmgr. msc and press Enter.
The Certificate Manager tool for the current user appears.
Assign the correct privileges
In the Certificate Console, expand the nodes Console Root > Certificates (Local Computer) > Personal > Certificates.
Right-click the certificate you would like to work with.

From the menu, select All Tasks > Manage Private Keys....

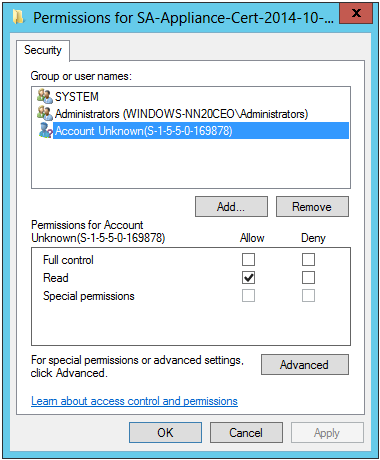
In the Permissions window under the section Group or user names, highlight the entry Account Unknown and click Remove.
In the Select Users or Groups window, click Locations... and ensure the location is the local machine and not the Active Directory Domain.
In the Enter the object names to select section, enter Network Service and click CheckNames.
Note
SAML Signing Certificate
If this certificate is used as a SAML Signing Certificate you will need to add an additional account. In the Enter the object names to select section, enter Authenticated Users and click CheckNames.
Verify that your settings are correct and click OK to confirm the changes.

In the Permissions window under the section Group or user names, highlight the entry NETWORK SERVICE and uncheck the Allow check box next to Full Control.
Tip
If this is a SAML Signing Certificate repeat the same process with the Authenticated Users entry as well.

Verify that your settings are correct and click OK to confirm the changes.