Fortinet FortiGate integration guide (RADIUS)
Introduction
Use this guide to configure the integration of Fortinet FortiGate Secure Web Gateway with SecureAuth IdP.
Prerequisites
1. Fortinet FortiGate Secure Web Gateway (SWG) installed and configured.
2. SecureAuth IdP RADIUS 2.3.9 installed and configured.
3. SecureAuth IdP realm (version 8.2+) configured and ready for the integration.
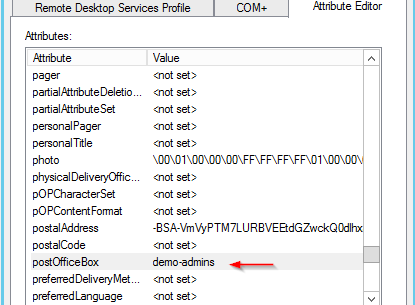
4. In the Active Directory Domain Controller, use attribute editor to enter a value for the attribute ("demo-admins" in this case).
Note that this value will be used to create the User Group in Fortinet and names should match exactly.
 |
SecureAuth IdP configuration steps
SecureAuth IdP RADIUS realm
1. On the Data tab of RADIUS realm, map an AD attribute to the AUX ID field.
 |
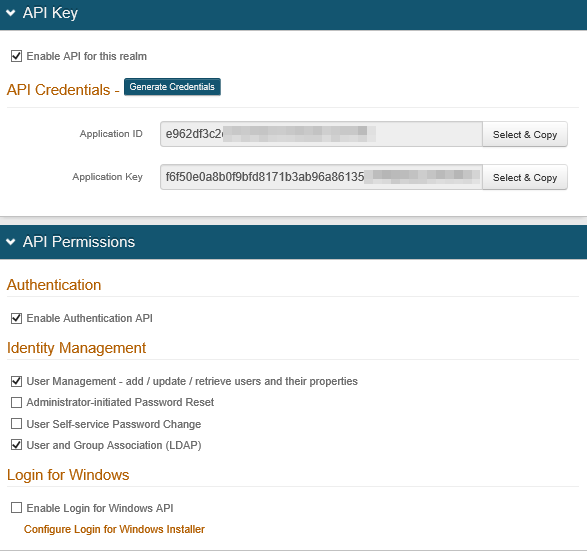
2. On the API tab of the RADIUS Realm, ensure that you have selected Enabled User Management (must) and User and Group Association (optional).
 |
RADIUS Server configuration
3. On the RADIUS Admin interface, for the RADIUS client, map the IdP field to the appropriate AUX ID in the custom attribute mapping section:
IdP Field = auxId3 → maps to demo-admins for the attribute chosen on the Data tab.
Note that this is case sensitive and the field should be used as shown in the screenshot.
Vendor ID = 12356 → Fortinet Vendor ID
Attribute = 1 → maps to Vendor Defined string Fortinet-Group-Name
Field Type = String
 |
4. Update the data dictionary file of the SecureAuth RADIUS Server. This file is located in C:\idpRADIUS\bin folder and the filename is default_dictionary.txt.
Add the following lines at the end:
VENDOR 12356 Fortinet VENDORATTR 12356 Fortinet-Group-Name 1 string VENDORATTR 12356 Fortinet-Client-IP-Address 2 ipaddr VENDORATTR 12356 Fortinet-Vdom-Name 3 string VENDORATTR 12356 Fortinet-Client-IPv6-Address 4 octets VENDORATTR 12356 Fortinet-Interface-Name 5 string VENDORATTR 12356 Fortinet-Access-Profile 6 string |
The file should appear as the following example:
 |
5. Restart the RADIUS Server.
Fortinet FortiGate configuration steps
Choose RADIUS Servers for user and device
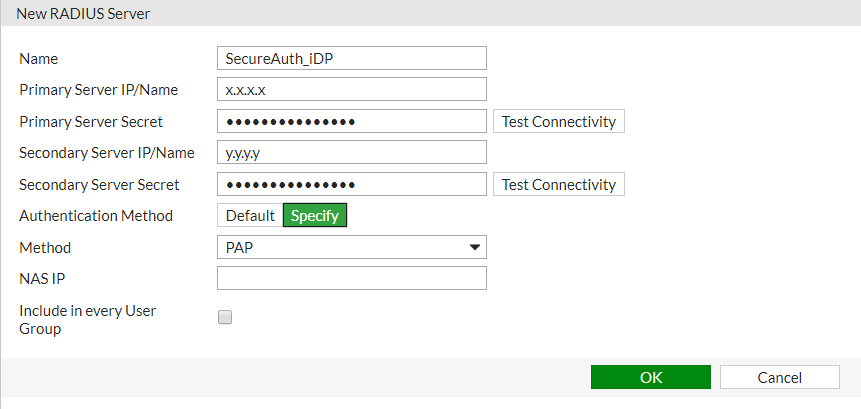
1. Click Create New to create a new RADIUS Server.
2. Fill in the Name, Primary Server IP/Name, Primary Server Secret, Secondary Server IP/Name (if applicable), Secondary Server Secret (if applicable), and specify an Authentication Method.
3. From the Method dropdown, choose PAP.
4. Click OK (see screenshot below).
 |
Choose User Groups for user and device
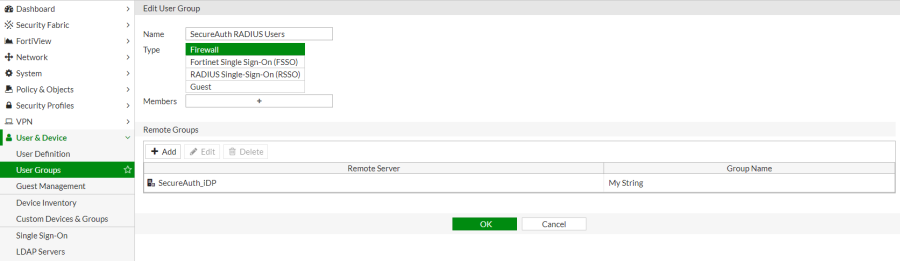
5. Click Create New to create a new User Group.
6. Fill in the Name field and choose Firewall as the Type.
7. Under the Remote Groups heading, click Add.
8. In the Add Group Match pane, from the Remote Server dropdown, choose the previously created RADIUS Server.
9. In the Groups field, enter a group name. This should match the value you created in step 4 of the Prerequisites section of this guide – in this example, "demo-admins".
The group name can be any text string of your choice. Any RADIUS user authenticating to FortiGate must have this same text string set in one of their user attributes – a mapping to this attribute is then created on the SecureAuth IdP and RADIUS Server(s).
9. Click OK.
 |
10. Click OK on the Edit User Group screen to save the newly created group.
 |
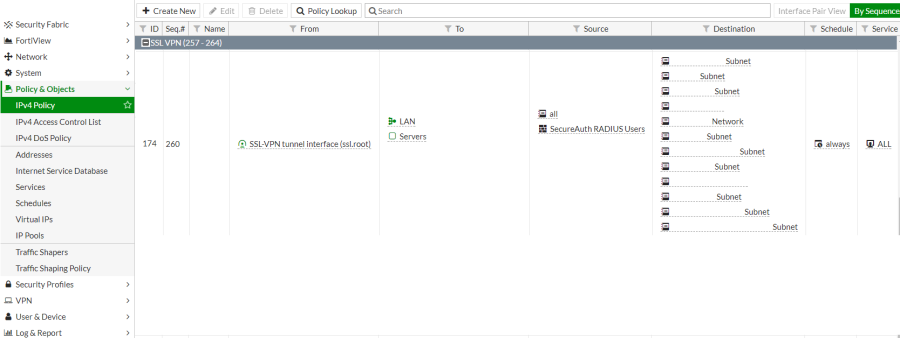
11. Once the group has been created, it must be added to a policy.
At Policy & Objects, choose IPv4 Policy.
Create an SSL VPN access policy which allows the previously created user group access to network resources when connecting via the SSL VPN.
 |
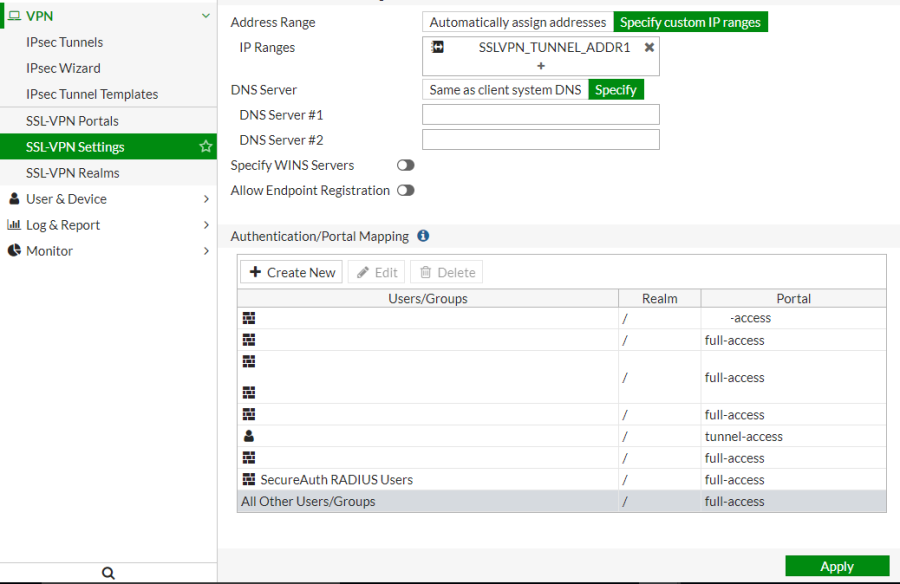
12. At VPN, choose SSL-VPN Settings.
13. Under Authentication/Portal Mapping, click Create New.
Ensure the previously created user group has access to the desired VPN portal either by specifying the group or by specifying a default portal for the All Other Users/Groups entry.
14. Click Apply.
 |